
- Step 1: Connect Your Website to the EmbedPress API
- Step 2: Add Your Places
- How to Embed Google Reviews in Gutenberg Editor
- How to Embed Google Reviews in Elementor
- Final Outcome
Showcasing real customer reviews on your website is one of the most effective ways to build trust and credibility. With EmbedPress, you can now seamlessly embed Google Reviews in WordPress to display them anywhere on your site in just one click.
EmbedPress offers a dedicated Google Reviews block and widget that lets you fetch reviews, filter them by minimum ratings and display them in stunning, fully responsive layouts like Grid, Carousel and Masonry without needing to manually configure complex Google API keys.
Follow this step-by-step guide to learn how to connect and embed Google Reviews in WordPress websites.
[Note: Since Google Reviews is a freemium feature, you need to install and activate both EmbedPress free and PRO to use all of the options and controls here.]
Step 1: Connect Your Website to the EmbedPress API #
Before embedding reviews into your pages, you need to connect your WordPress site to the EmbedPress API and add your desired business locations. To do this, go to ‘EmbedPress → Google Reviews’ from your WordPress dashboard.
Under the EmbedPress API section, simply click the Connect to EmbedPress API button. This is a seamless, one-click process that requires no signup and no manual Google API keys. Once connected, your status will show a green “Connected” badge along with your Site ID.
Step 2: Add Your Places #
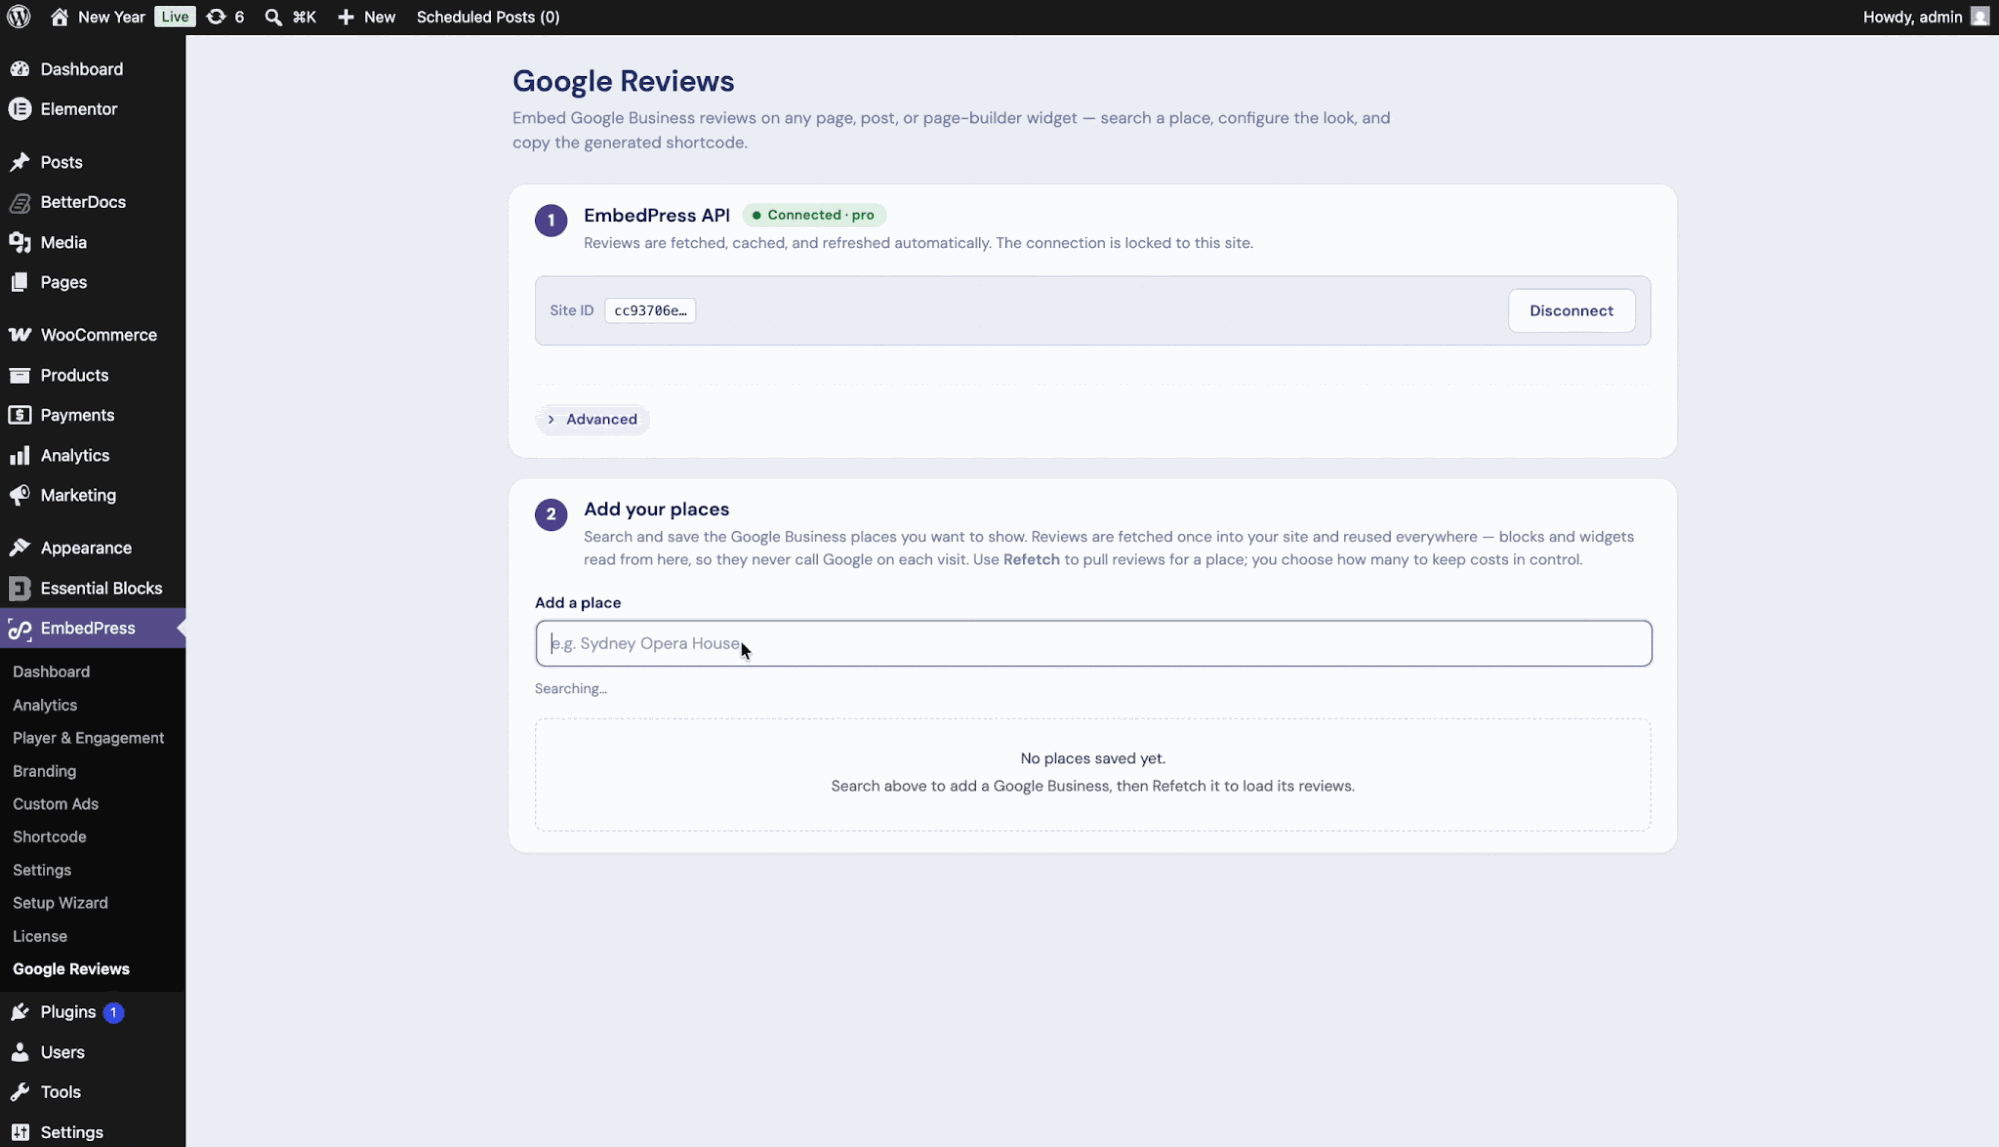
Scroll down to the Add your places section. Use the search bar to look for the Google Business locations you want to showcase (e.g., “Sydney Opera House”). Once you find your desired location, add it. It will then fetch available reviews in a few seconds.
How to Embed Google Reviews in Gutenberg Editor #
Once your places are saved, you can easily display their reviews on any page or post using the Gutenberg editor.
Step 1: Insert the Google Reviews Block #
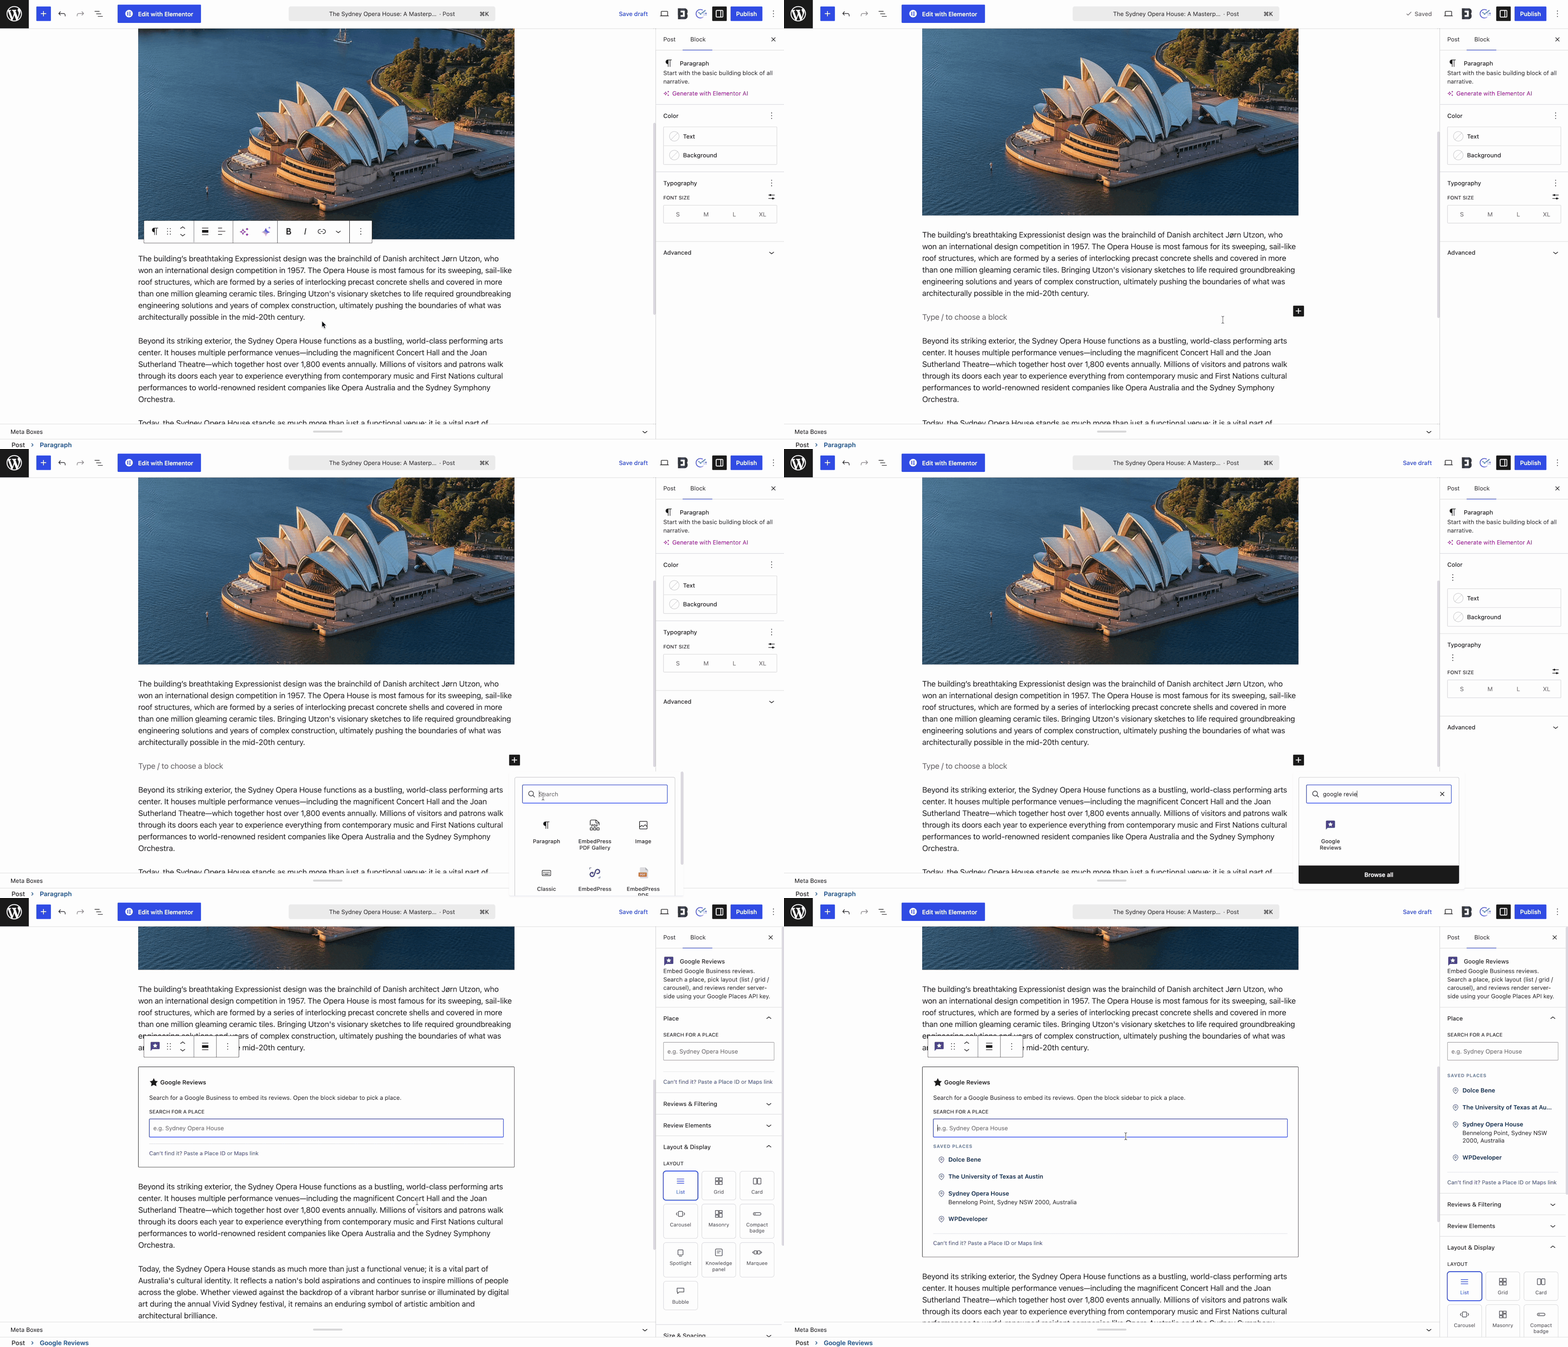
Open the page or post where you want to display the reviews. Click the ‘+’ icon to add a new block and search for Google Reviews. Click on the block to insert it into your editor.
Step 2: Select Your Saved Place #
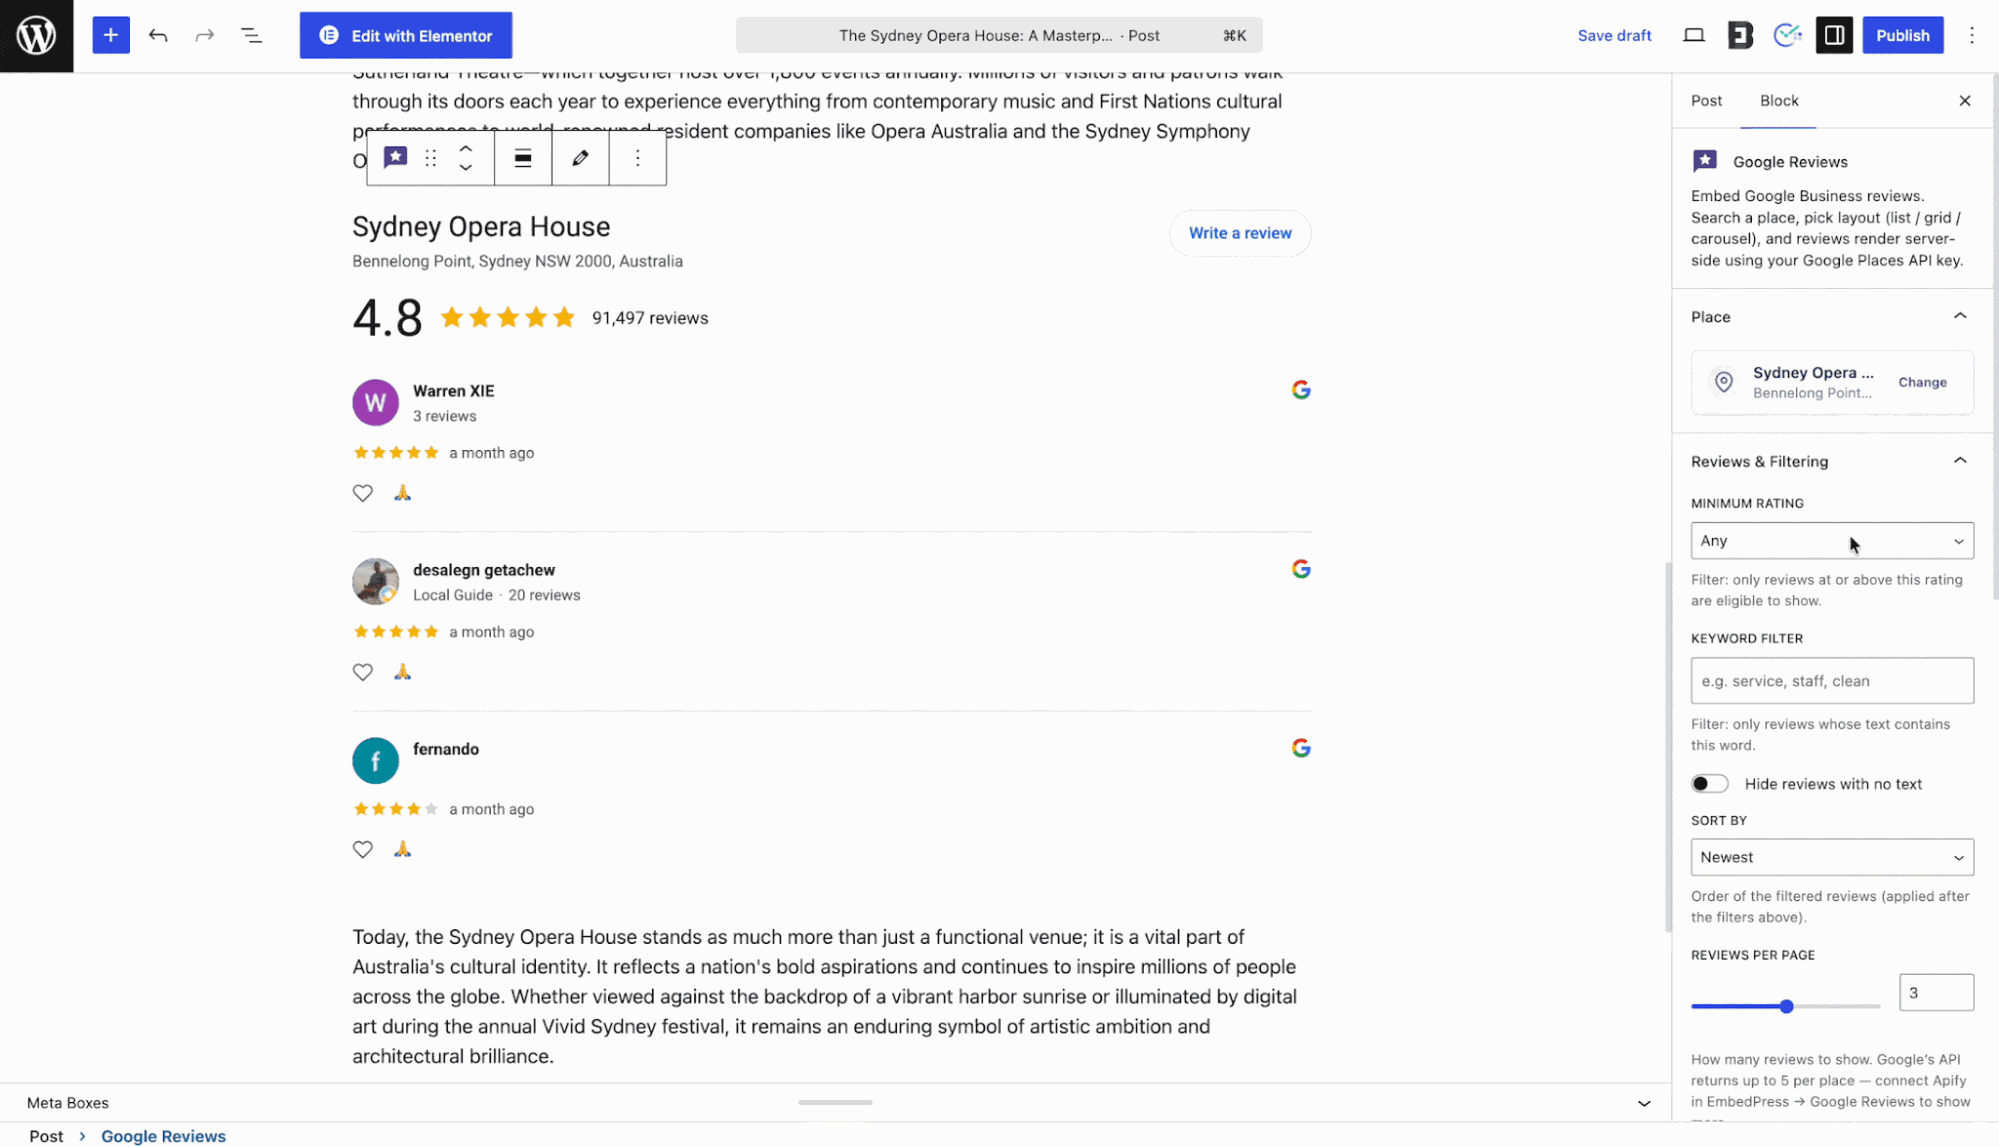
Once the block is added, the right-hand settings panel will open. Under the ‘Place‘ tab, you will see a list of your Saved Places. Click on the location you want to display (e.g., Sydney Opera House). EmbedPress will instantly load the reviews for that location into the editor.
Step 3: Configure Layout & Display #
Navigate to the Layout & Display tab in the settings sidebar. Here, you can choose exactly how you want your reviews to be presented.
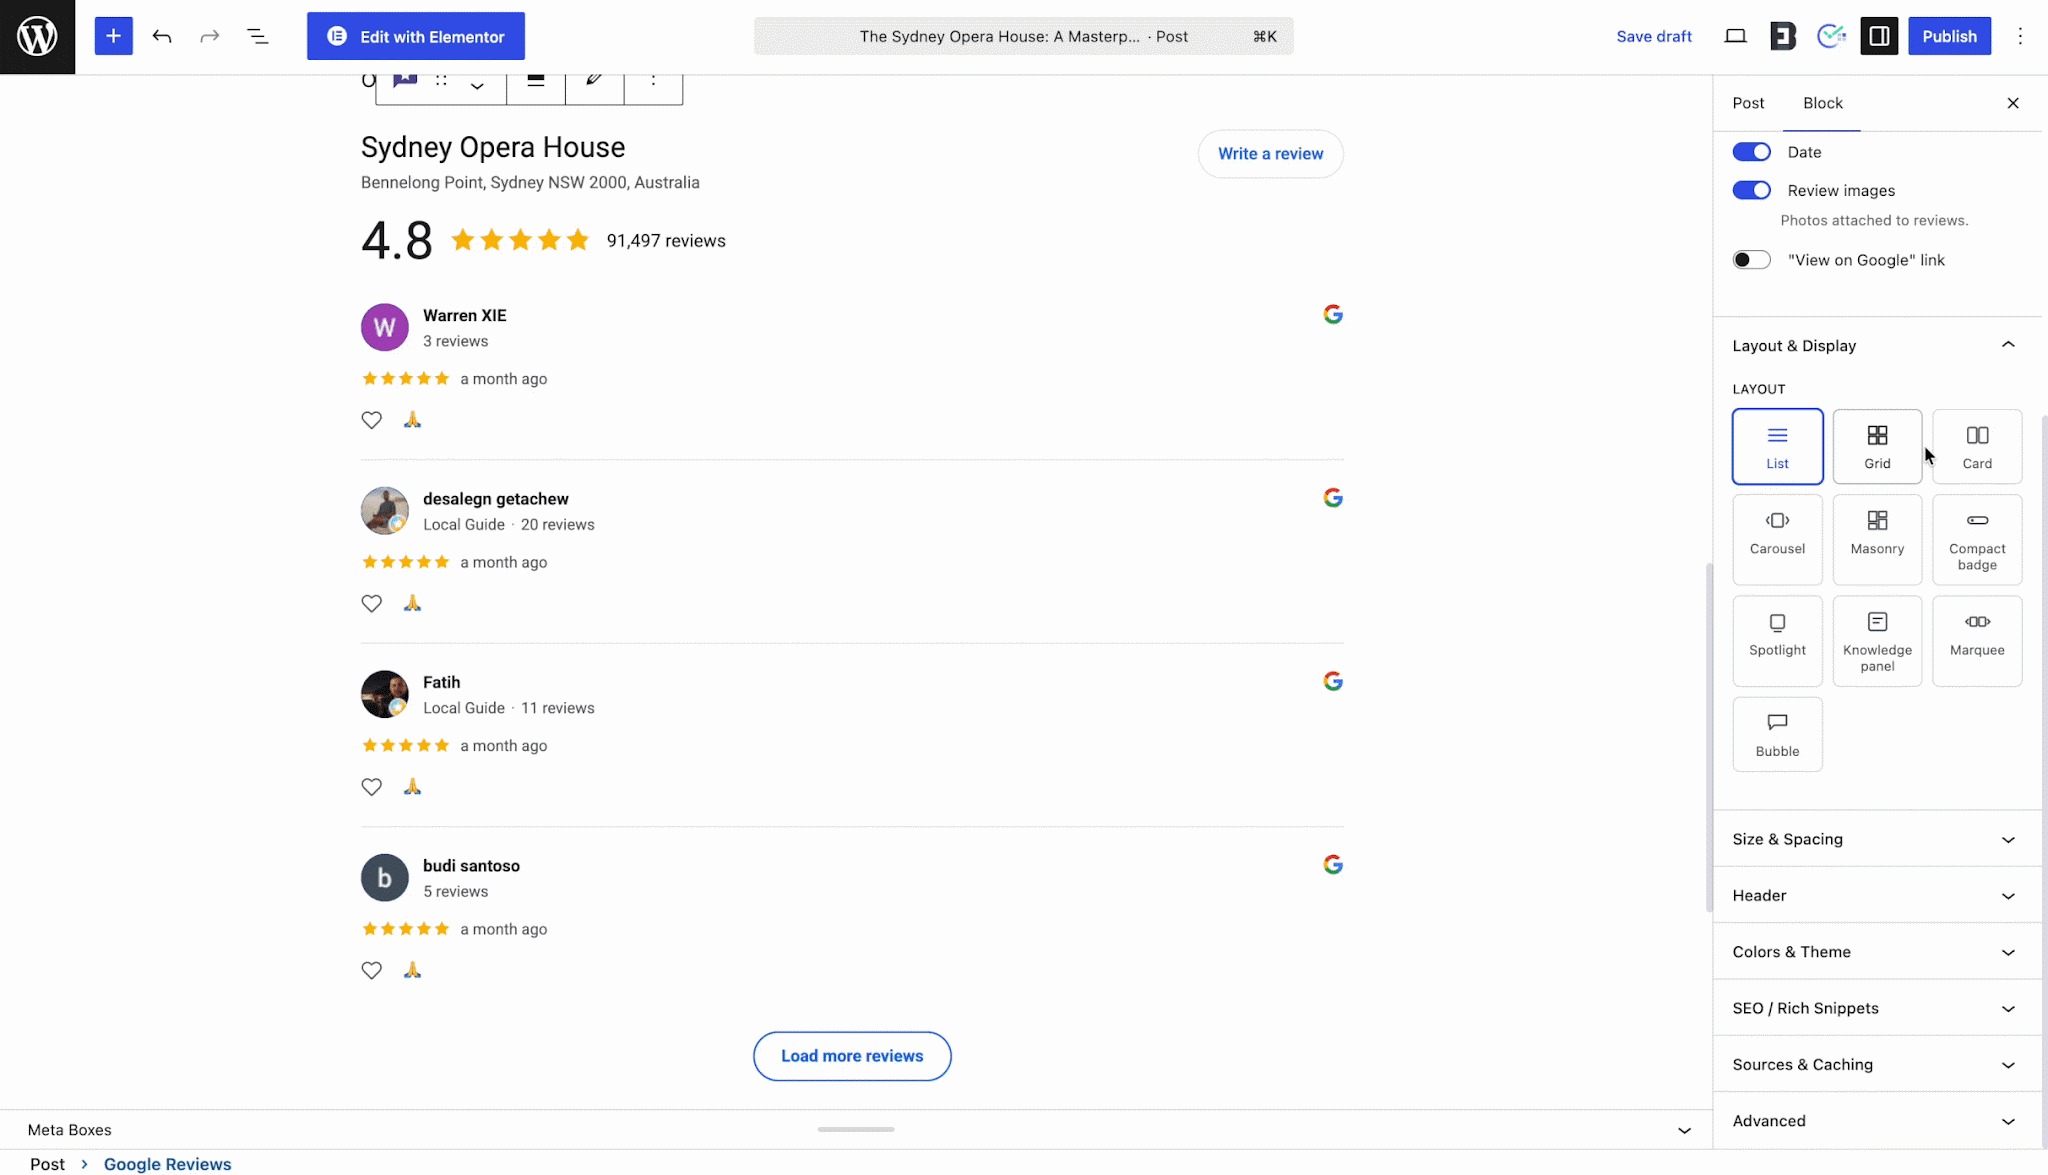
PRO Layouts: Masonry, Compact badge, Spotlight, Knowledge panel, Marquee and Bubble.
Free Layouts: List, Grid, Card and Carousel.
Step 4: Filter & Customize Review Elements #
You have complete control over which reviews appear and what data is shown alongside them:
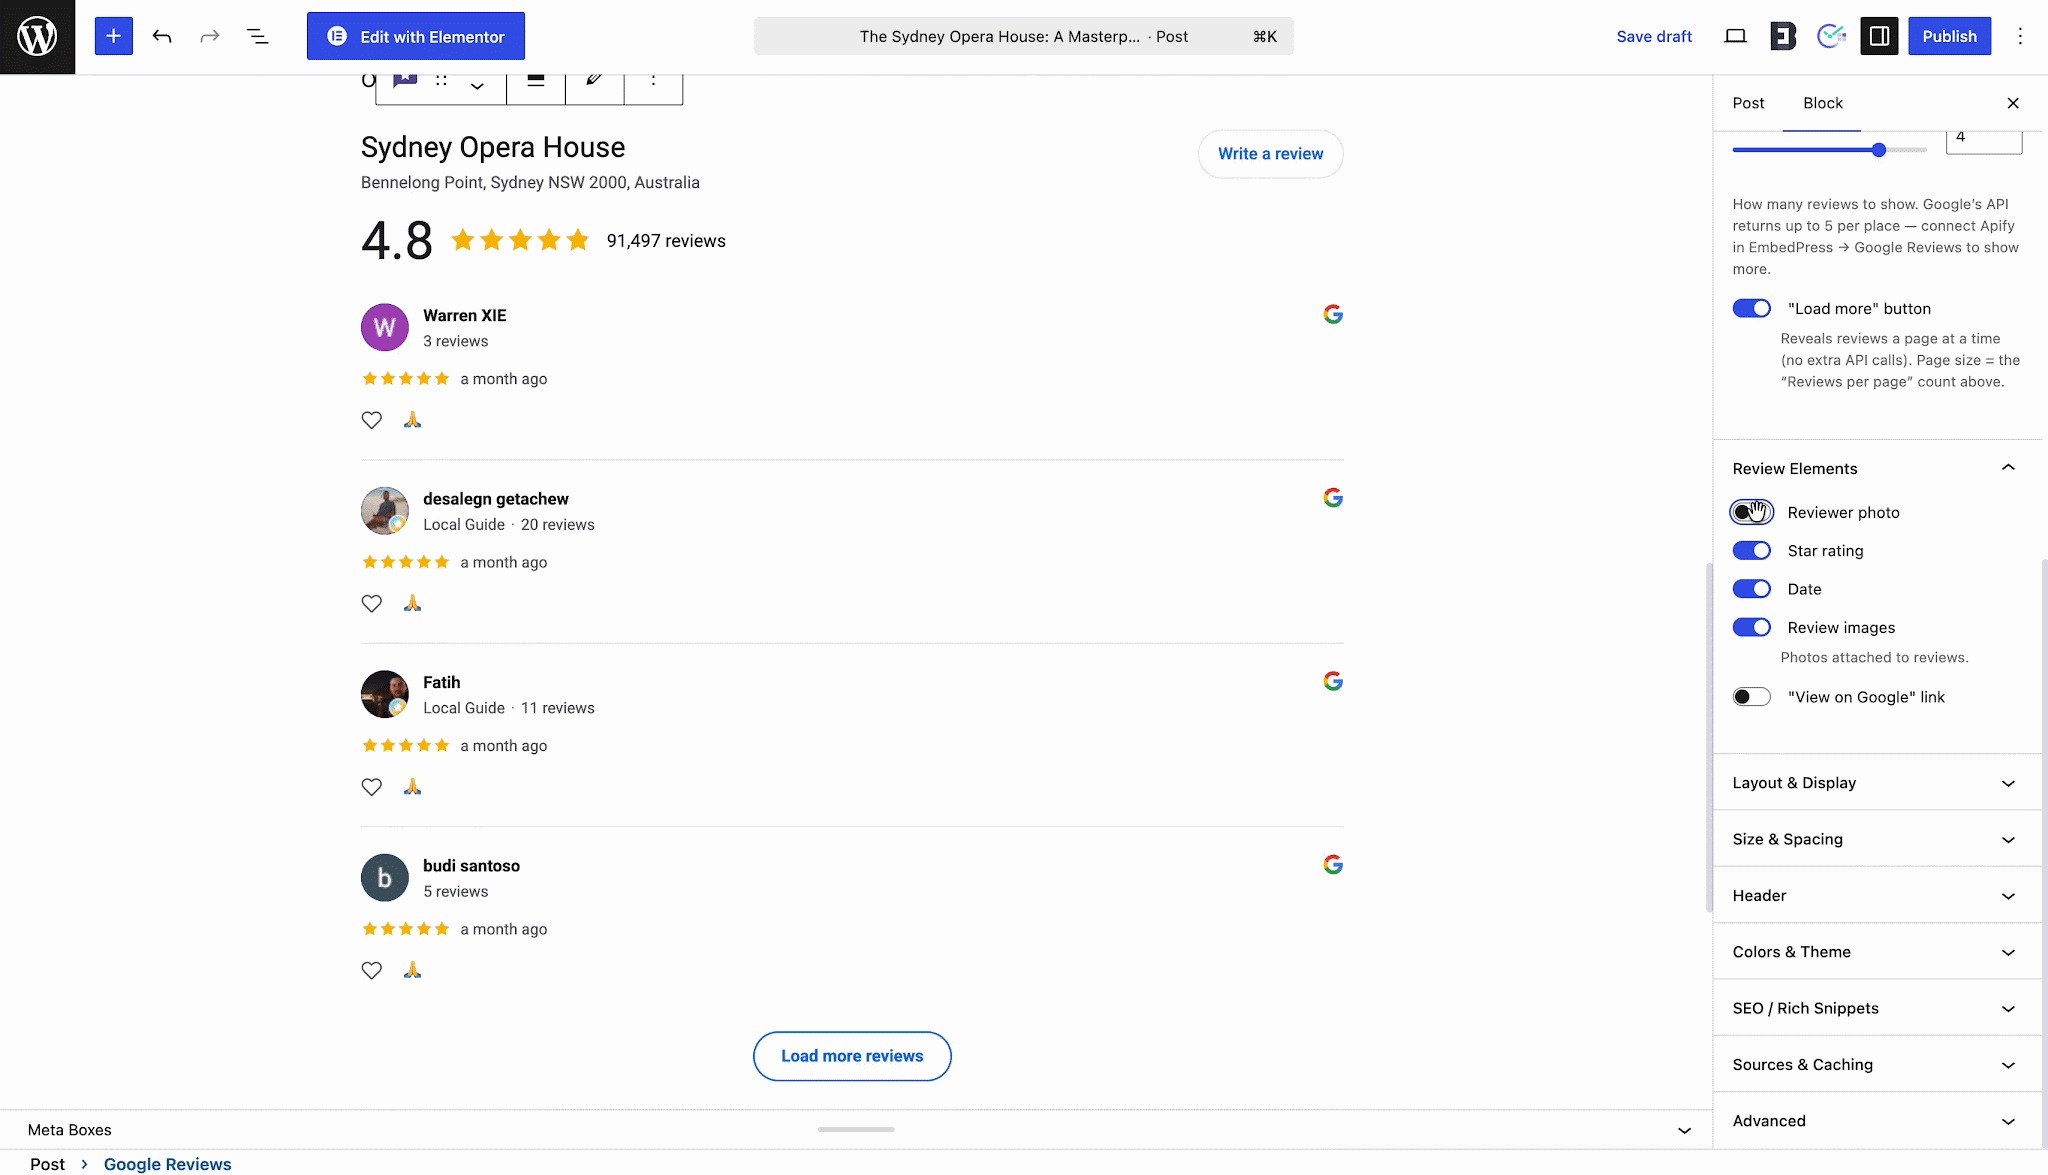
Reviews & Filtering #
Filter reviews by Minimum Rating (PRO feature) to only show 4 or 5-star feedback. You can also use the Keyword Filter to only show reviews containing specific words, sort by newest, and adjust the number of reviews shown per page.
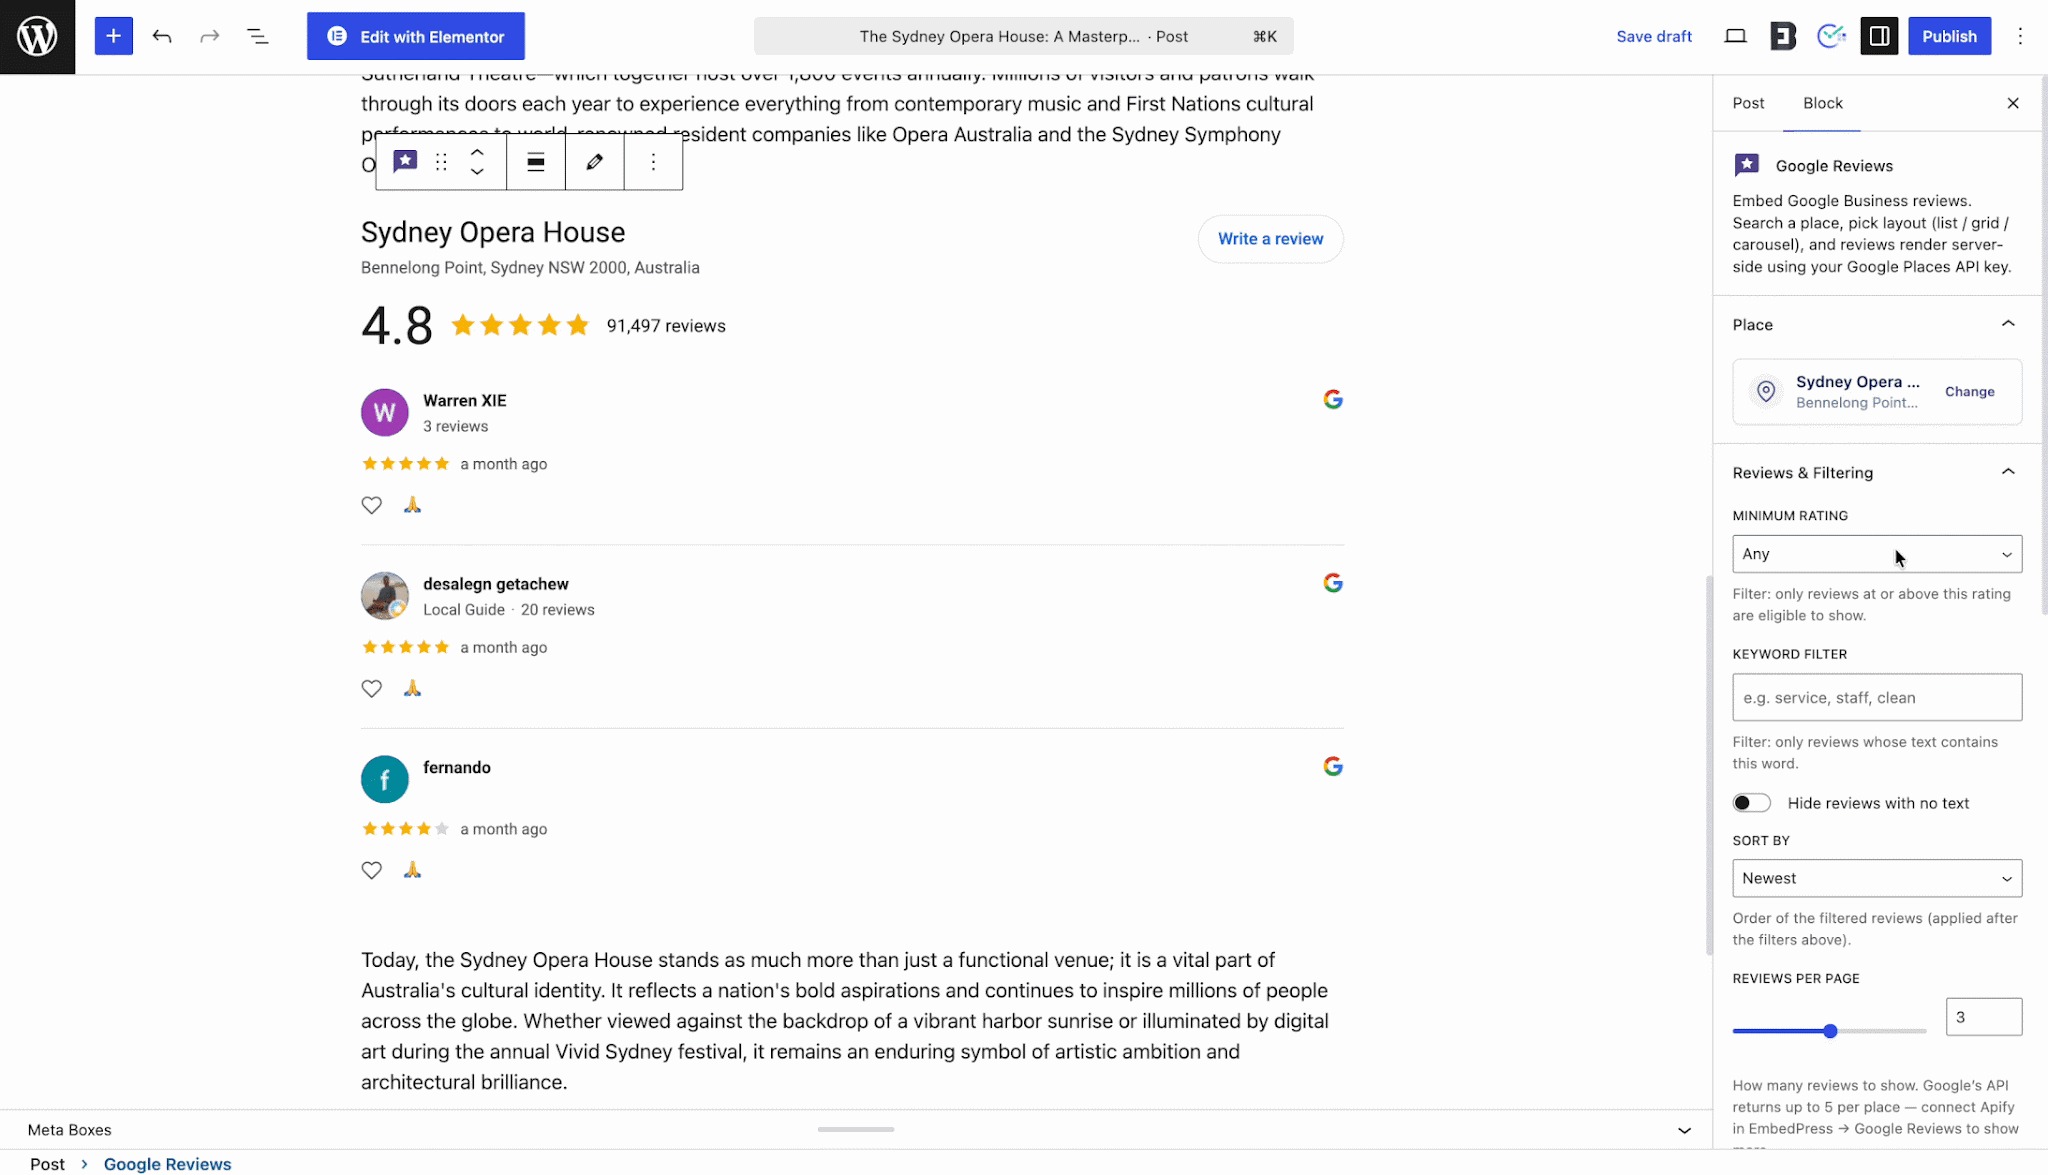
Review Elements #
Toggle exactly what information is visible on the review cards, including the Reviewer photo, Star rating, Date, Review images, and the “View on Google” link. You can also enable or disable the “Load more” button.
Step 5: Adjust Size, Spacing & Motion #
If you select dynamic layouts like the Carousel, additional settings will become available to fine-tune the behavior.
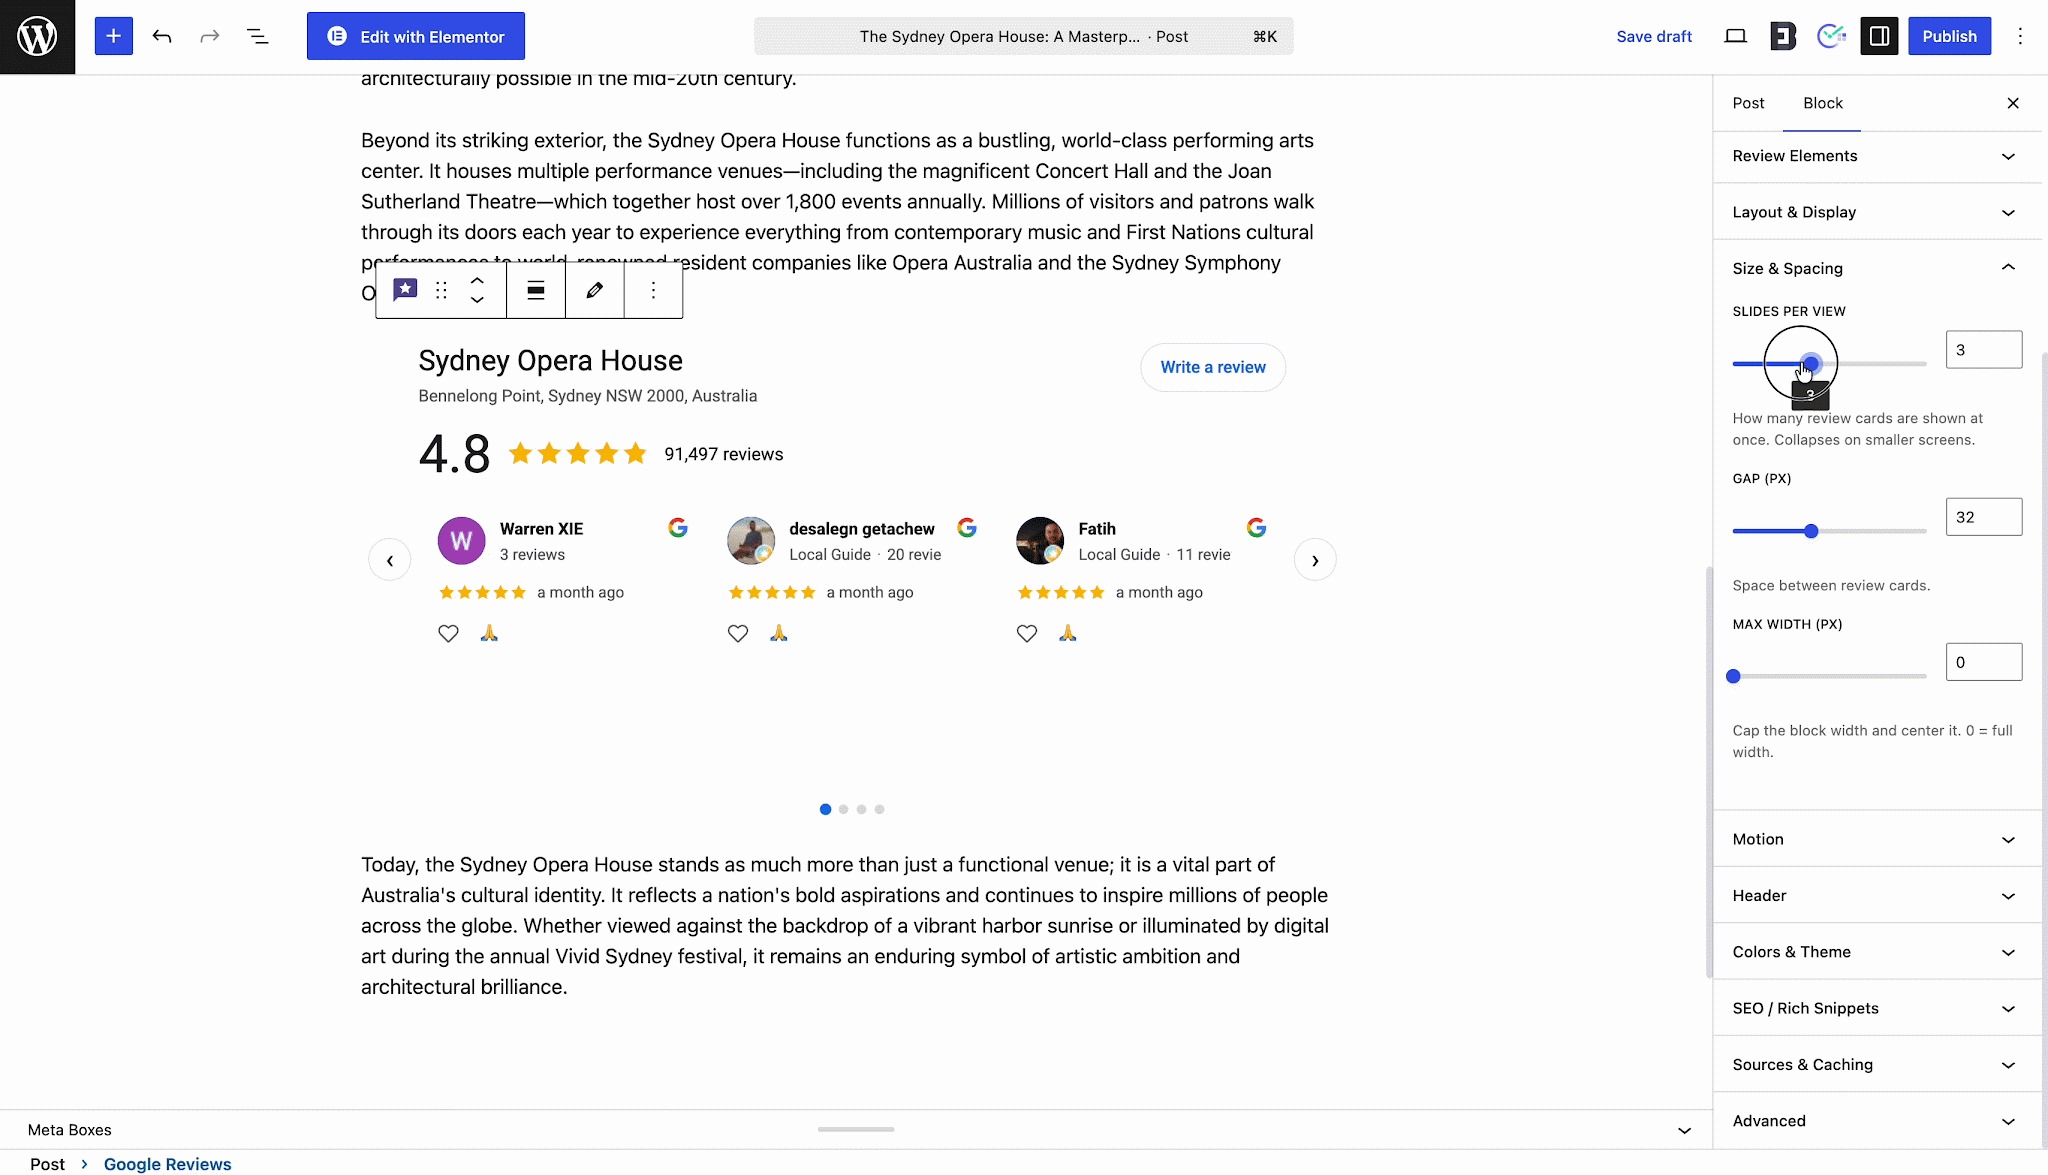
- Size & Spacing: Adjust the Slides Per View to determine how many review cards are shown at once, and tweak the Gap between the cards for perfect alignment.
- Motion: Under the Motion tab, you can toggle navigation controls like Show arrows and Show dots. You can also enable Infinite loop for seamless scrolling or turn on Autoplay so the reviews advance automatically.
Step 6: Customize the Header #
Expand the Header tab to manage the introductory section of your reviews. By toggling on Show header, you can display the business name, address, overall star rating, total review count, and a direct “Write a review” button at the top of the block.
Step 7: Configure Colors & Theme #
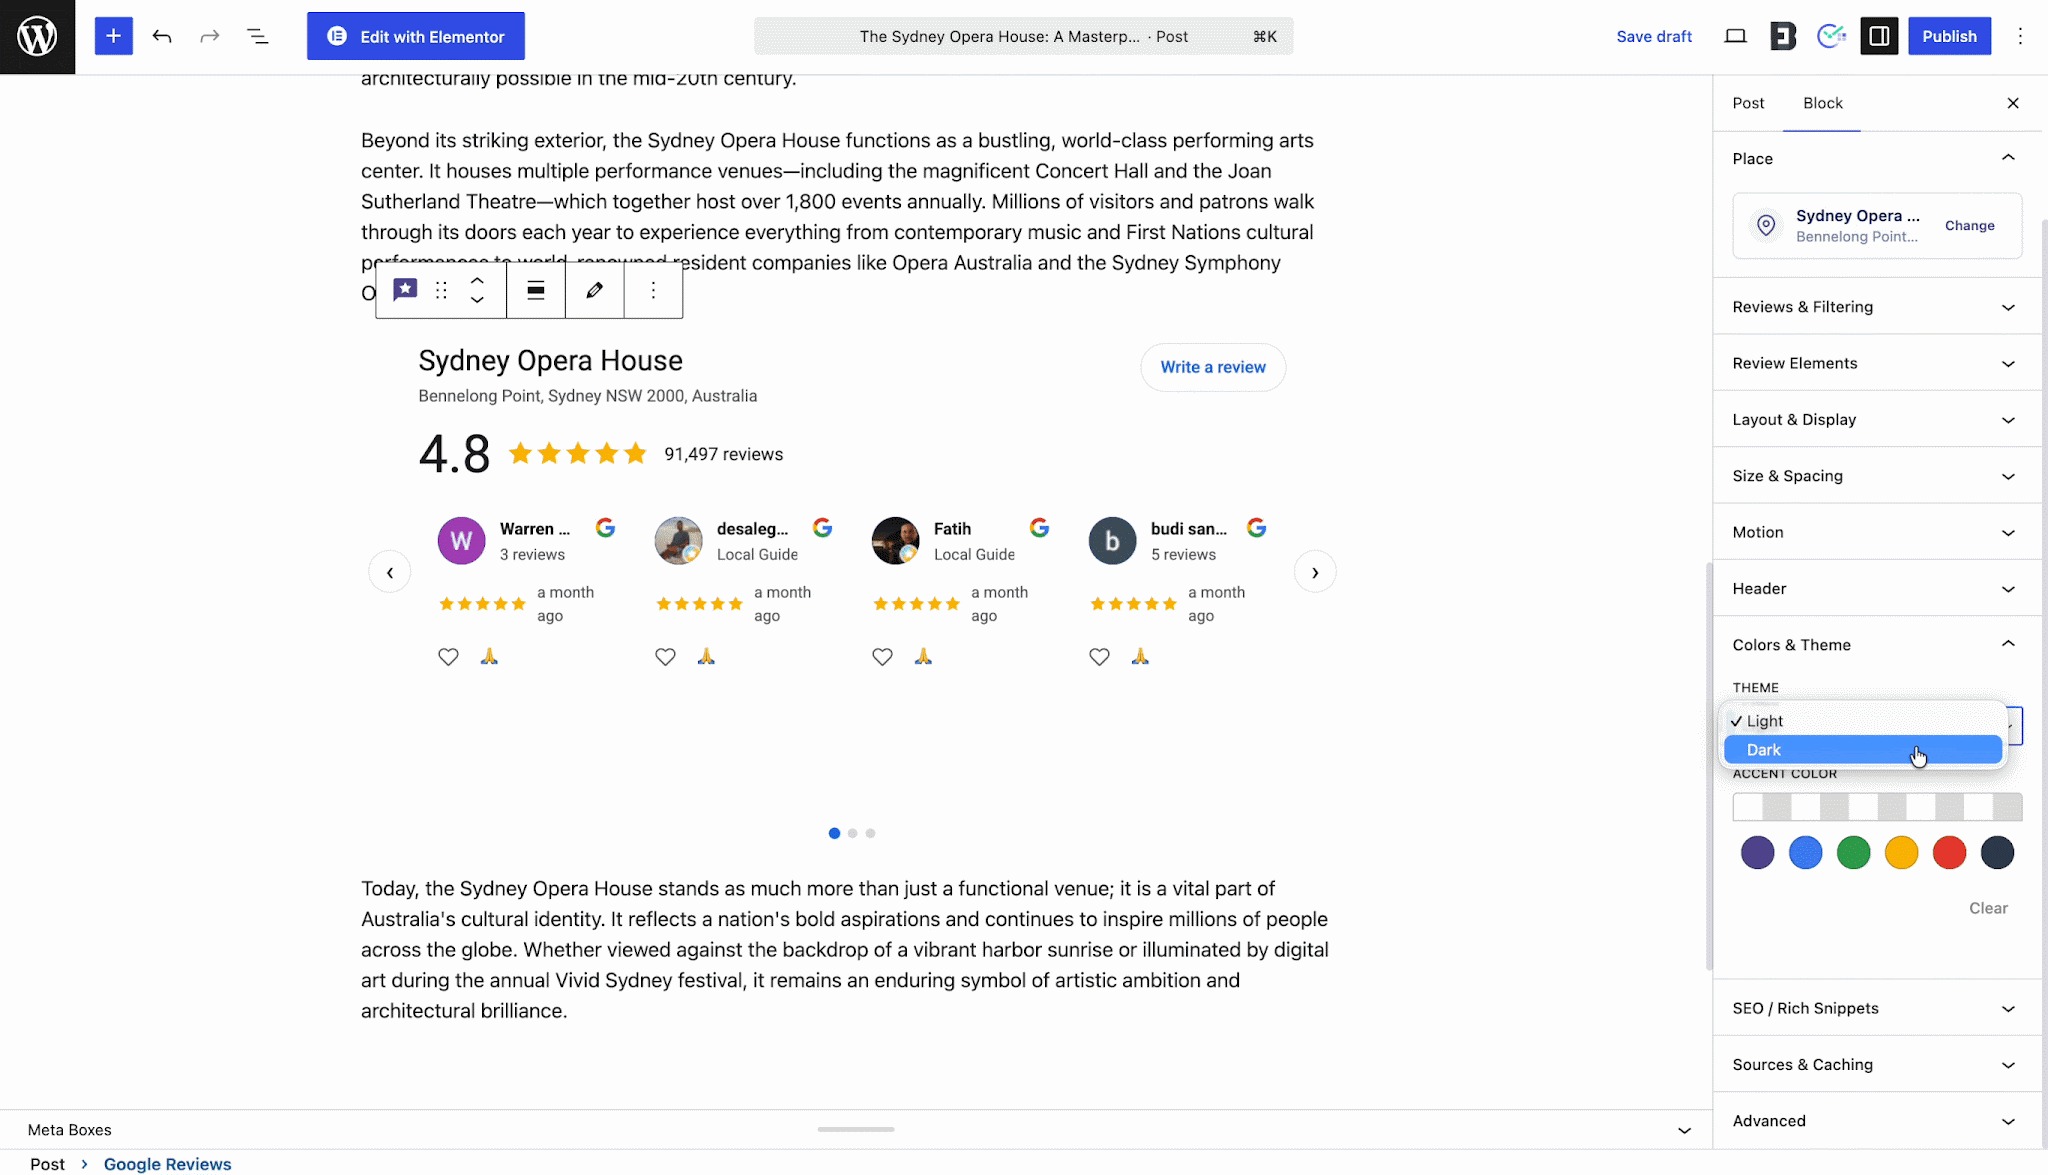
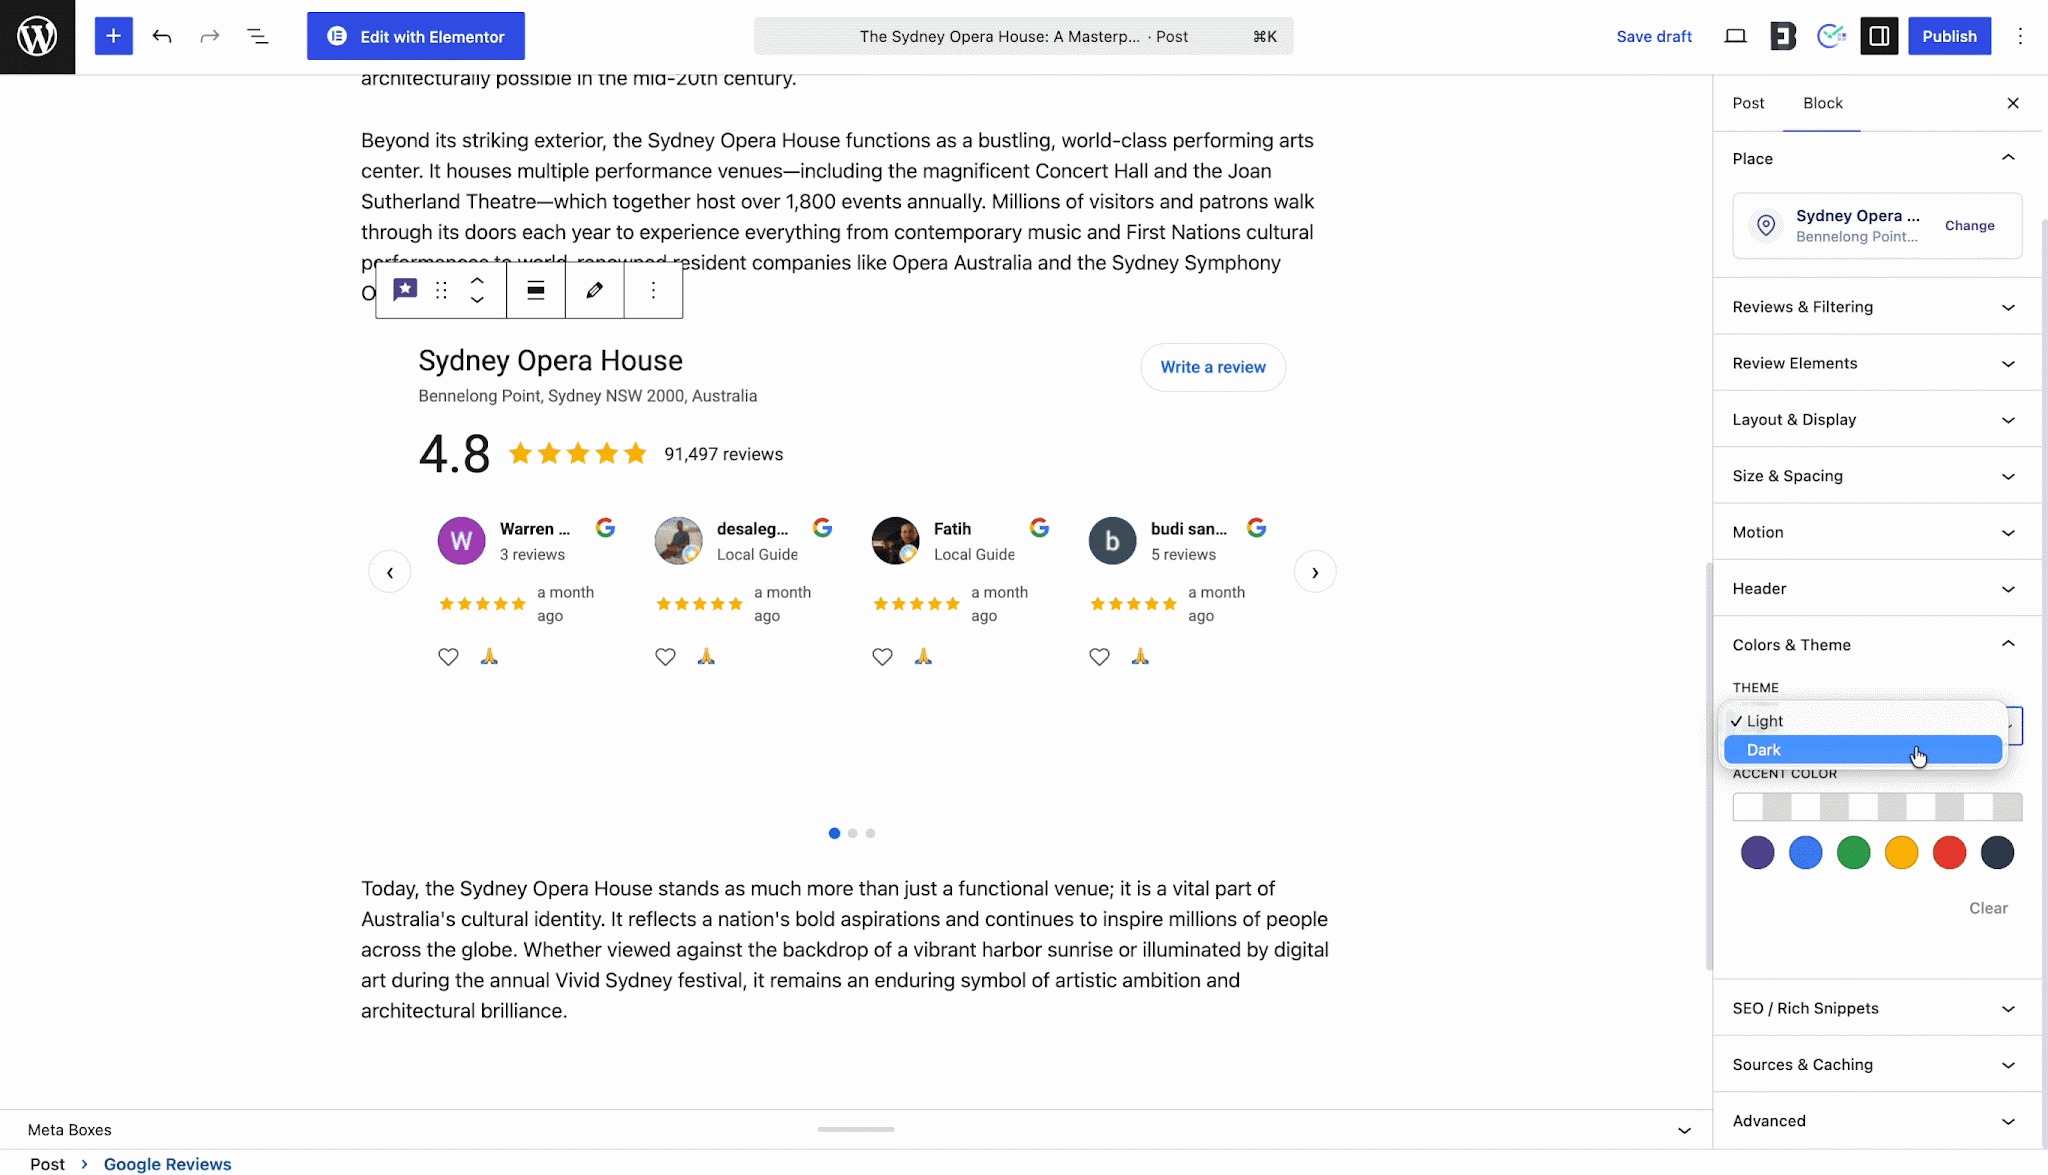
Match the reviews to your website’s branding by opening the Colors & Theme tab. Use the dropdown to select a base Theme (Light or Dark). You can also choose an Accent Color from the provided palette to customize elements like buttons and icons.
Step 8: Optimize SEO & Caching #
Ensure your reviews work hard for your site’s visibility and performance.
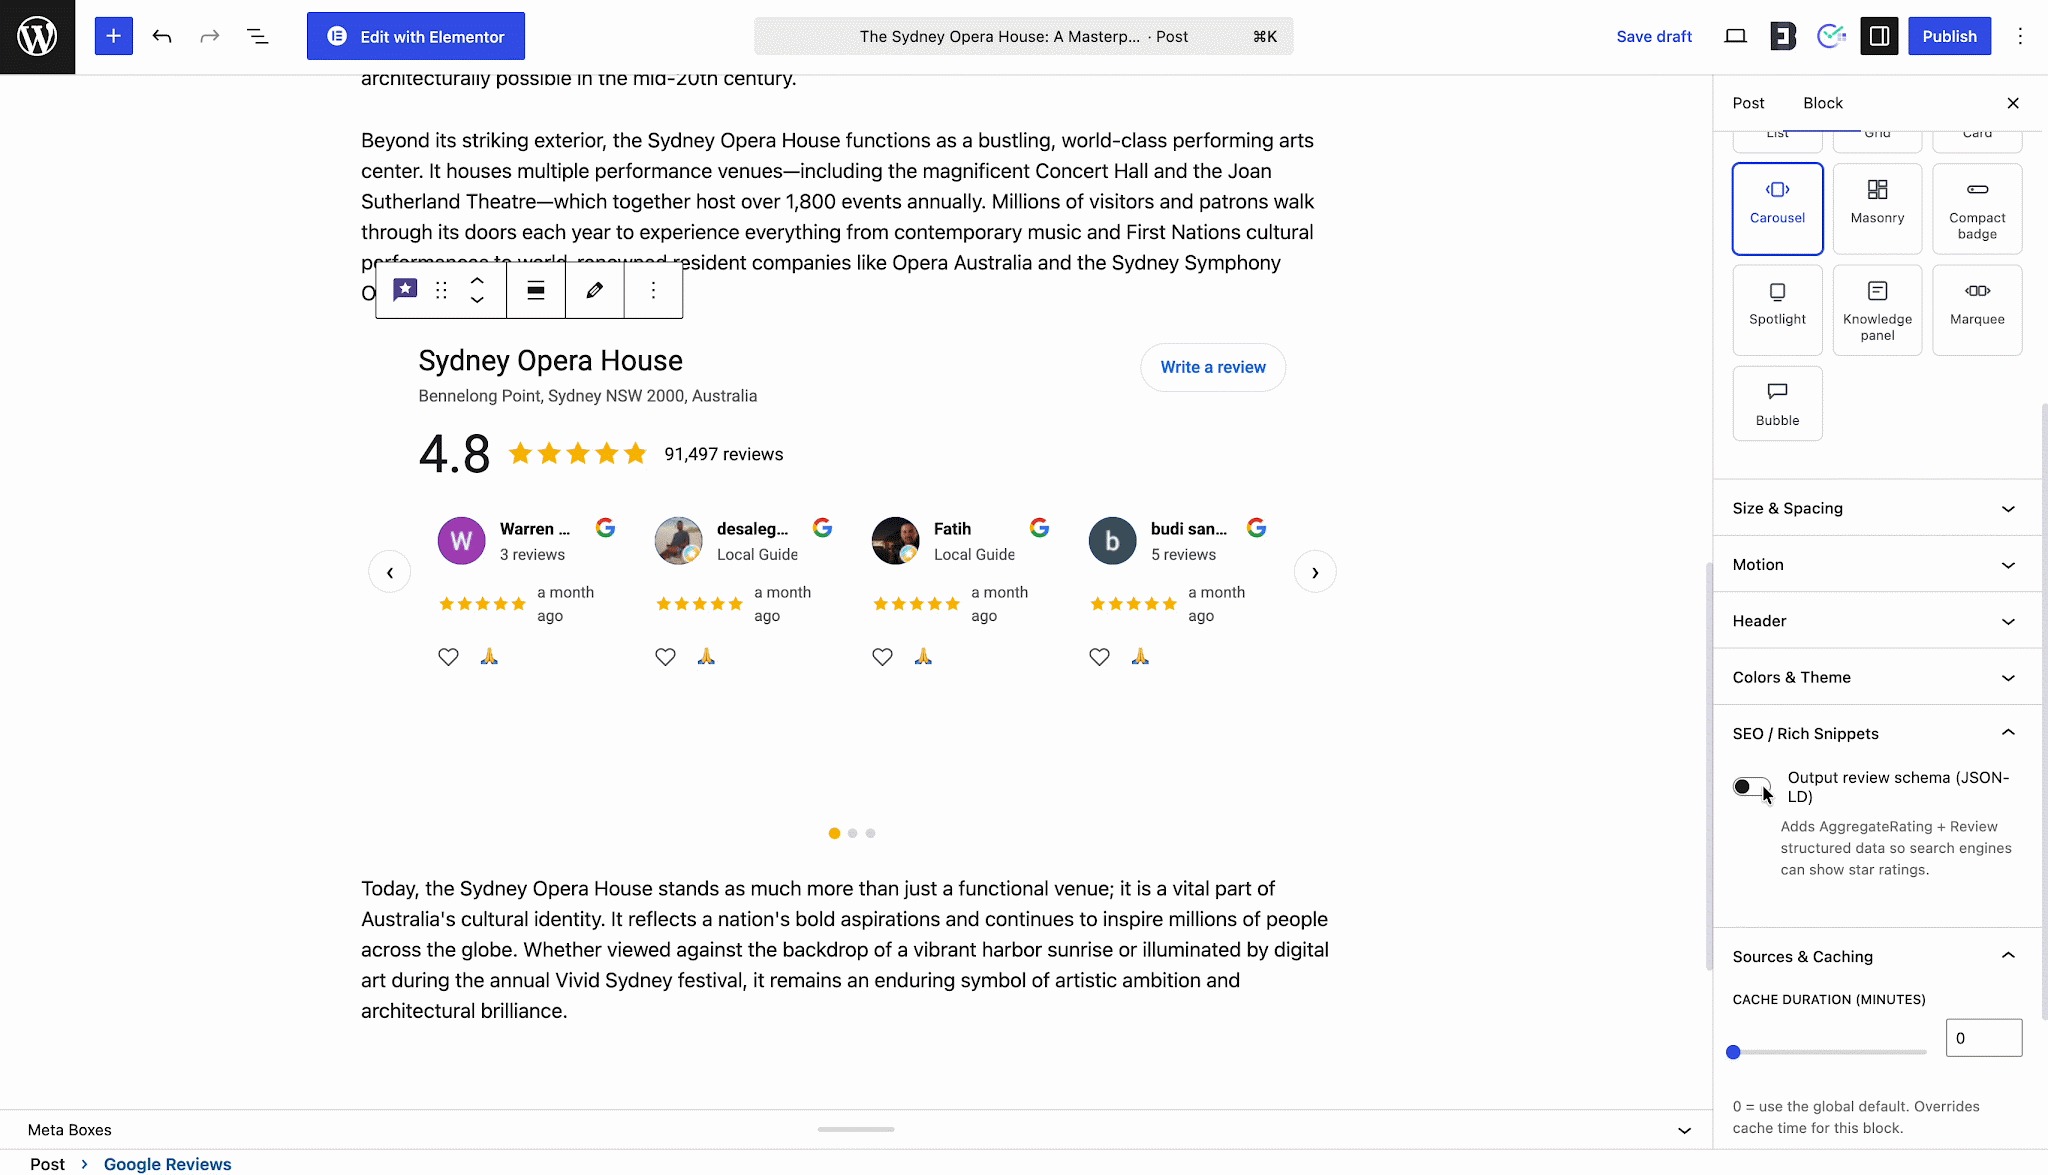
- SEO / Rich Snippets: Toggle on Output review schema (JSON-LD). This automatically adds AggregateRating and Review structured data, allowing search engines to display star ratings for your page in the search results.
- Sources & Caching: Adjust the Cache Duration (Minutes) using the slider or input field. This lets you control how long reviews are stored locally before fetching fresh data (leaving it at ‘0’ uses the global default).
When you are satisfied with the look and feel of your Google Reviews section, click Publish or Update. Your real-time customer feedback will now be beautifully displayed for your website visitors!
How to Embed Google Reviews in Elementor #
If you prefer building your pages with Elementor, EmbedPress offers a dedicated widget that provides the exact same powerful features and stunning layouts.
Step 1: Insert the Google Reviews Widget #
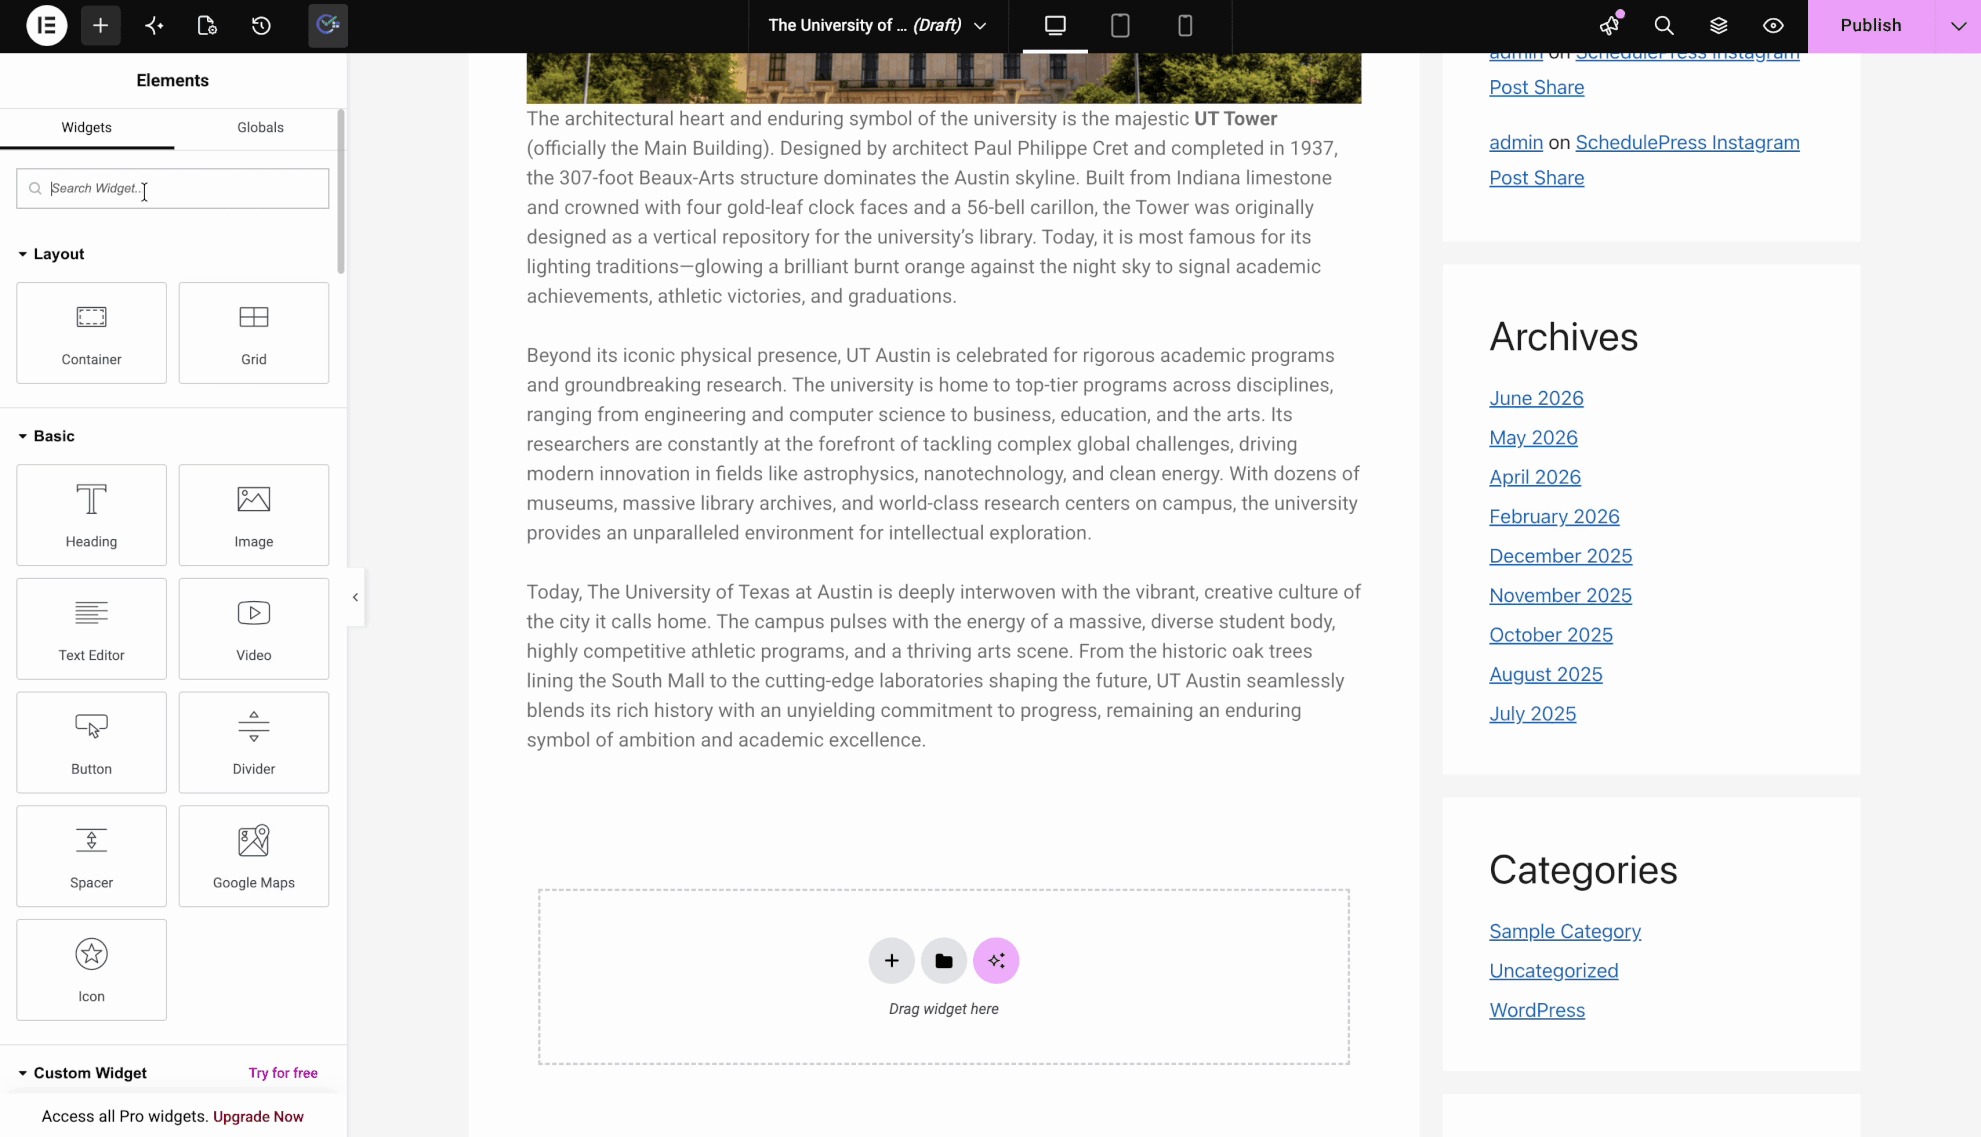
Open your desired page or post using the Elementor editor. In the left-hand Elements panel, search for the EmbedPress Google Reviews widget. Simply drag and drop the widget into your preferred section or container on the canvas.
Step 2: Select Your Saved Place #
Once the widget is dropped into your layout, the Content tab will open in the left panel. Expand the Place section to search for and select your desired Google Business location. Alternatively, you can use the “Have a Place ID? Enter manually” field to directly input a specific Google Place ID to fetch its reviews.
Step 3: Configure Layouts, Filters & Displays #
Just like the Gutenberg editor, you can seamlessly set up and configure your Google Reviews using the familiar controls available right inside the Elementor sidebar.
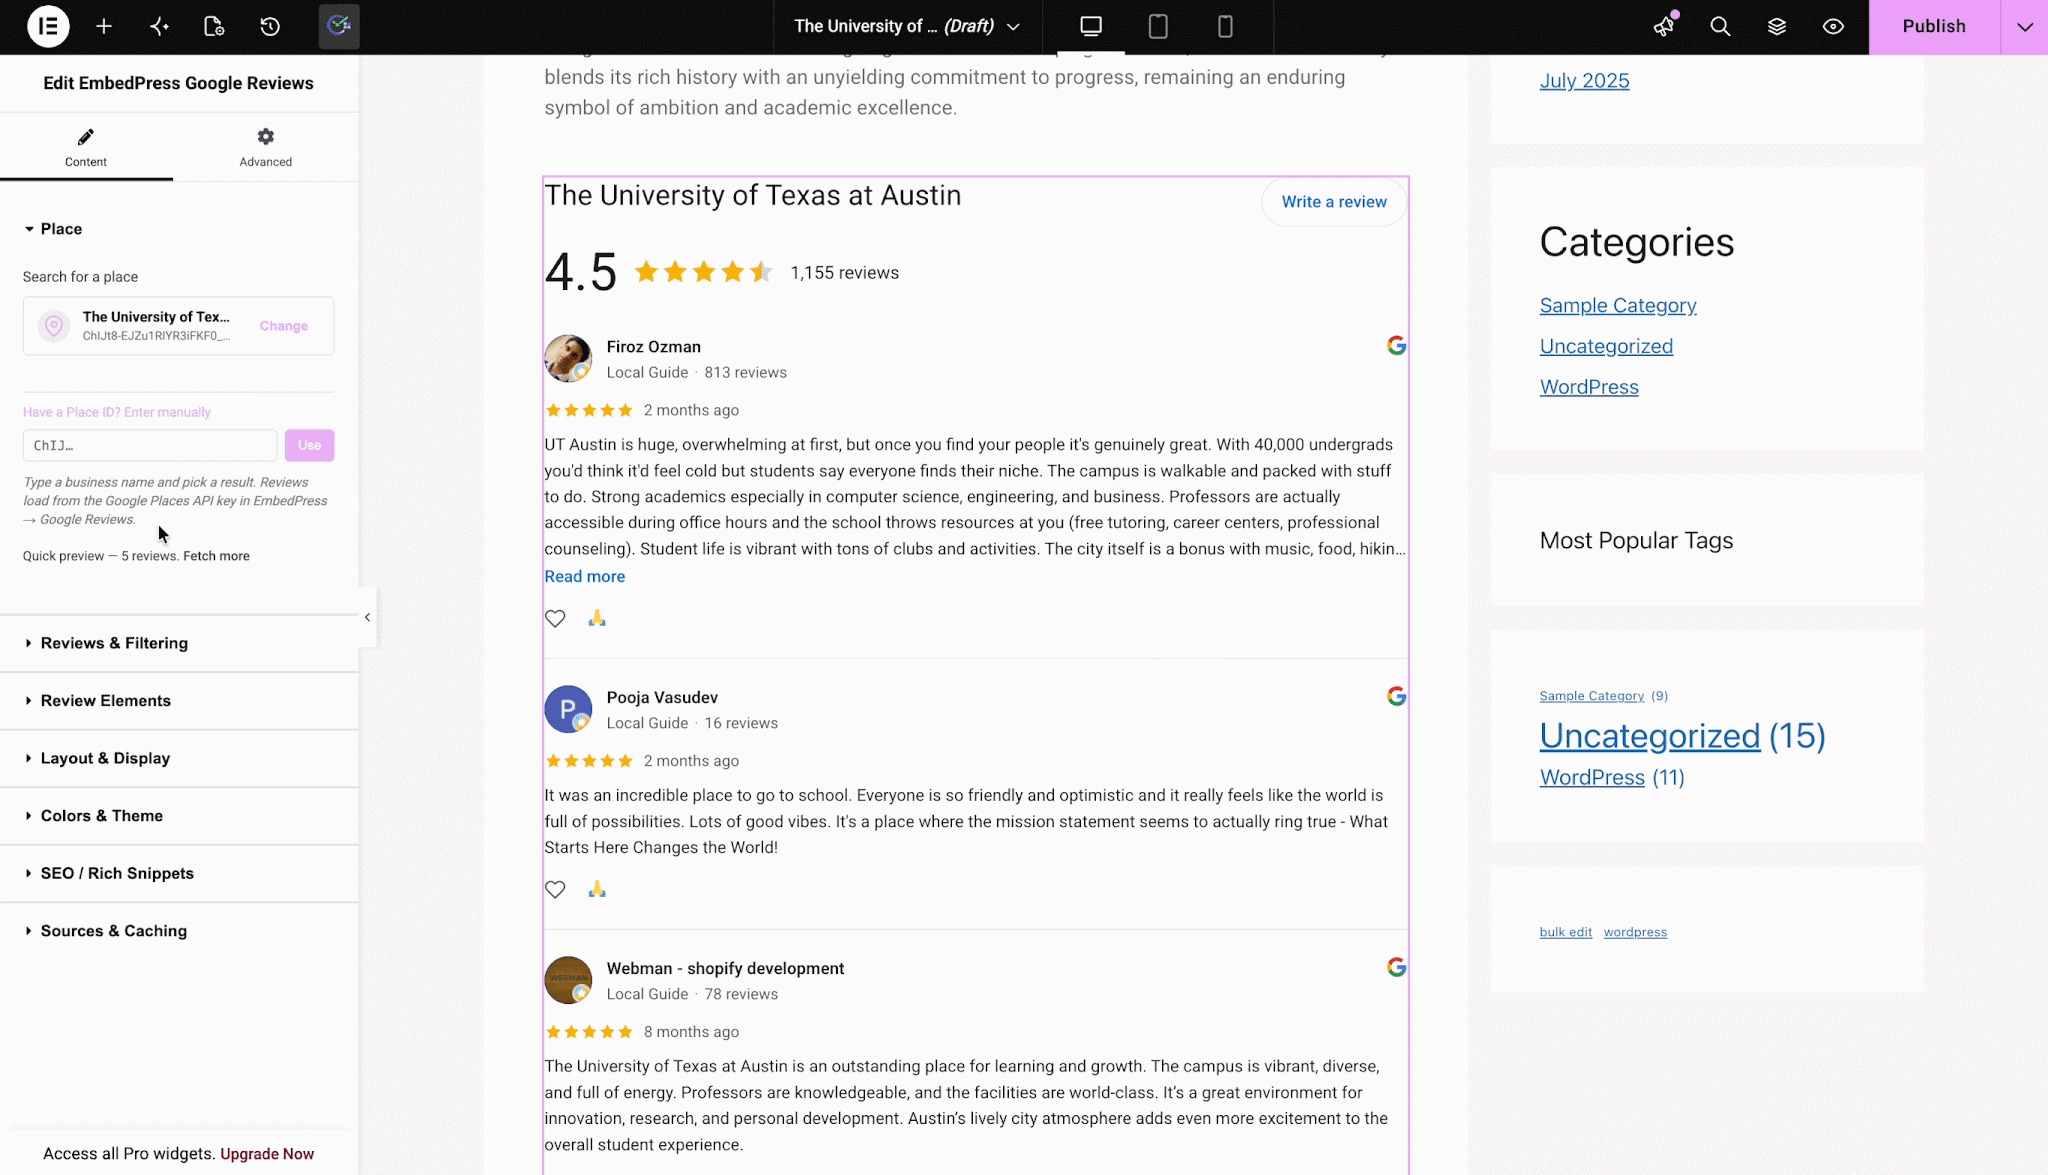
Expand the subsequent menus to fully customize your review feed:
- Reviews & Filtering: Set minimum ratings, filter by keywords and choose how many reviews to display.
- Review Elements: Toggle reviewer photos, star ratings, dates, review images and links on or off.
- Layout & Display: Choose from the free layouts (List, Grid, Card, Carousel) or unlock advanced PRO layouts (Masonry, Compact badge, Spotlight and more).
- Colors & Theme: Switch between Light and Dark themes and define accent colors to match your brand style.
- SEO / Rich Snippets: Enable JSON-LD review schema to boost your search engine visibility.
- Sources & Caching: Control your cache duration for optimal page load performance.
When you are satisfied with the design and layout of your Google Reviews, click Publish or Update at the bottom of the Elementor panel. Your beautiful, trust-building review feed is now live on your website.
Final Outcome #
Once you are done with all the customization and polishing, publish or update your page. Once done, here is how it will look on your website.
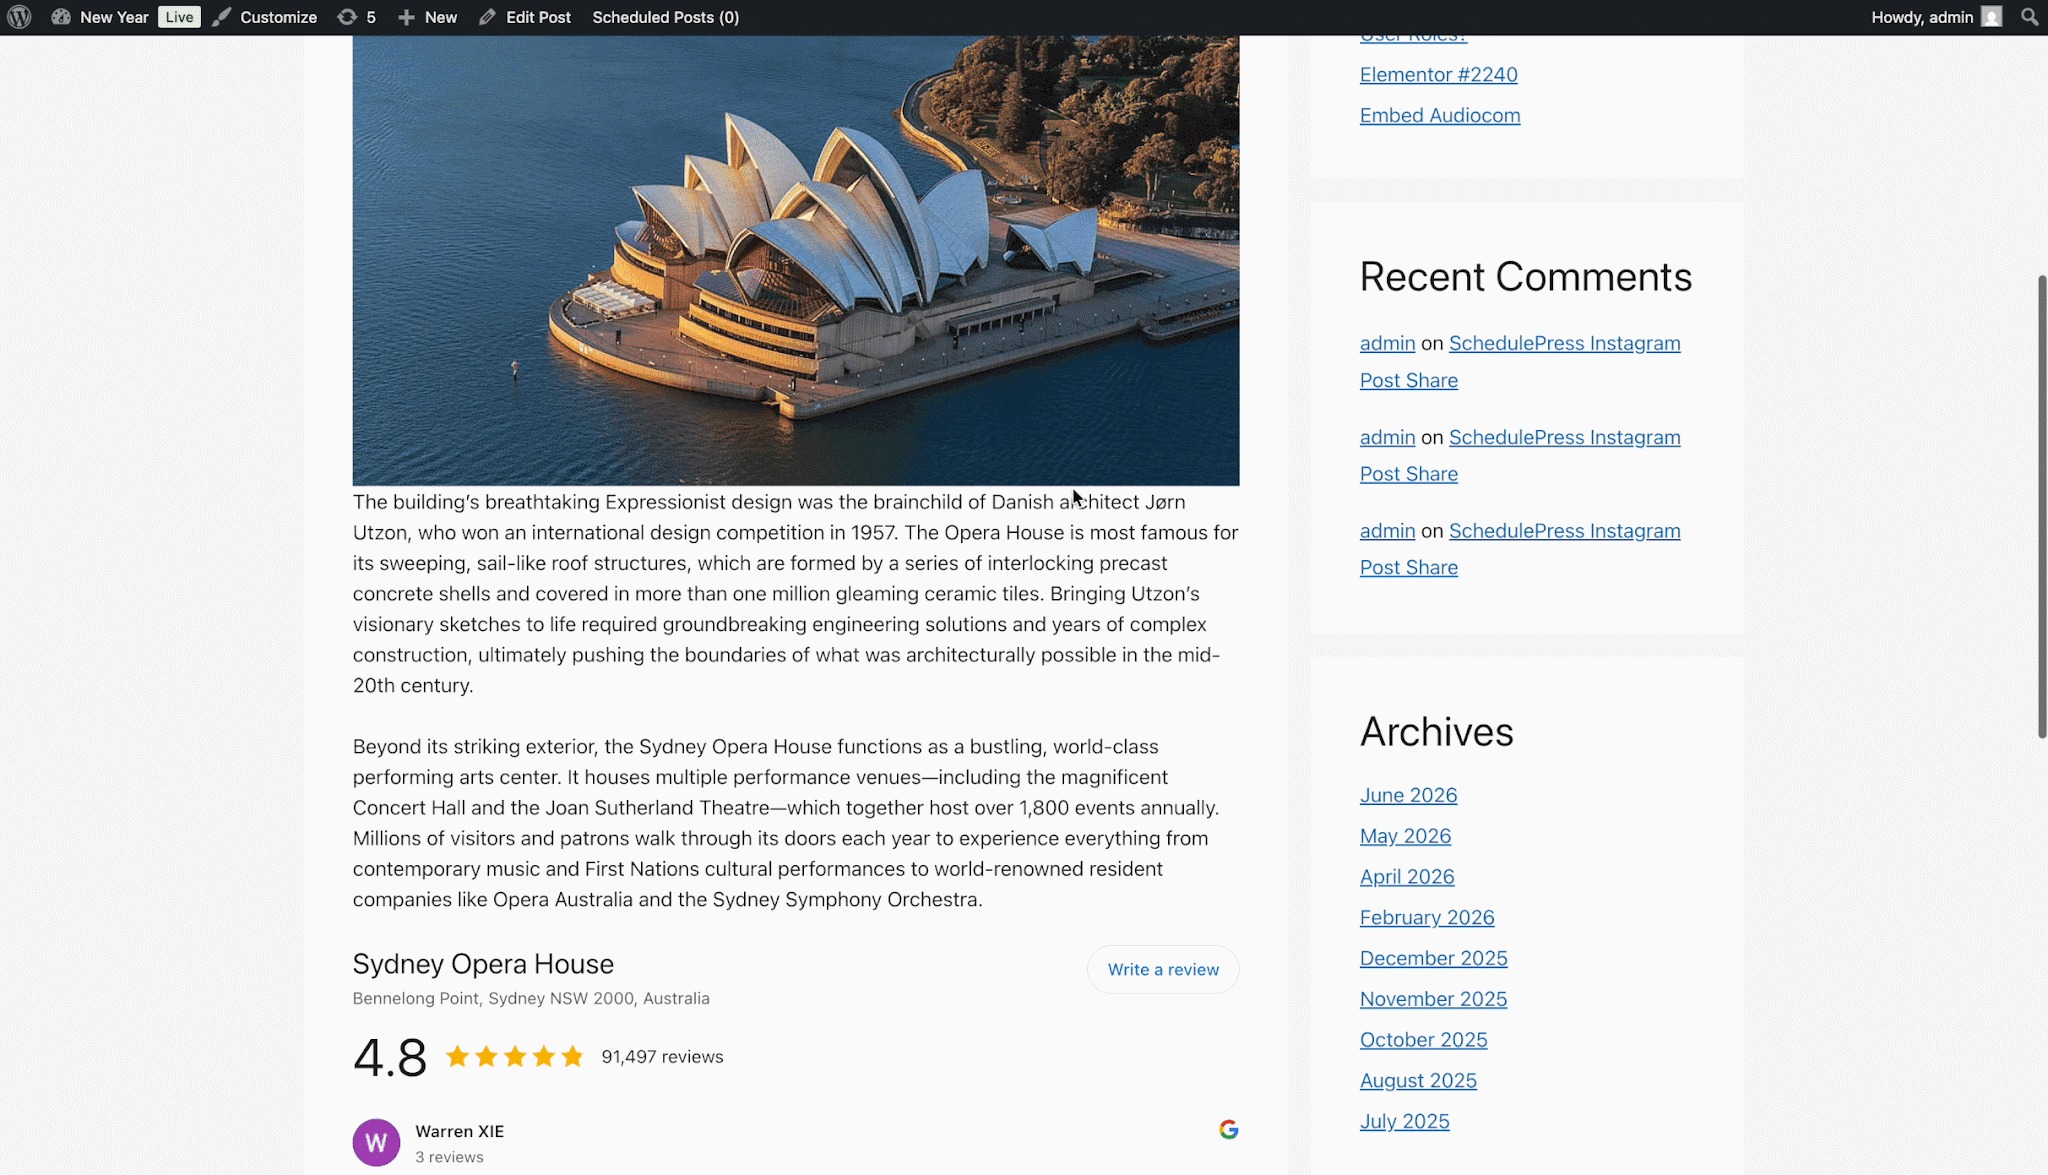
This is how easily you can seamlessly embed Google Reviews in WordPress to display them anywhere on your site in just one click.
If you are facing problems and require further assistance, feel free to contact our support or join our Facebook Community to get in touch with WordPress experts and content creators like yourself.