Google Photos is a widely popular photo management and sharing service on the web, offering an intuitive way to store, organize and share images and videos. It has become the go-to platform for users seeking a seamless and accessible photo library with powerful editing and sharing capabilities. Moreover, you can embed your Google Photos in your site directly with ease.
EmbedPress simplifies embedding Google Photos on your website. With a click, you can embed a single photo or a Google Photos album on your site. Follow the steps below to embed stunning images, albums, etc.
How To Embed Google Photos In WordPress? #
Follow the step-by-step guide below to learn how to easily collect the public Google Photos URL and embed it on your WordPress website, whether it is Gutenberg or Elementor web builder, with a single URL.
Step 1: Collect Public Google Photos URL #
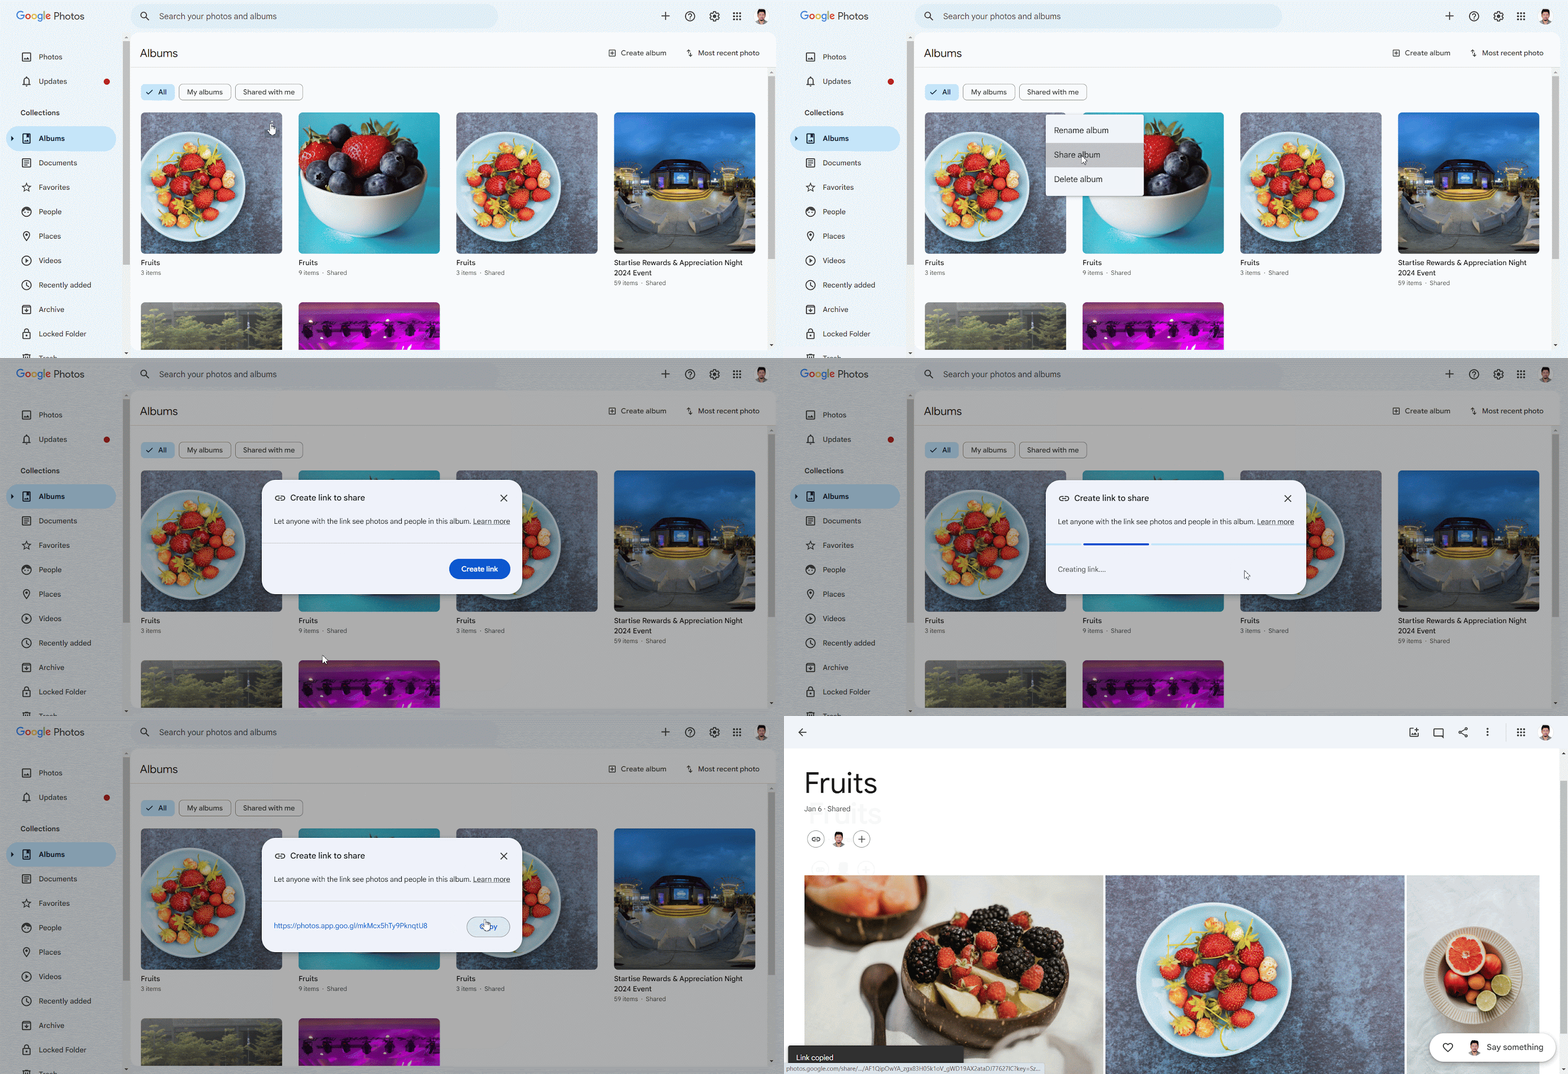
Now, navigate to your Google account and choose your Google Photos Album → Share Album’ and click on the ‘Create Link’ button to share with others that you want to embed. From there, click on the ‘Copy link’ button and copy the URL of the album. You are now all set to embed and showcase your Google Photos album on your website.
How To Embed Google Photos In Gutenberg Editor? #
After you have collected your Google Photos URL, you are ready to embed album photos onto your WordPress website. Follow the steps given below to embed Google Photos in WordPress websites using the Gutenberg editor.
Step 1: Insert The EmbedPress Block #
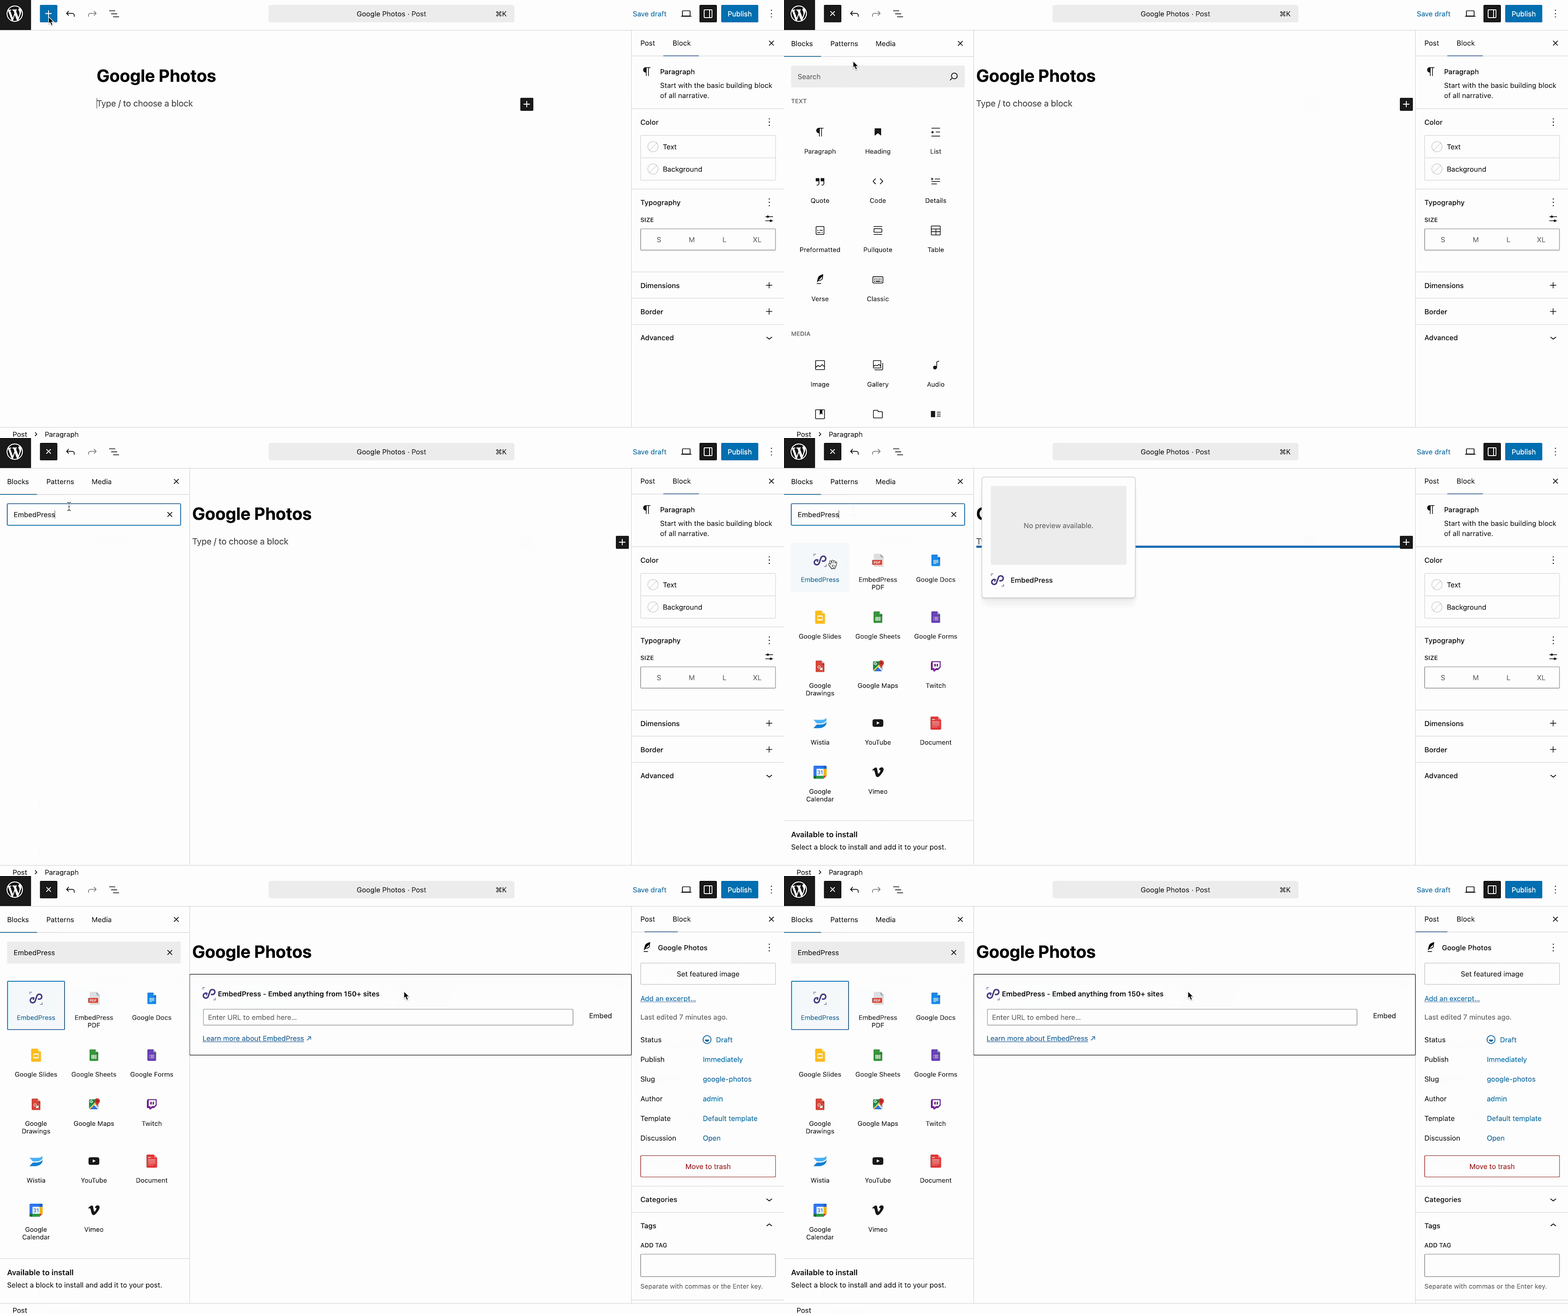
Create a new post or page from your WordPress dashboard and then click on the ‘+’ icon on top of the web page or anywhere in your content area of the Gutenberg editor. Search for ‘EmbedPress’ block, as shown below and drag and drop it into the page.
Step 2: Embed The Google Photos Public Album #
To embed your ‘Public’ Google Photos album, simply paste the public URL that you previously copied into the input field of the block. After that, click on the ‘Embed’ button to seamlessly insert the album into your WordPress website.
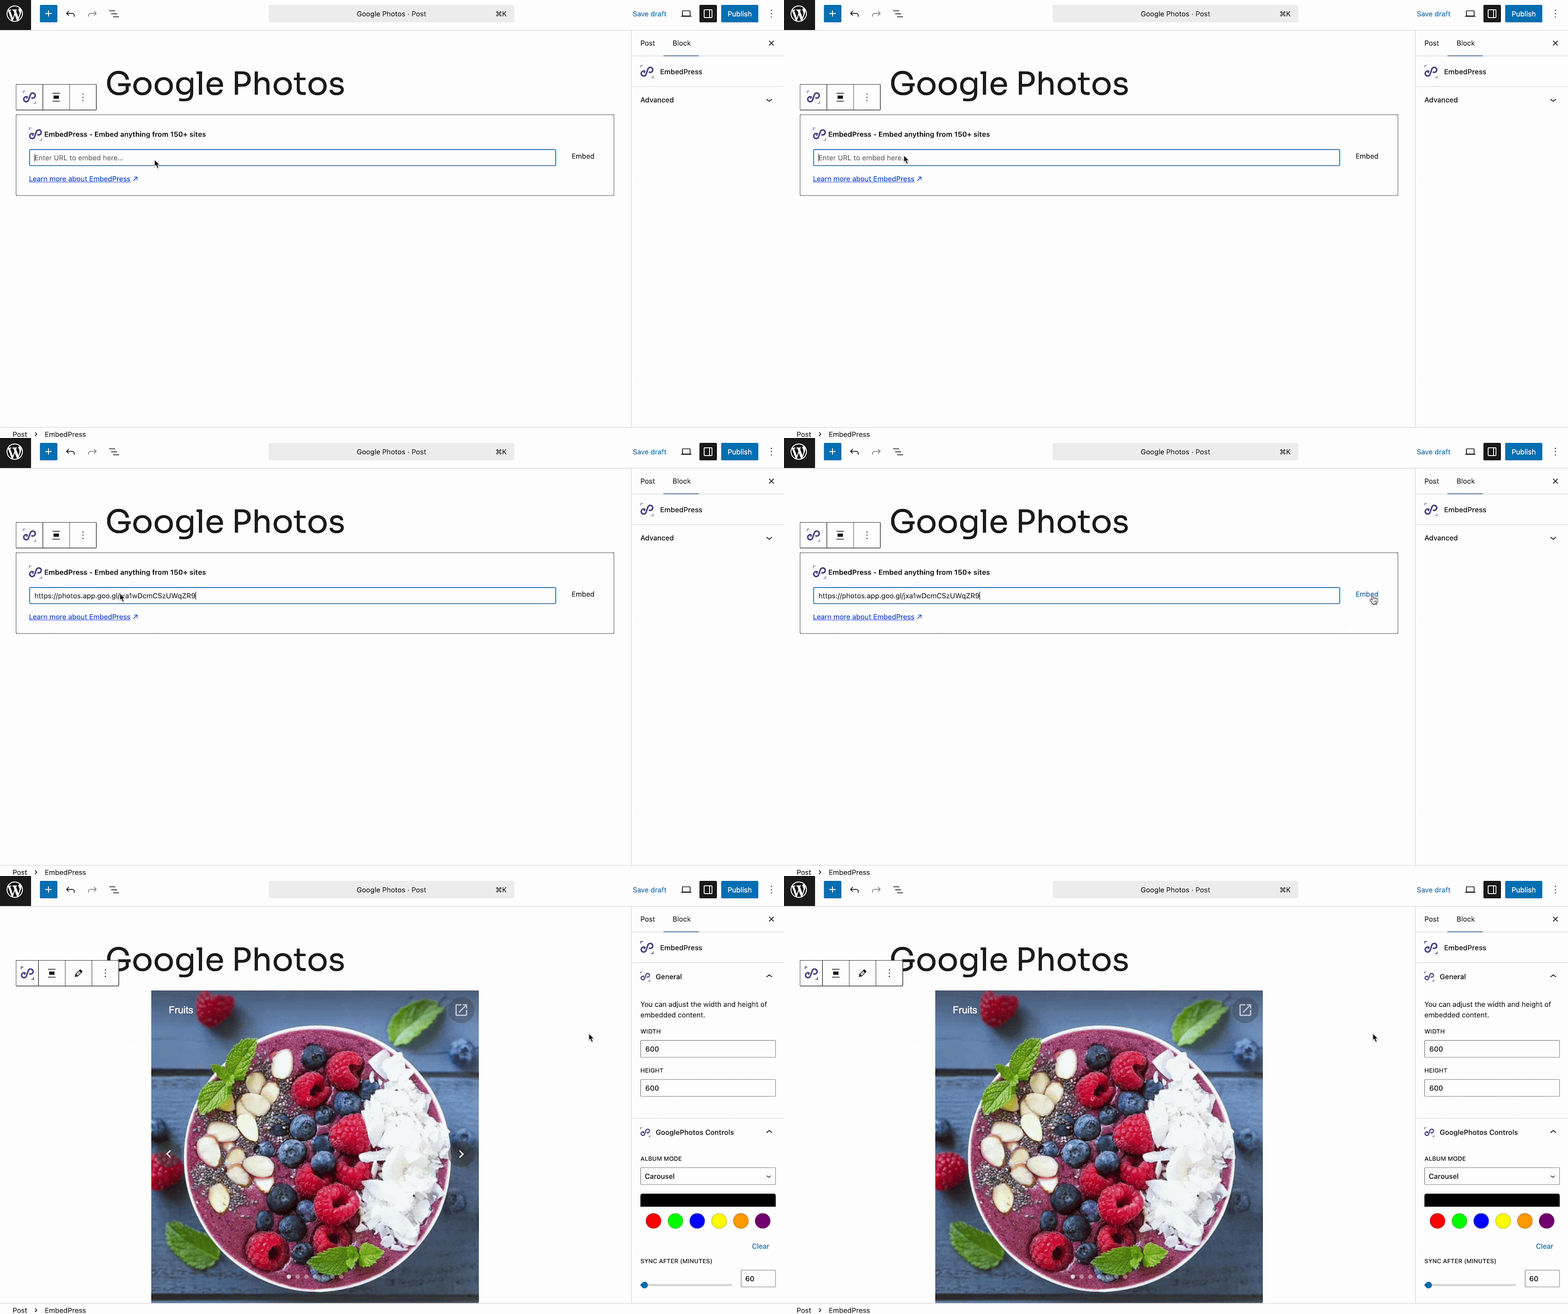
Afterward, you can see the embedded Google Photos album on your site editor within a while. Now you can customize height and width, update controls and implement other advanced features from here.
Step 4: Customize Your Embedded Album Appearance #
Head over to the ‘General’ section in the sidebar, where you can adjust the ‘Height’ and ‘Width’ of your Google Photos album. Set these dimensions to your preferred size to customize the album’s display.

Next, locate the ‘Album Mode’ option under the ‘Google Photos Controls’. Here, you can get versatile, ready album layouts. You can choose from the pre-made layouts such as ‘Carousel’, ‘Gallery Player’, ‘Grid, ‘Masonry’ and ‘Justify’ layout. Pick the layout that best suits the style and functionality you want for your album.
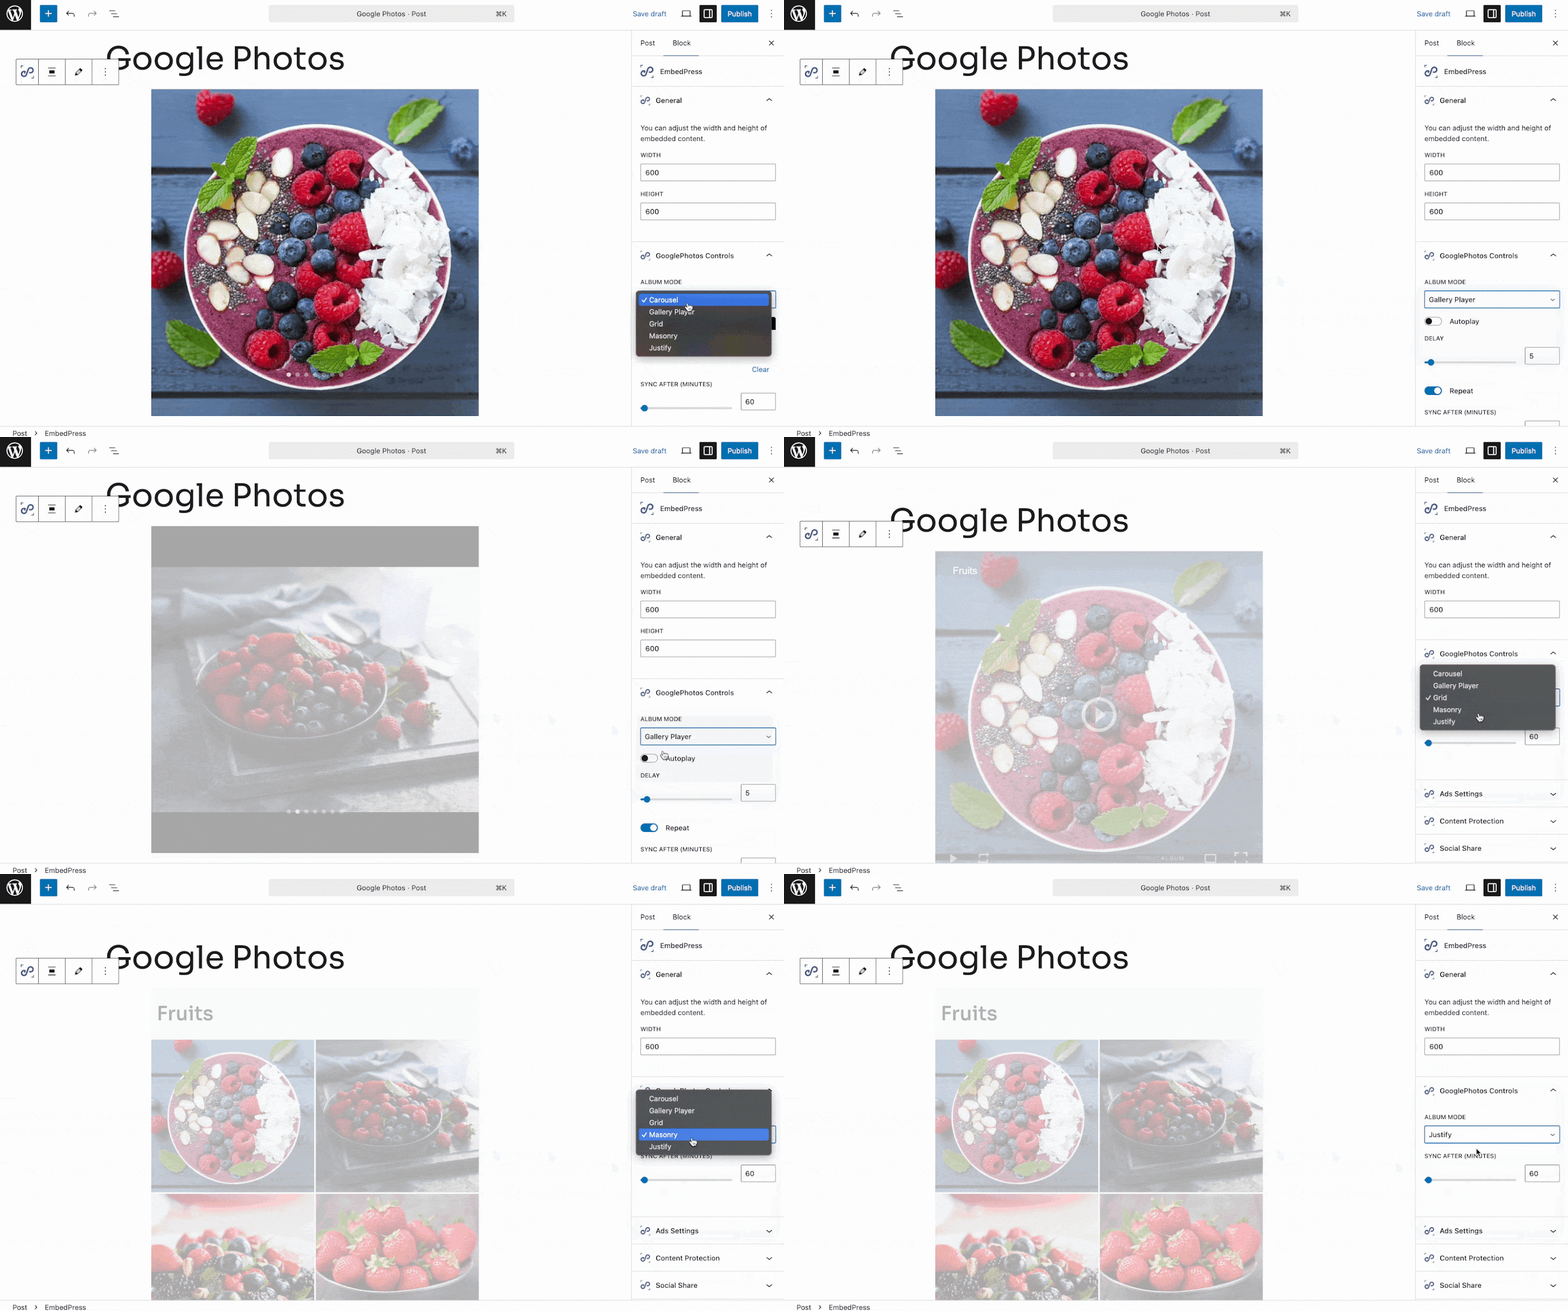
For the Gallery player layout, you can enable autoplayer, set delay, enable repeat, etc. And, you can adjust sync after time for the four other layouts.
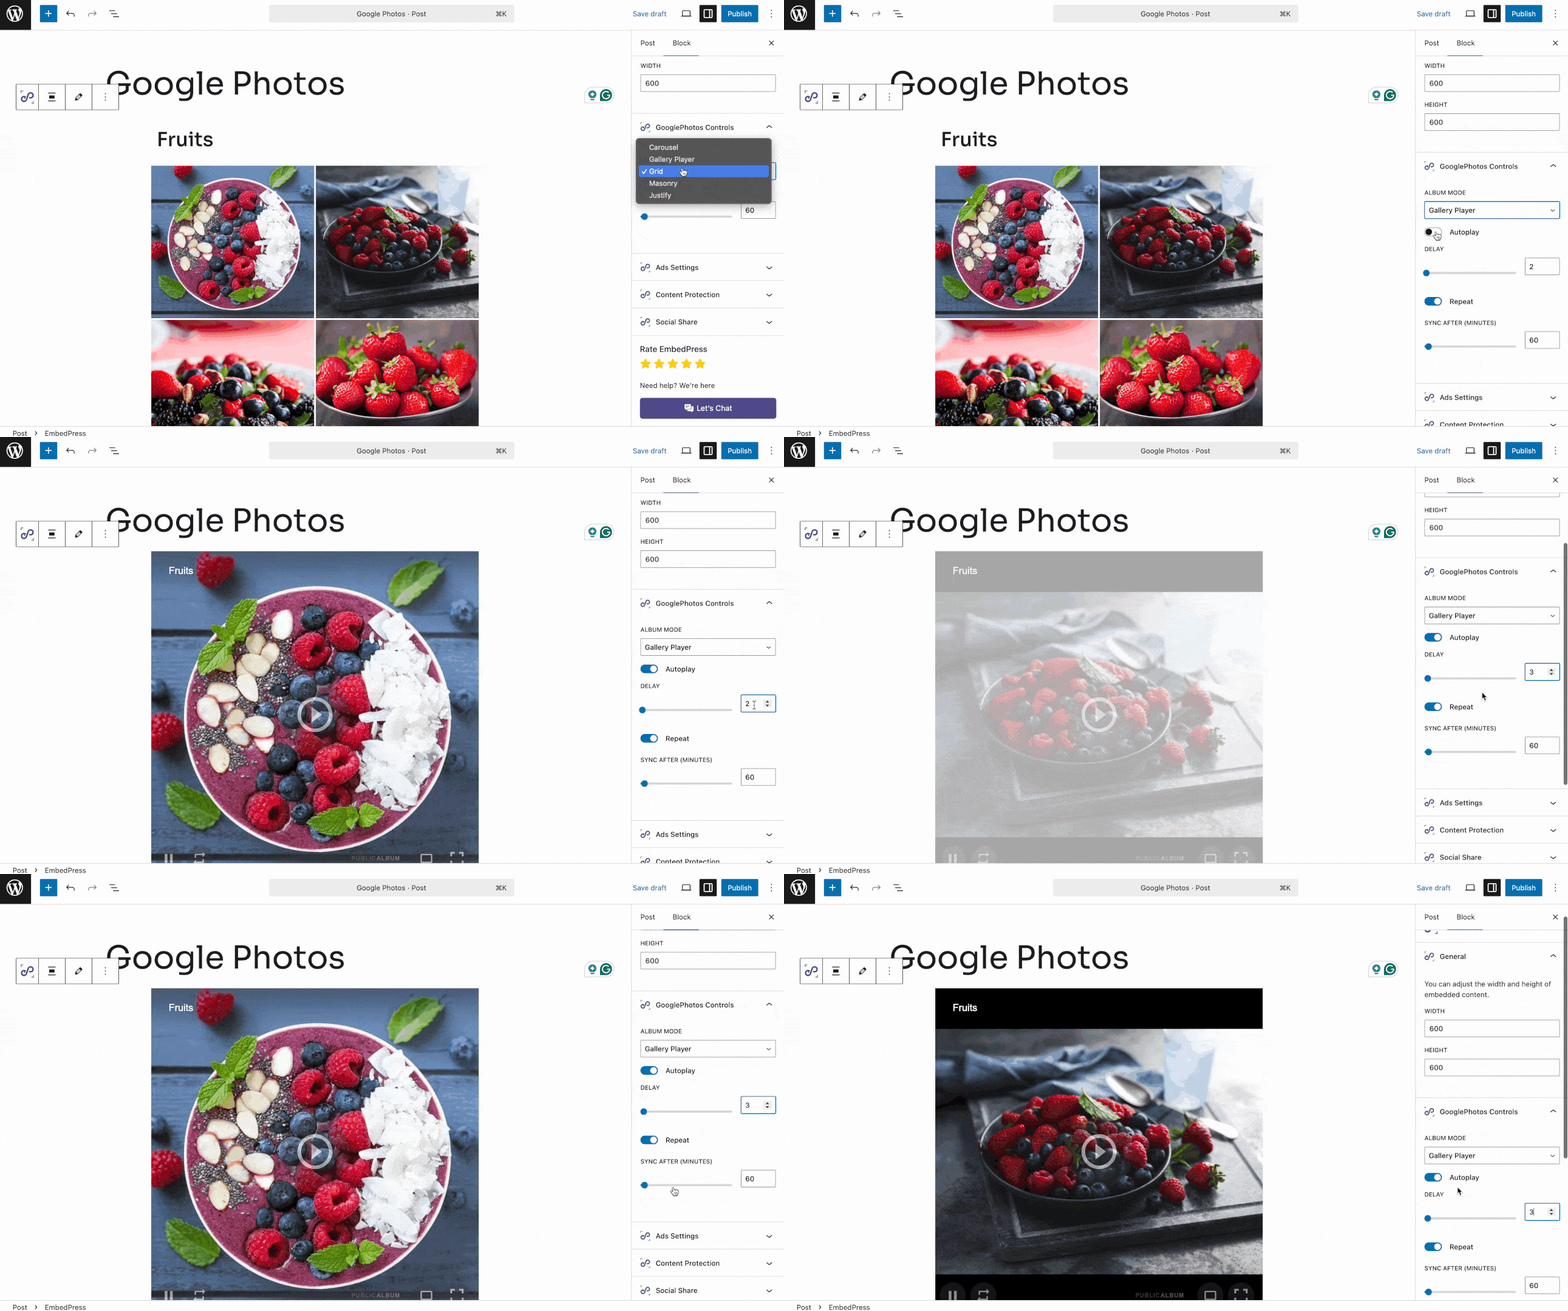
Now, adjust the ‘Background Color’ of the album according to your preferences. Then, go to the ‘Sync after (minutes)’ option and set the time according to your preference to sync the images again.

When you are done, click on ‘Publish’ and preview to see how the album of Google Photos has been embedded by EmbedPress.
How To Embed Google Photos In Elementor Website Builder? #
You can use the EmbedPress widget with Elementor as well to seamlessly embed Google Photos into your WordPress website. Just follow the detailed steps outlined below to get started and customize the embed to fit your site’s needs.
Step 1: Insert The EmbedPress Widget #
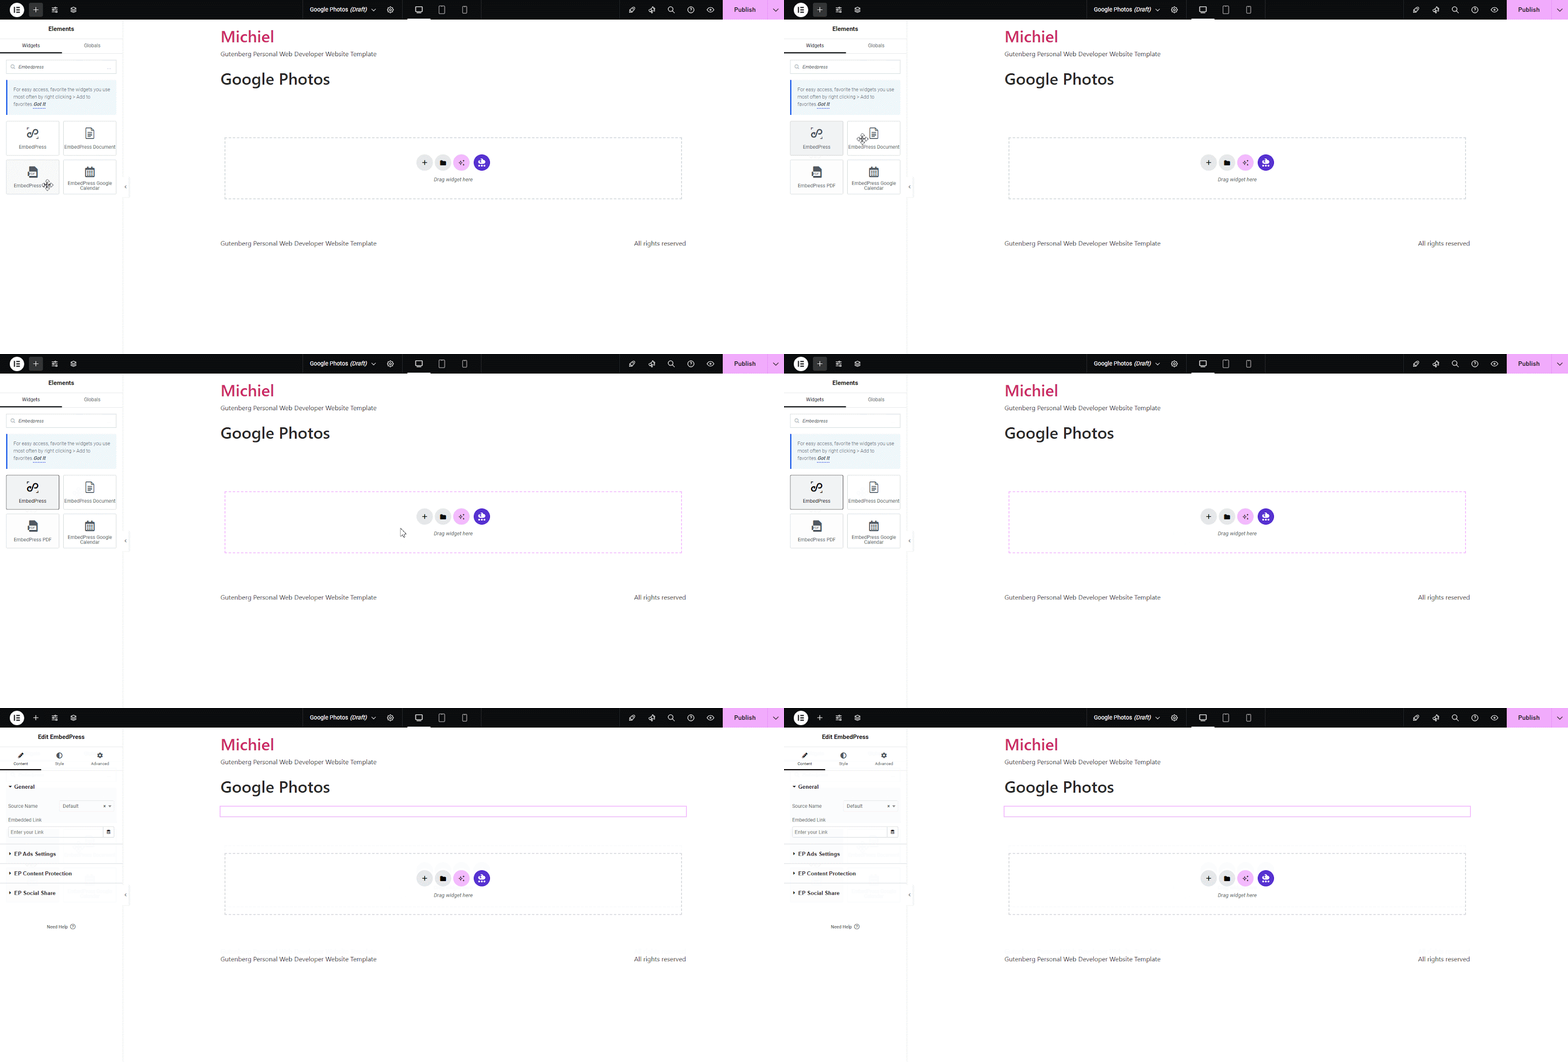
First, create a new page from your WordPress dashboard by navigating to the page where you want to add the ‘Google Photos Album URL’. Then search for the‘EmbedPress’ widget from under the ‘Elements’ tab in the editor’s side panel. Next, drag and drop this element anywhere on your page where you want to embed your photos or albums.
Step 2: Embed Your Public Google Photos Album In Elementor #
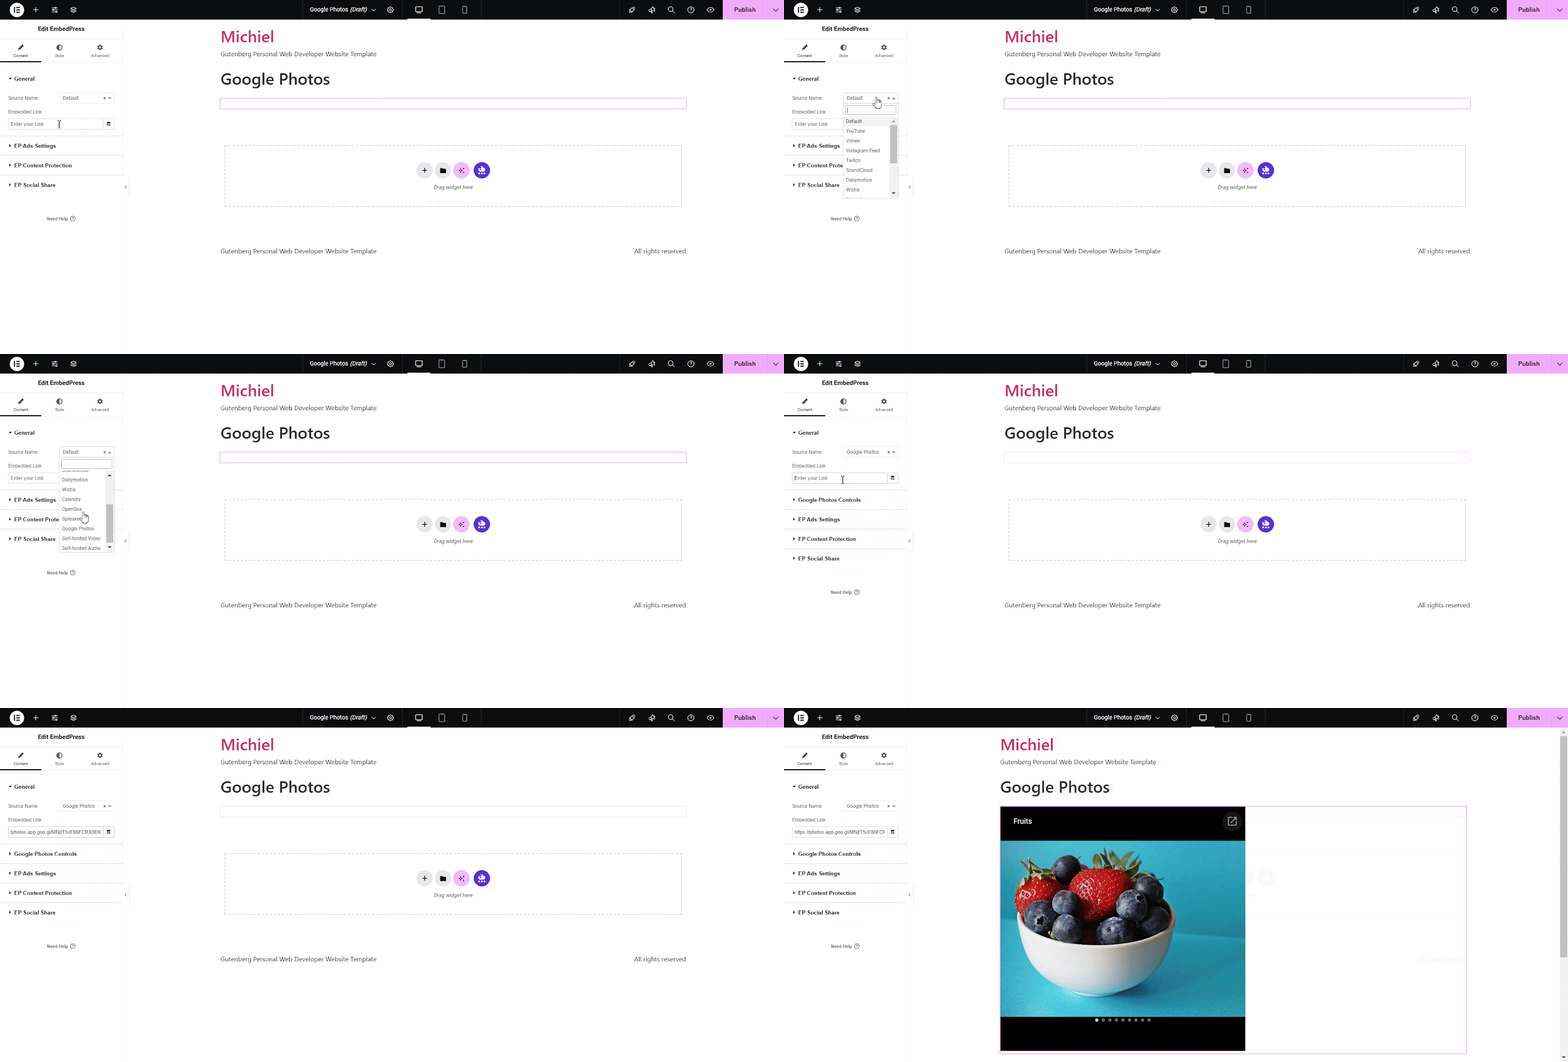
From the ‘Content’ tab on the side panel, go to the ‘General Settings’. Now you can choose the ‘Source’ type as ‘Google Photos’ and paste the copied public Google Photos album URL. EmbedPress will instantly embed Google Photos into your website.
Step 3: Advanced Customization Of The Google Photos Album #
Next, navigate to the ‘Google Photos Controls’ section.
Here, you can get versatile, ready album layouts. You can choose from the pre-made layouts such as ‘Carousel’, ‘Gallery Player Layout’, ‘Grid Layout’ & ‘Masonry Layout’ and ‘Justify’ layout. Pick the layout that best suits the style and functionality you want for your album.
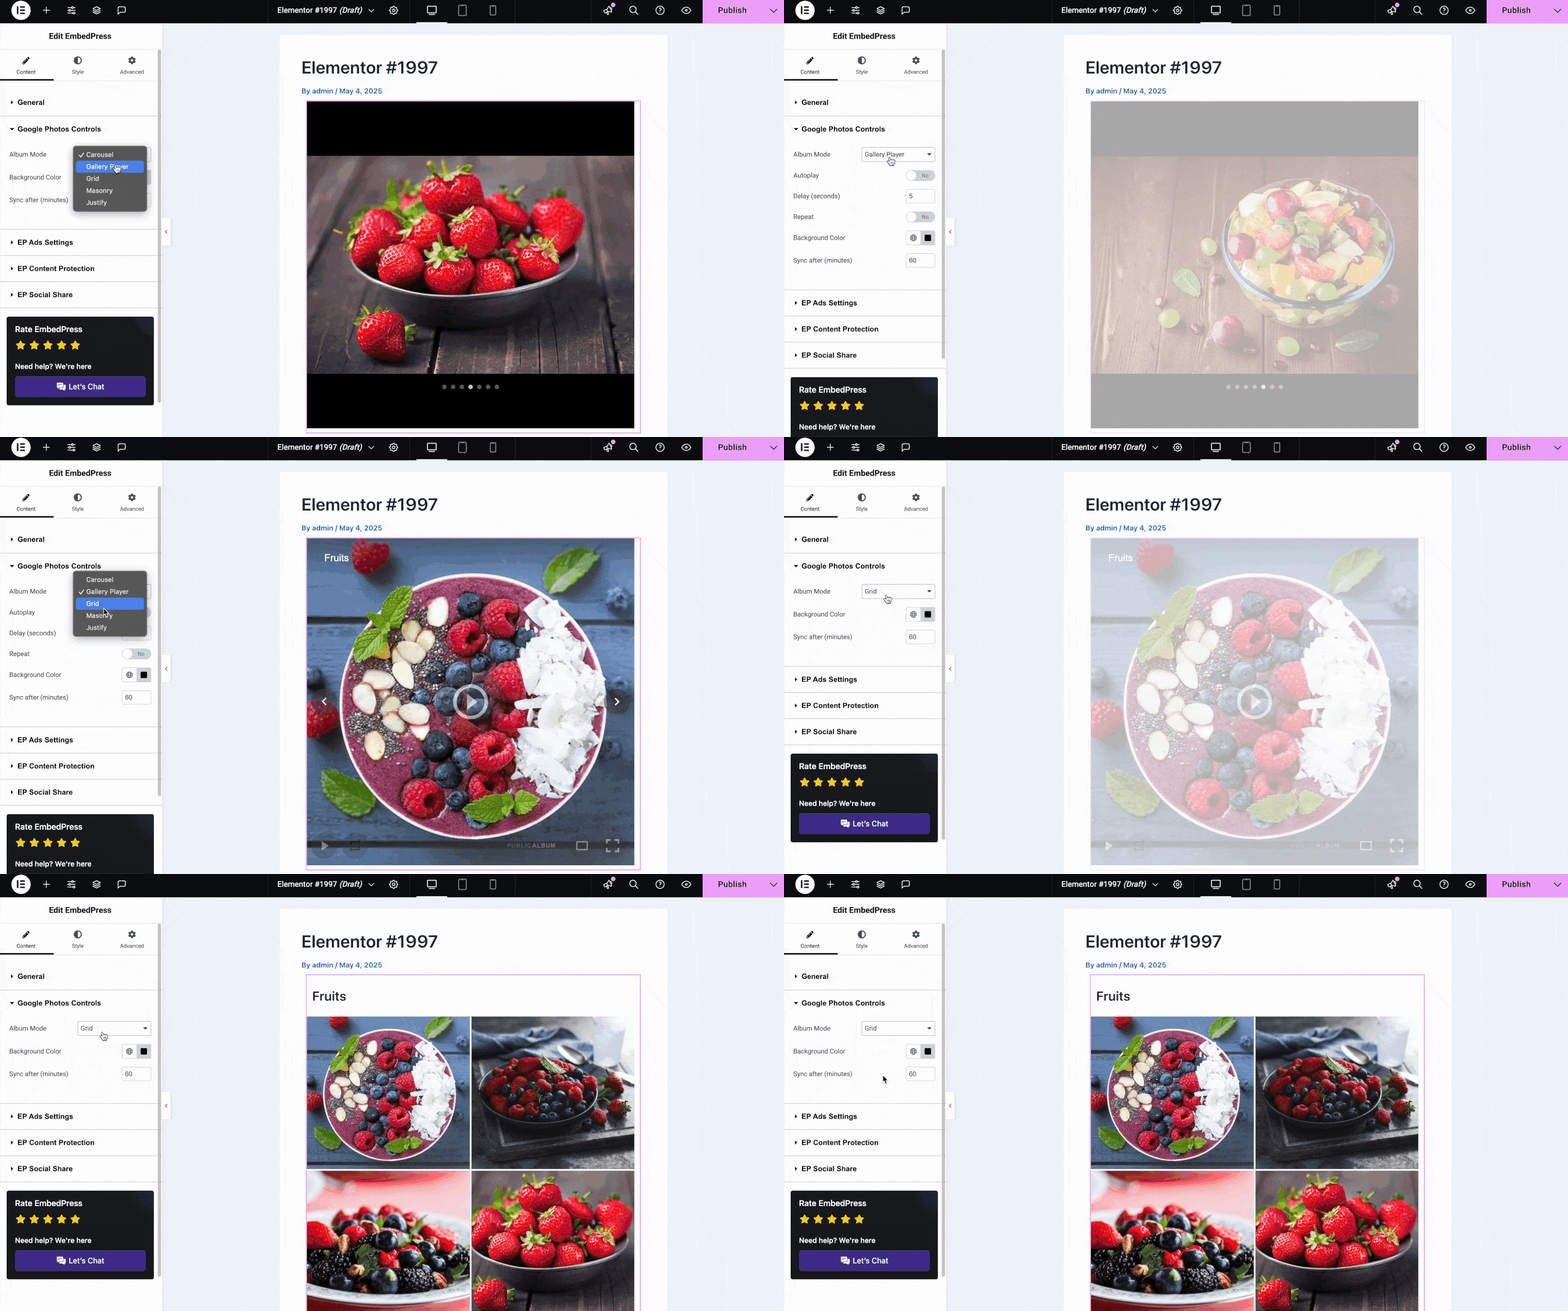
For the Gallery player, you can enable autoplayer, set delay, enable repeat, etc. And, you can adjust sync after time for the four other layouts.
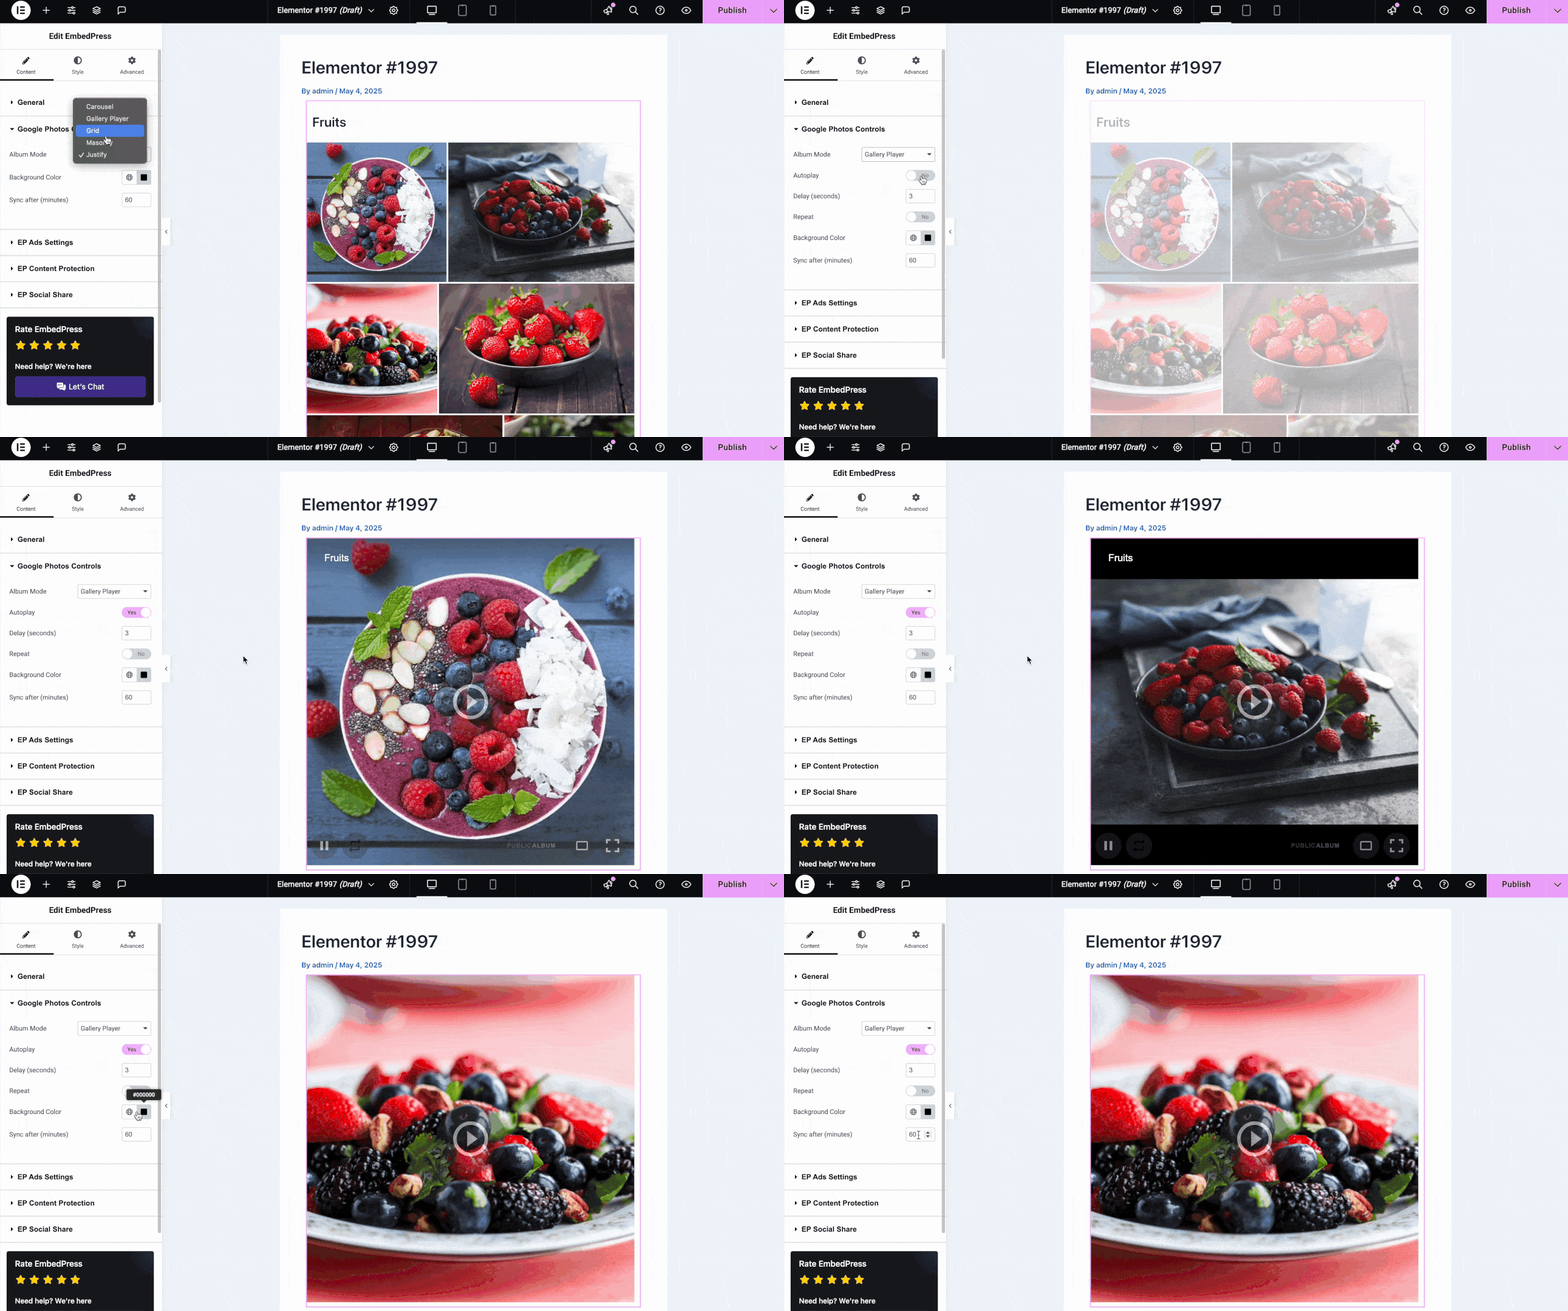
Now go to the ‘Style’ tab to get more customization of your embedded album and adjust your album ‘Height’, ‘Width’, ‘Alignment’, ‘Margin’ and more to give it a customized look to your preferences.

When you are done, click on ‘Publish’ and preview to see how the album of Google Photos has been embedded by EmbedPress.
Final Output #
This is how the fully responsive ‘Google Photos Album’ will appear when published on your WordPress website, ensuring that it automatically adjusts to fit any screen size for an optimal viewing experience across devices.
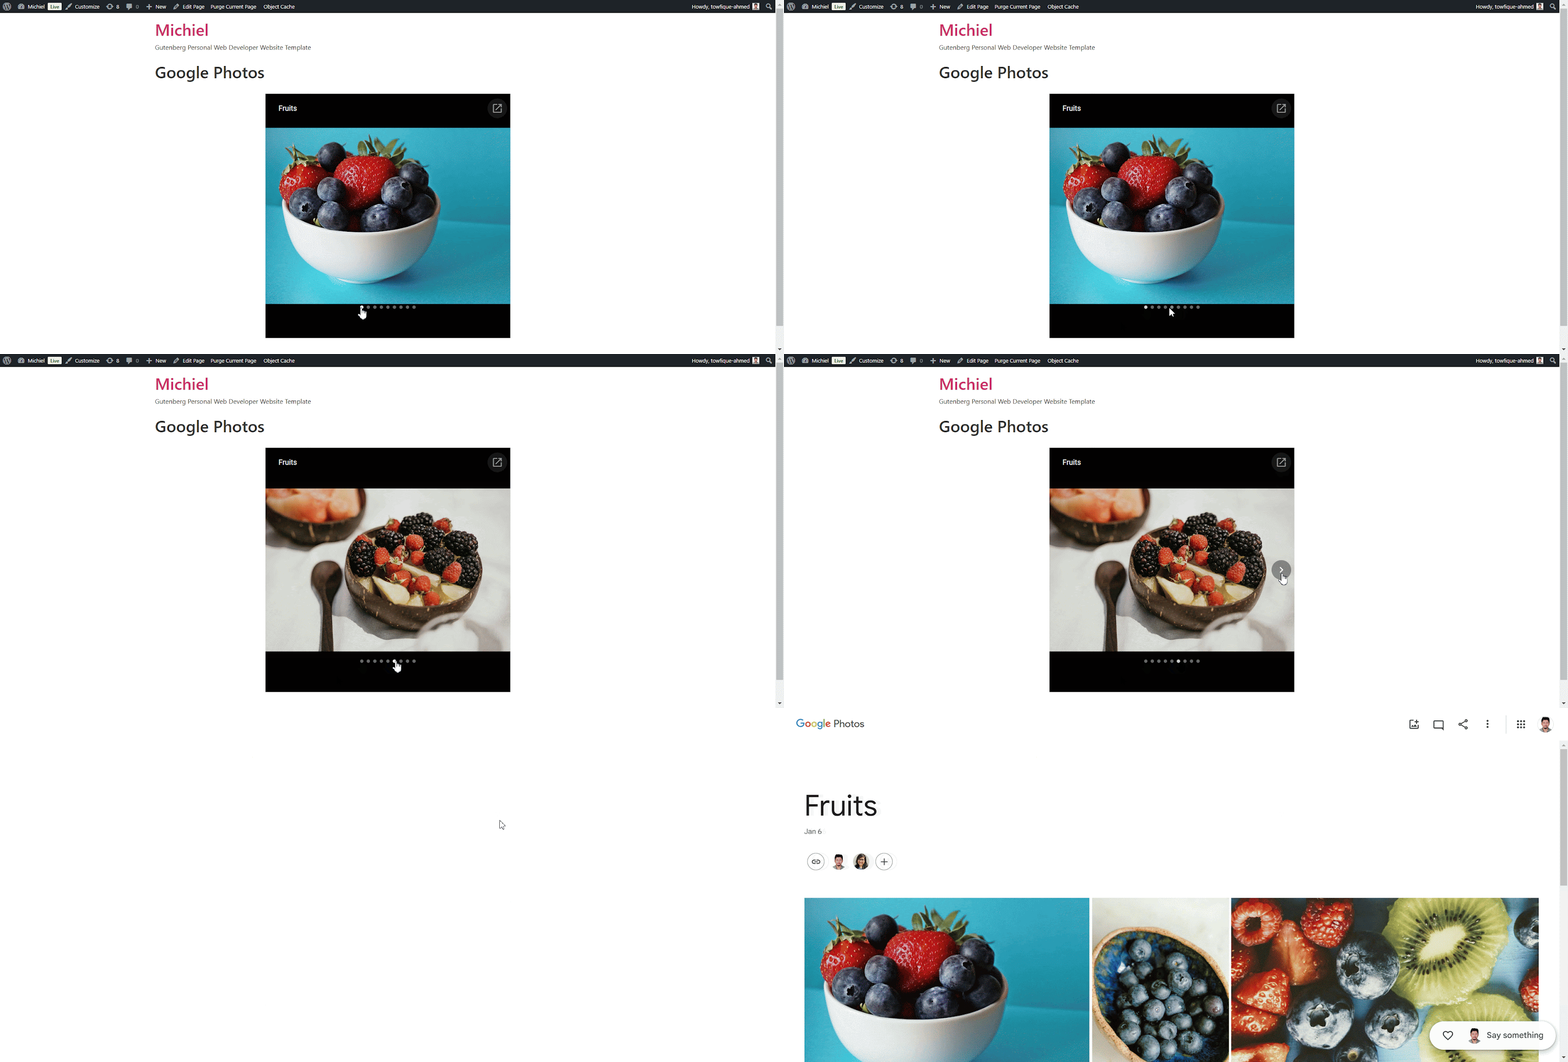
Get a Live Experience Of Embedded Google Photos on Your Website #
If you are facing problems and require further assistance, feel free to contact our support or join our Facebook community to get in touch with WordPress experts and content creators like yourself.


