Google Calendar is an enormously popular calendar service on the web. It is quickly emerging as most people’s top go-to scheduling application. It is ideal for organizing schedules, managing and sharing any type of events, creating reminders, and more.
While Google Calendar embeds are possible, they’re not easy to use via the traditional methods. However, EmbedPress now lets you effortlessly embed Google Calendar (both public and private calendars) with just a few clicks.
Here’s how to embed Google Calendar into your WordPress site preferred editor using this EmbedPress plugin following the simple, easy steps below.
How To Embed Google Calendar In WordPress? #
With EmbedPress, now you can easily embed any of your public Google Calendar in your Gutenberg or Elementor editor using just a single URL. Follow the step-by-step guide below to learn how to easily collect the public calendar URL and embed it on your WordPress website.
Step 1: Retrieve & Collect Public Google Calendar URL #
First, you need to navigate to your Google Calendar account. There, you will see all your public and private calendars listed on the left-hand side panel.
To retrieve the public Google Calendar URL, you need to click on the calendar you want to embed on your website and select ‘Settings and Sharing,’ as shown below.

Step 2: Copy The URL For Public Google Calendar #
This will redirect you to a new web page where you will come across the option to ‘Integrate Calendar’. It will contain the public URL for the calendar you have selected. Simply copy this URL.

How To Retrieve App API For A Private Google Calendar? #
Now, with EmbedPress PRO, you can even embed your private calendar easily within just a few steps. Follow the instructions below to learn how you can easily retrieve Google Calendar App API.
Step 1: Create New Project In Google Cloud Platform #
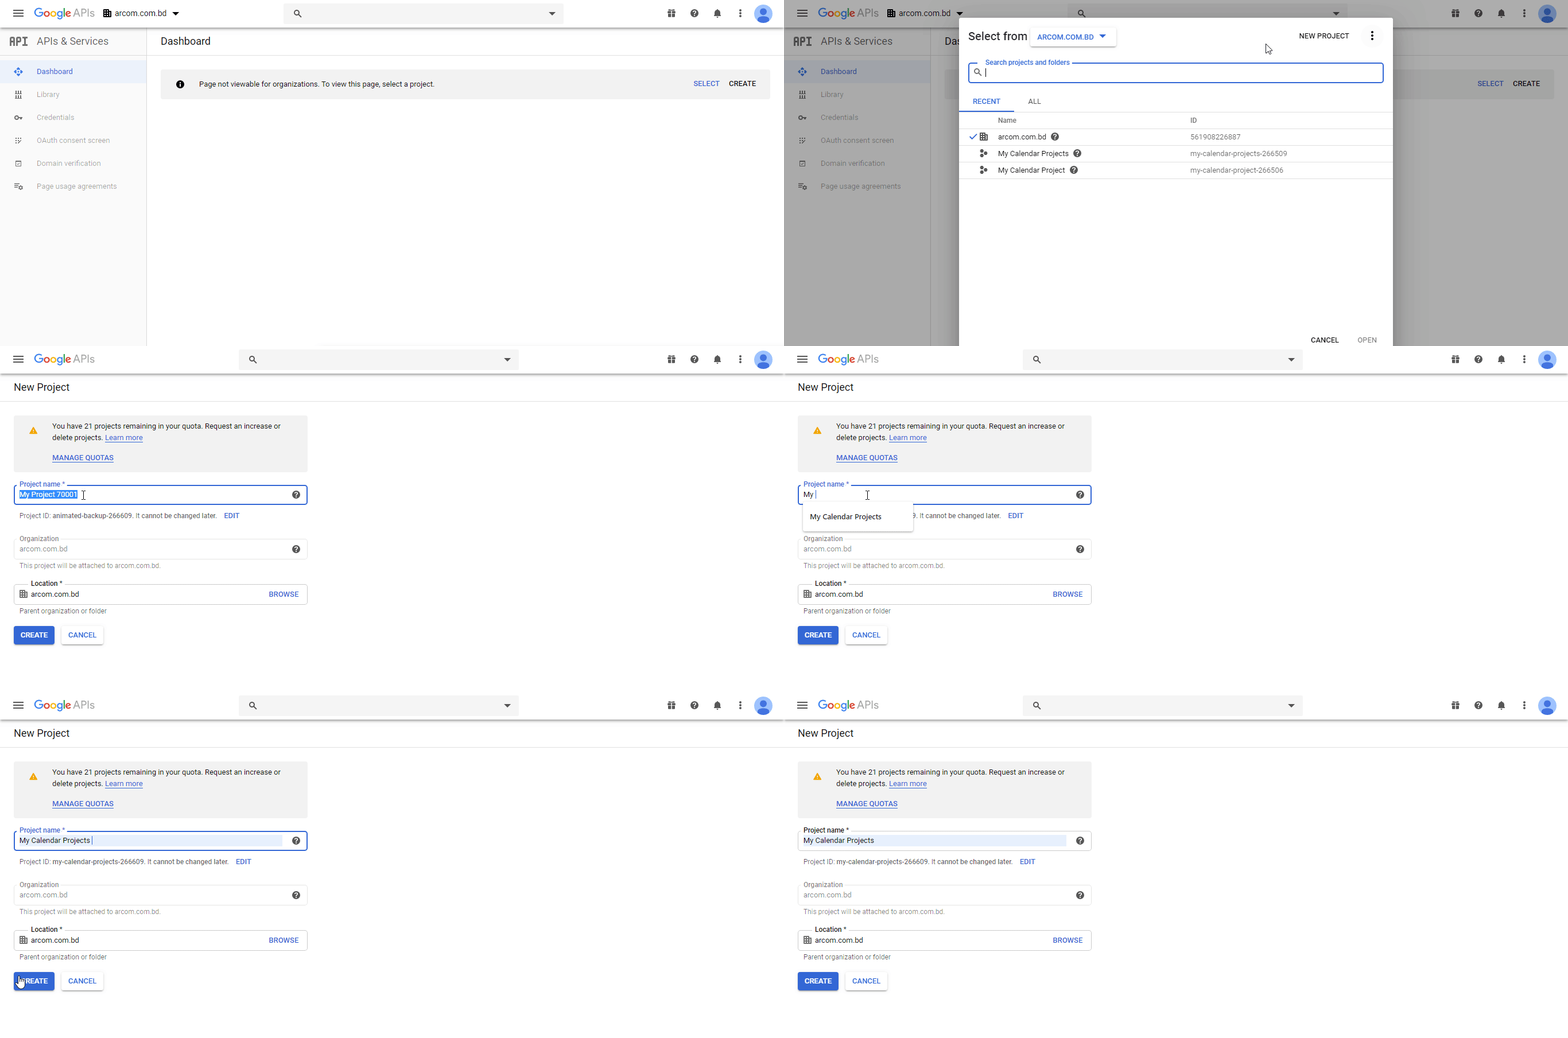
To retrieve your Google Calendar API Key, you have to go to the Google Developers Console to generate your Google Calendar API. Afterward, you have to create a project and give it a name by clicking on the ‘New Project’ from the Dashboard. Here, provide a custom name and organization location for your project, as shown below. And then, hit the ‘Create’ button.
Step 2: Configure Application Registration #
Once the project is created, navigate to the OAuth consent screen → API and Services tab from the left-hand side panel of your Google Cloud Platform. Here, set the user type to ‘External’ and hit the ‘Create’ button.

You will be redirected to the Edit App Registration page where you need to fill out all the necessary fields with related information.

Step 3: Publish The App To The Web #
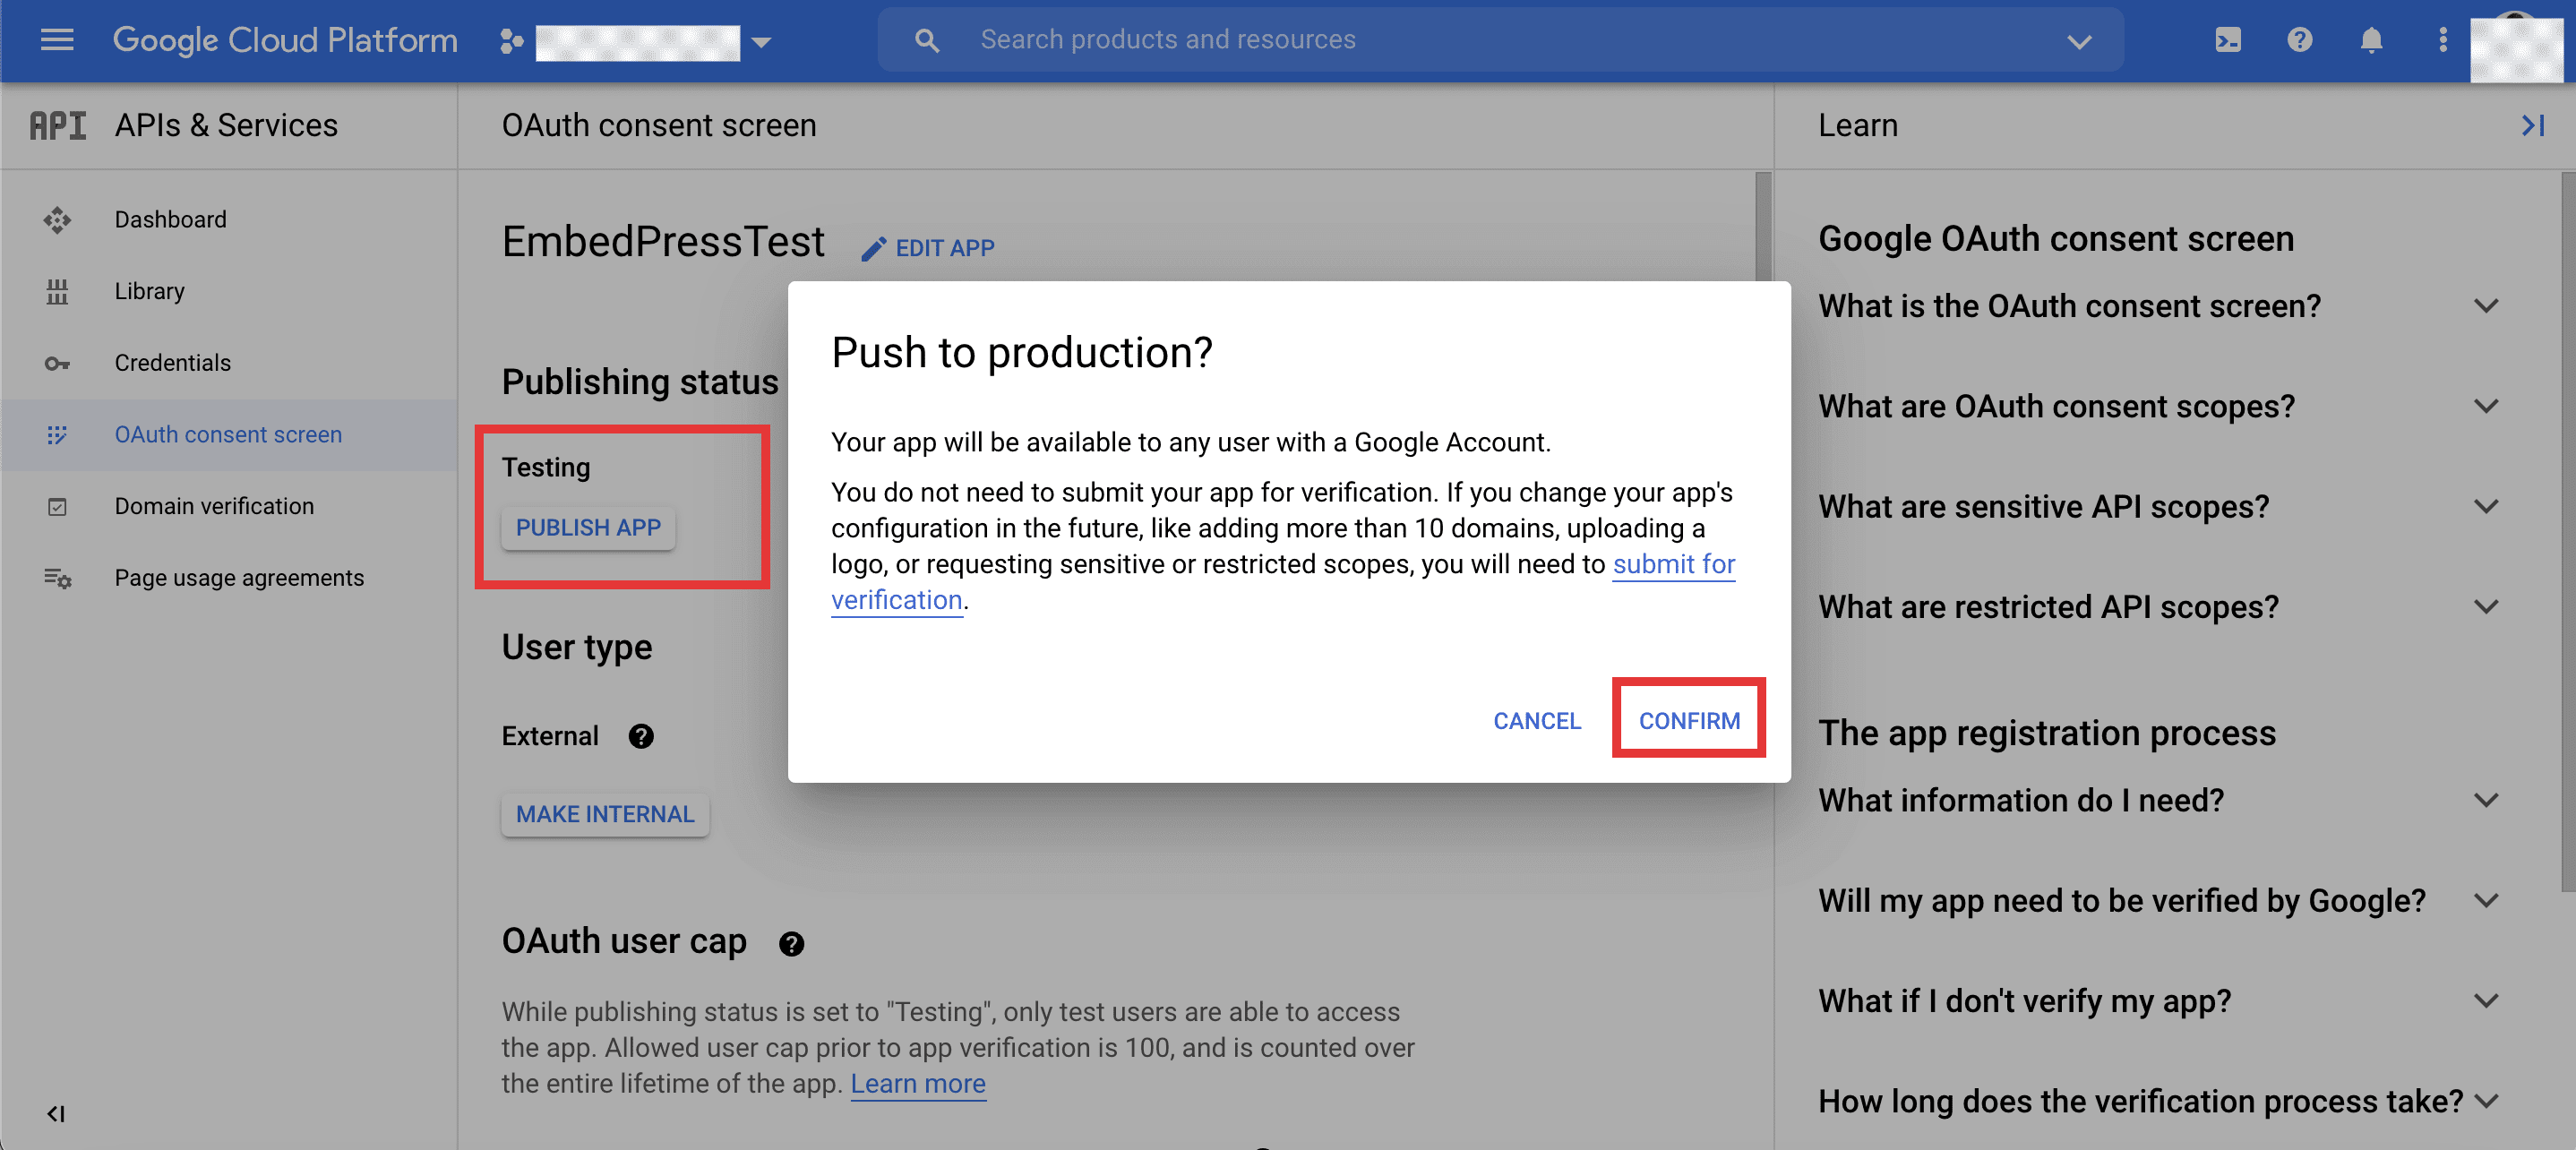
Then, you will be redirected back to the ‘OAuth Consent Screen‘, where you will find the ‘Publish App‘ button. Simply click on the button and hit ‘Confirm‘ to proceed.
Step 4: Enable The Google Calendar API
#
Afterward, navigate to the ‘Library’ tab from the left-hand side panel which will take you to the ‘API Library’. Here, search for ‘Google Calendar API’ and hit the ‘Enable’.

Step 5: Create OAuth ID & Set Authorized Redirect URL #
Then, navigate to the ‘Credentials’ tab → ‘Create Credentials’ → ‘Create OAuth ID’. Here, set the application type to ‘Web Application’.

Before you hit ‘Create’, you need to navigate to your EmbedPress plugin user interface from your WordPress website dashboard from a separate window or tab.
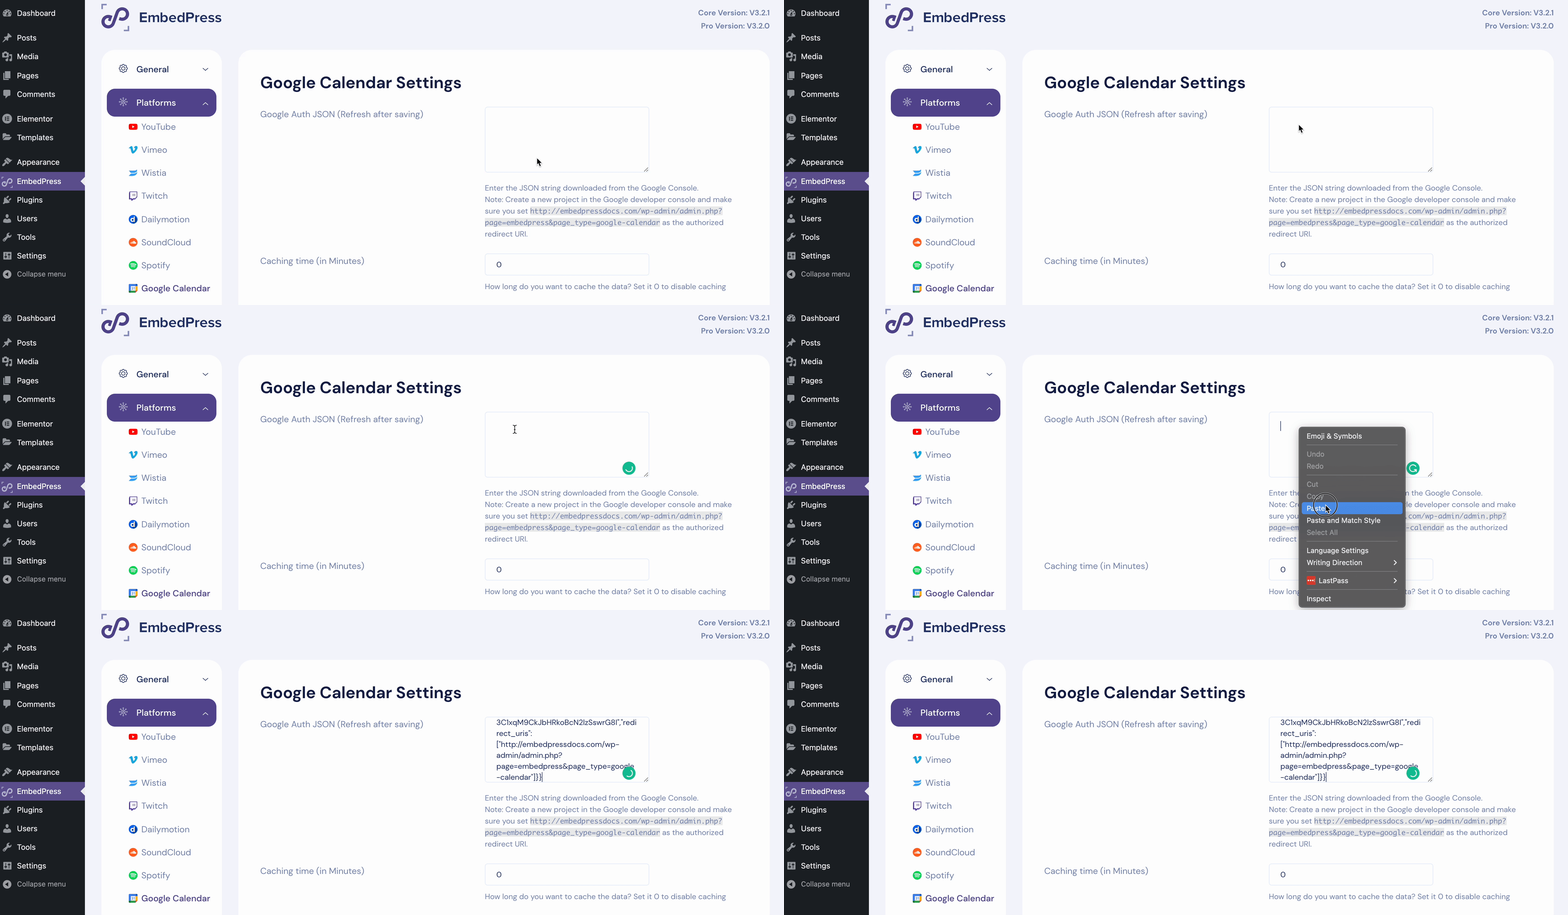
Click on the ‘Platforms’ tab and select the ‘Google Calendar’ option from the drop-down menu, as shown below. And copy the URL given to you under the Google Auth JSON section.

Then, head back to the Google Cloud Console ‘Client ID for Web Application’ page and paste the copied URL in the ‘Authorized redirect URLs’ field, and then hit ‘Create’.

Step 6: Paste The OAuth Client ID In EmbedPress #
You will then be redirected back to the Credentials page. Download the .JSON file of your newly created OAuth Client ID, as shown below.

Open the .JSON file, and copy the Client ID and Client Secret as given on the file. Then, head back over to the EmbedPress Platforms Google Calendar interface and paste the copied ID in the input field given. Then hit ‘Save’ and refresh the page.
You will find a new section that will appear at the bottom of the page named ‘Authorization’ with a list of all your available private calendars. Select all or any of your private Google Calendar to embed on your WordPress website, and hit ‘Save Changes’.

How To Embed Google Calendar In Gutenberg Editor? #
After you have collected your calendar URL or Client ID code, you are ready to embed the calendars onto your WordPress website. Follow these steps given below to embed Google Calendar in your WordPress website using the Gutenberg editor.
Step 1: Insert The Google Calendar Block #
Create a new post or page from your WordPress dashboard and click on the ‘+’ icon on top of the web page or anywhere in your content area of the Gutenberg editor. Search for ‘Google Calendar’ or ‘EmbedPress’, and select the Google Calendar block, as shown below.

Step 2: Embed The Public Calendar URL #
To embed your ‘Public’ Google Calendar, simply paste the public URL that you have copied earlier onto the input field of the block. And then, hit the ‘Embed’ button.

A completely responsive and customizable version of your public ‘Google Calendar’ will be embedded into your website instantly.
Step 3: Select Your Private Google Calendar #
If you want to embed your private Google Calendars in your website, simply toggle to disable the ‘Embedding Public Calendar’ from the right-hand side Block customizer panel as shown below.

Note: The Private calendar will only be displayed on the frontend of your website once you ‘Publish’ it.
Step 4: Edit & Publish Your Google Calendar #
You can then add some customization and choose how you want to showcase your embedded Google Calendar on your site. You can adjust the width and height of your calendar from the options under the Block tab on your right-hand side. You can also toggle to hide the ‘Powered By EmbedPress’ text if you want.

When you are done, publish and preview your WordPress content, and a fully responsive Google Calendar will be available for your website visitors to view.
How To Embed Google Calendar In Elementor Editor? #
You can also use EmbedPress with Elementor to embed Google Calendar in your WordPress website by following the detailed steps below.
Step 1: Insert The EmbedPress Google Calendar Widget #
First, create a new page from your WordPress dashboard by navigating to Pages→ Add New and then clicking on the blue ‘Edit With Elementor’ button.
Then search for the ‘EmbedPress Google Calendar’ widget from under the ‘Elements’ tab in the editor’s side panel. Next, drag and drop this element anywhere on your page where you want to embed your calendar.

Step 2: Embed Your Public Google Calendar #
From the ‘Content’ tab on the side panel, you can choose the type of Google Calendar from under the ‘Content Settings’, and set it to ‘Public’.
Then, paste the copied public calendar URL. EmbedPress will automatically embed the calendar into your website.

Step 3: Embed Your Private Google Calendar #
Similarly, simply set the Google Calendar type to ‘Private’, and EmbedPress will automatically embed the calendar into your website.
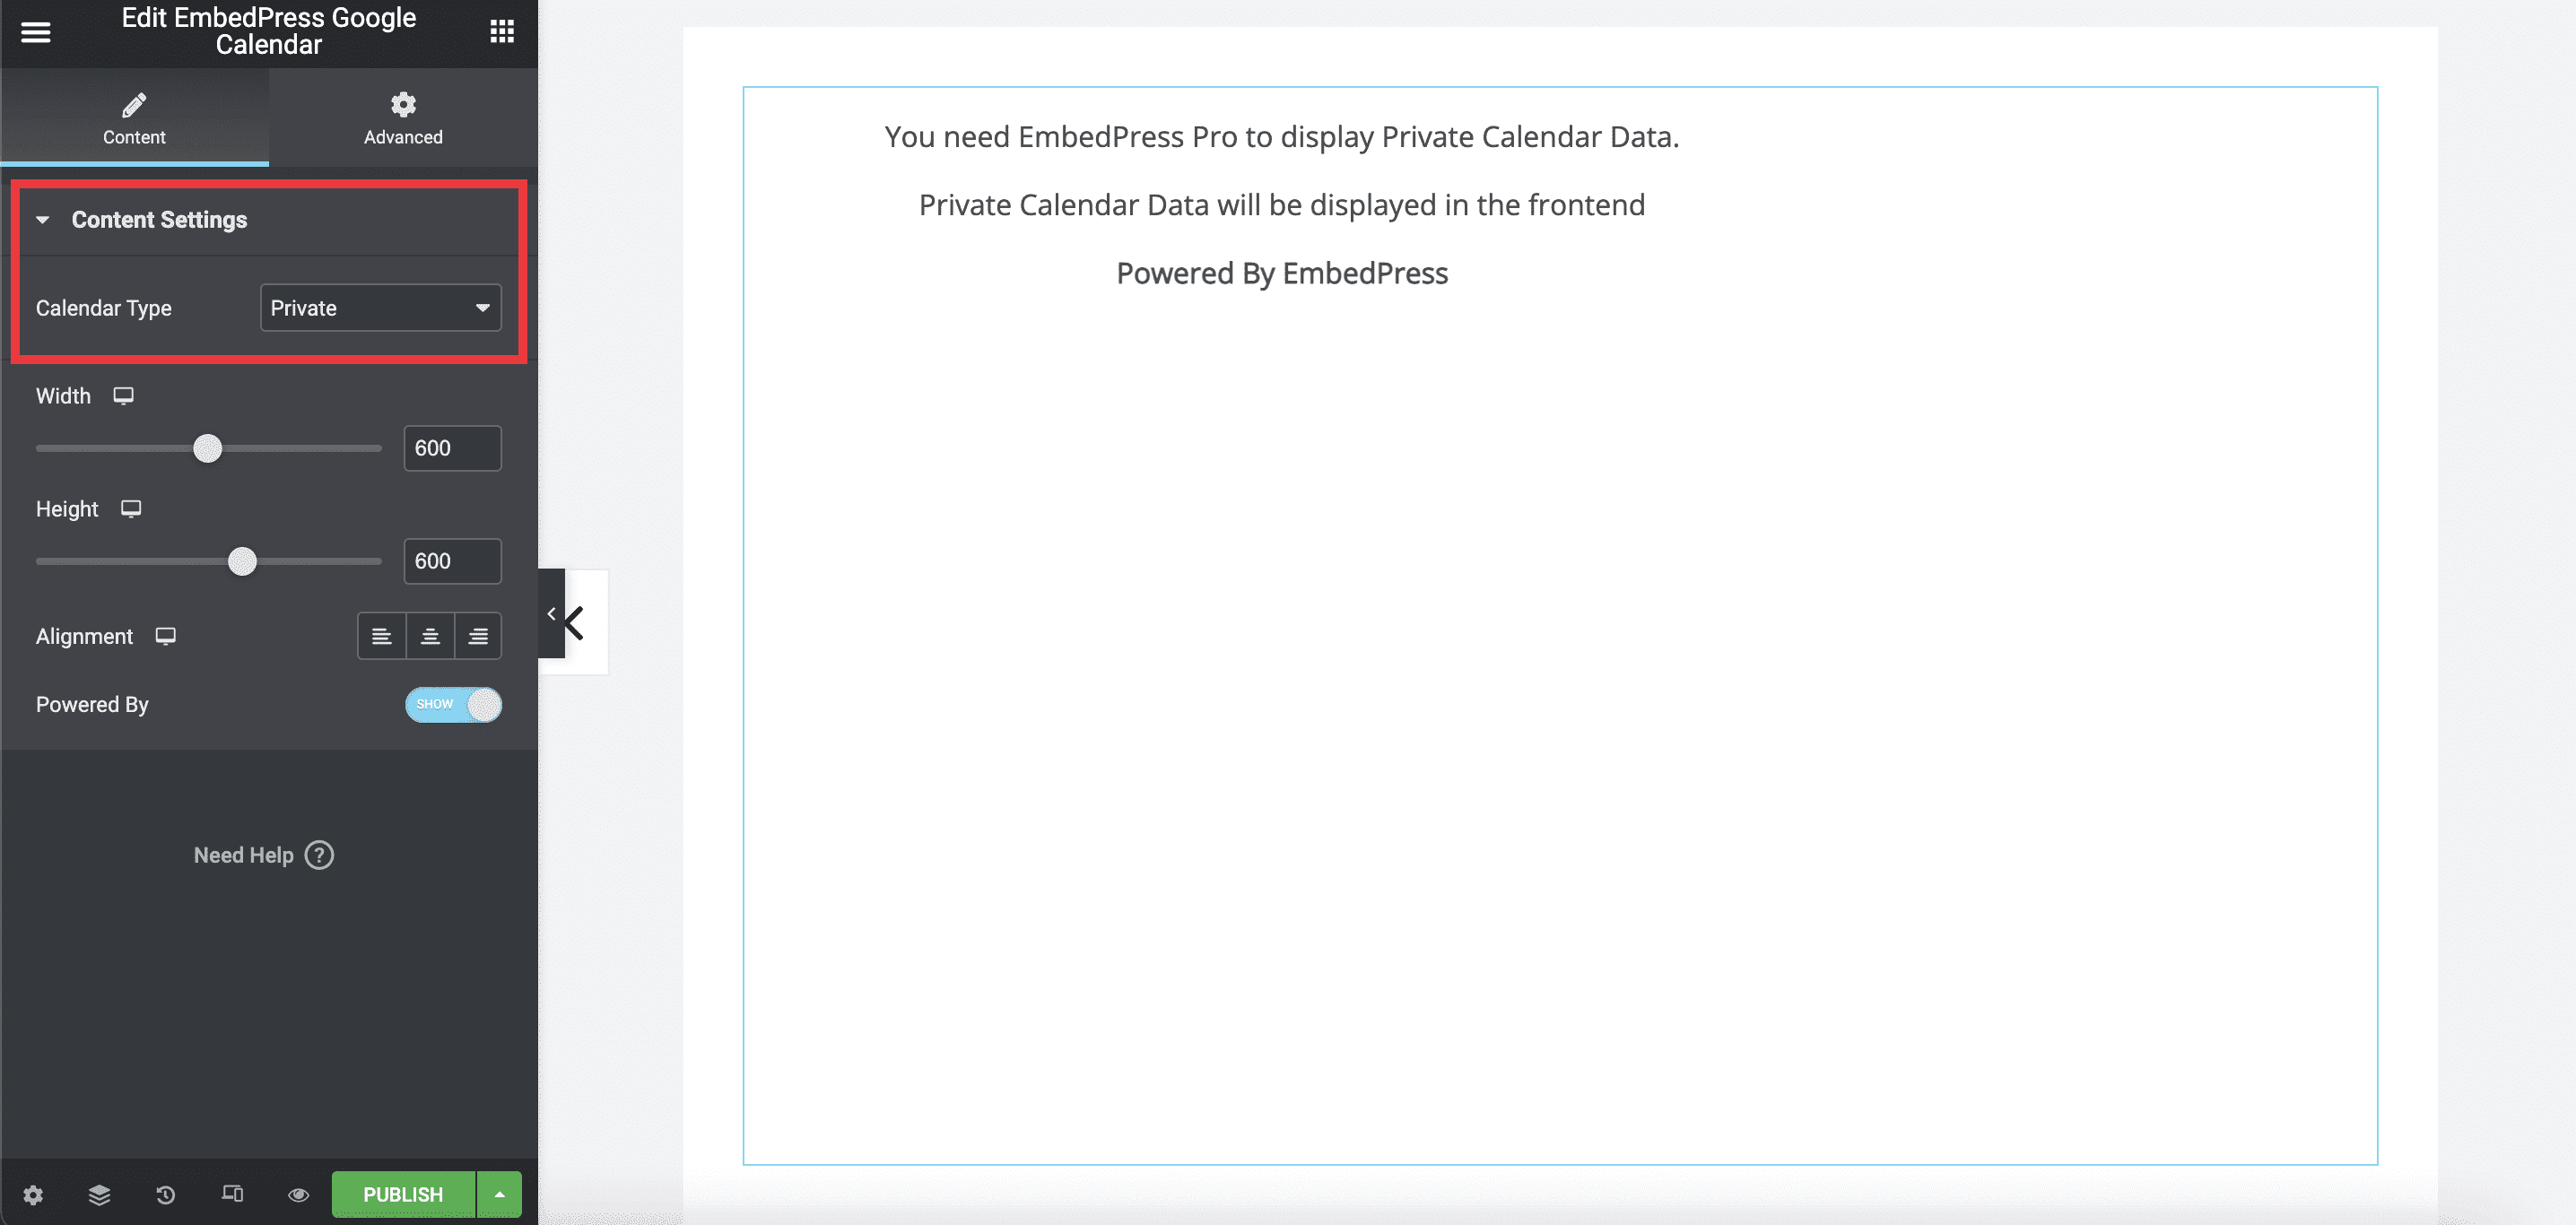
Note: The Private calendar will only be displayed on the frontend of your website once you ‘Publish’ it.
Step 4: Edit & Publish Your Google Calendar #
You can adjust the width and height of your Google Calendar, and even choose the alignment from the Elementor Editor. You can also toggle to hide or show the ‘Powered By EmbedPress’ text.

When you are done, click on ‘Publish’ and preview to see how a fully responsive and functional calendar has been embedded by EmbedPress.
Final Output #
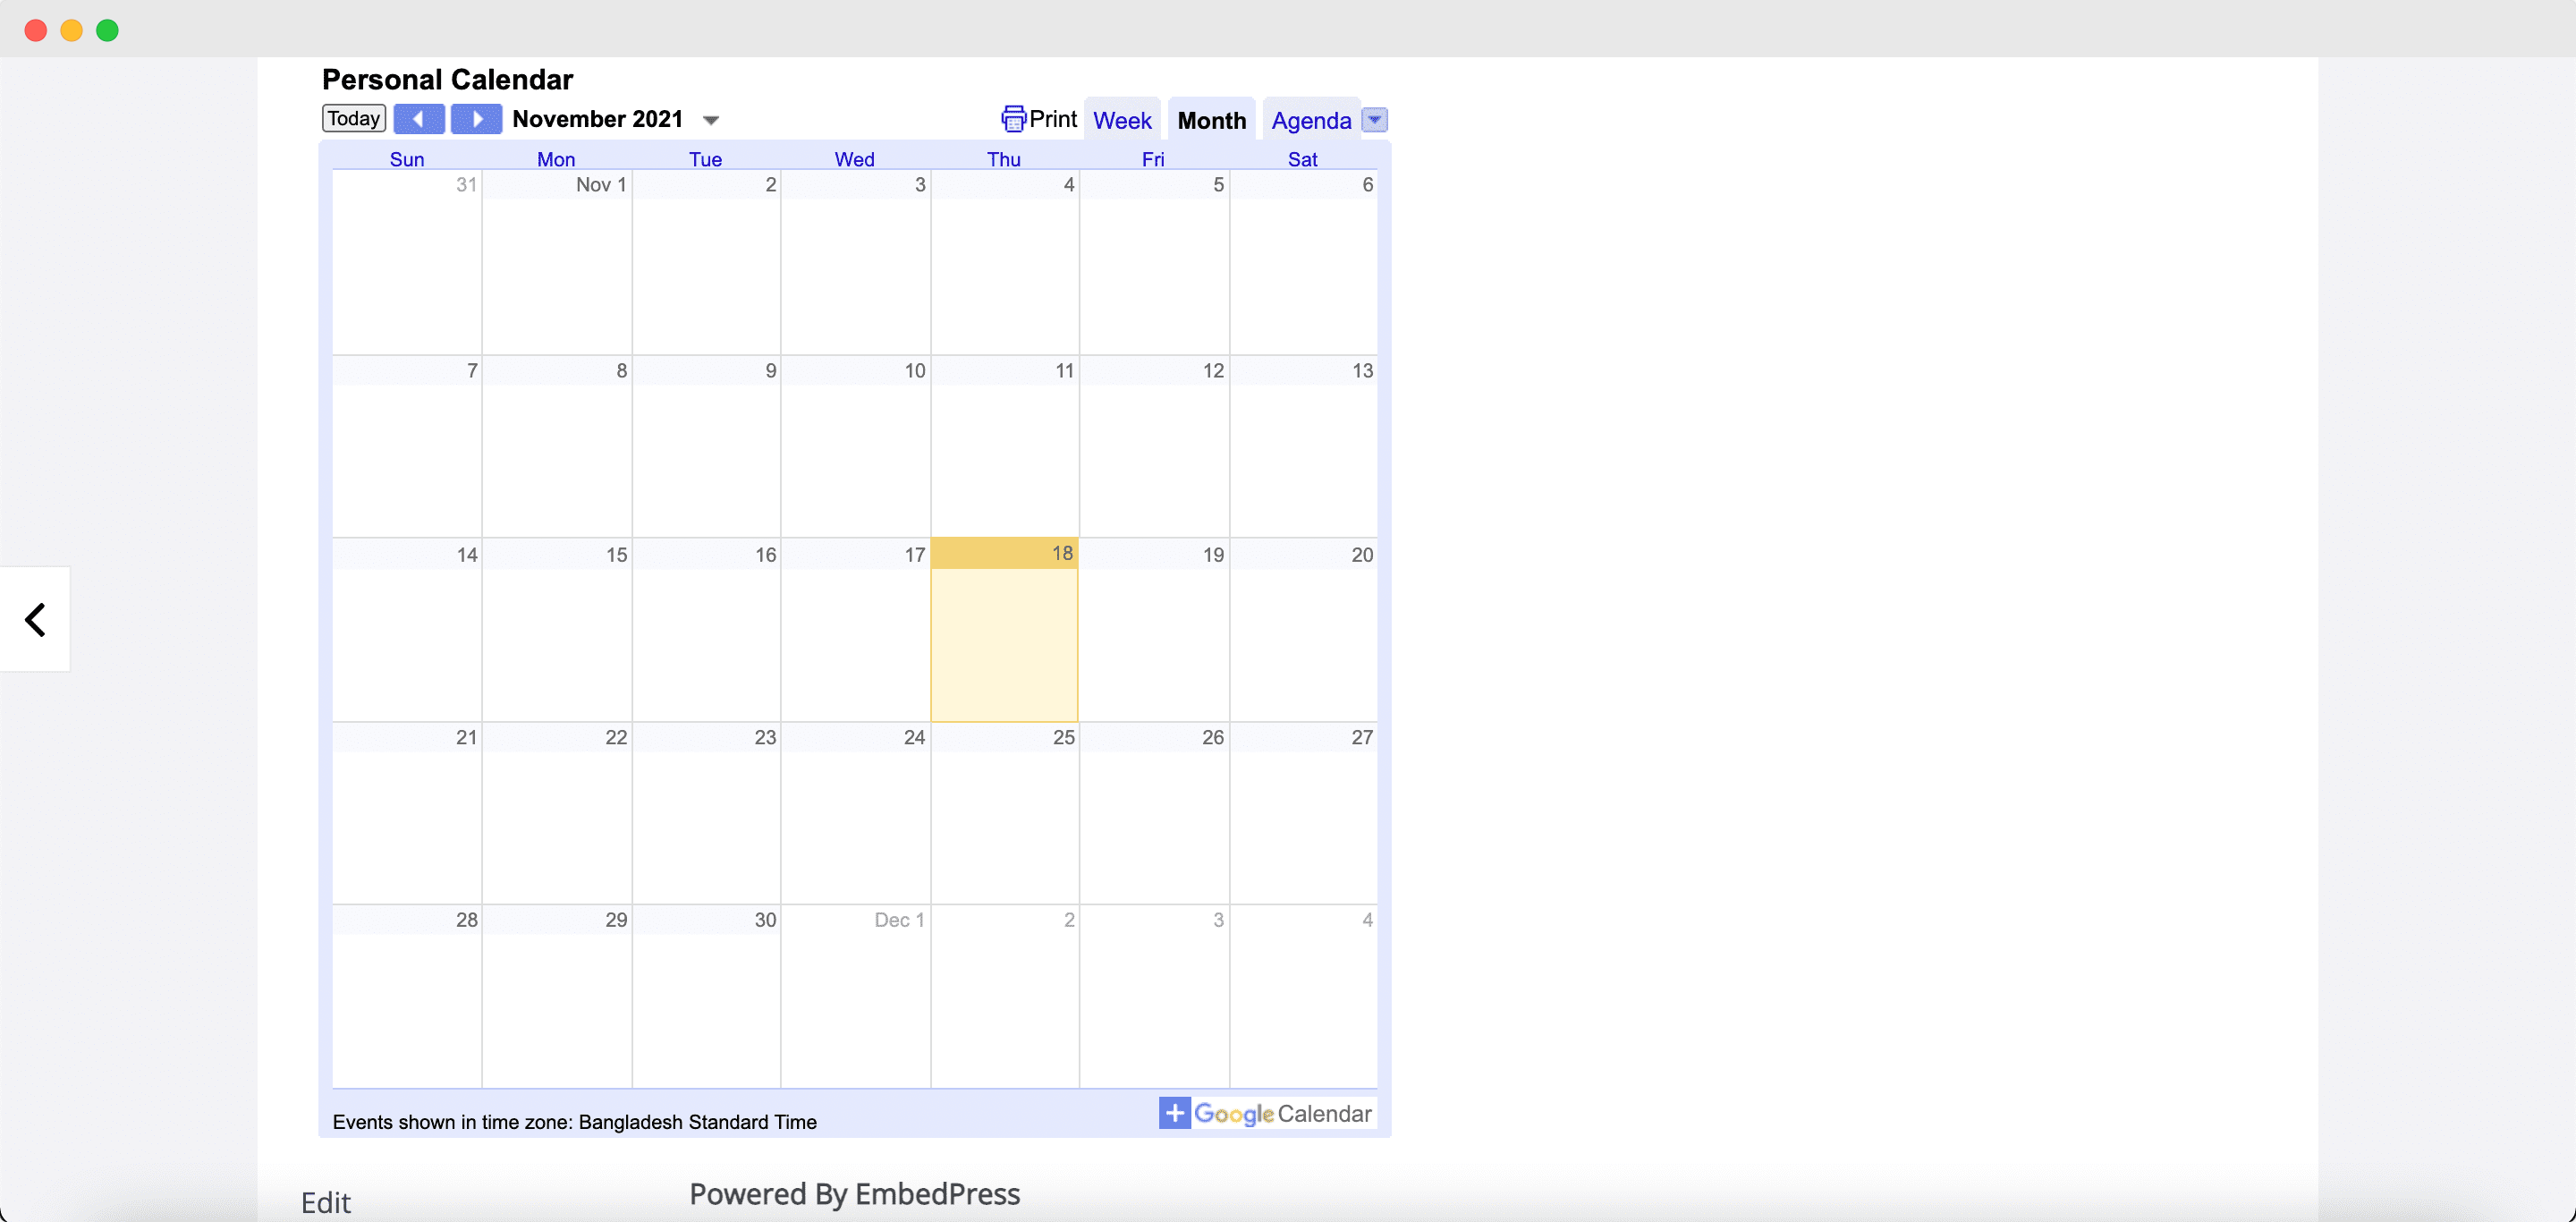
This is how the fully responsive ‘Public Google Calendar’ will look when published on your WordPress website.
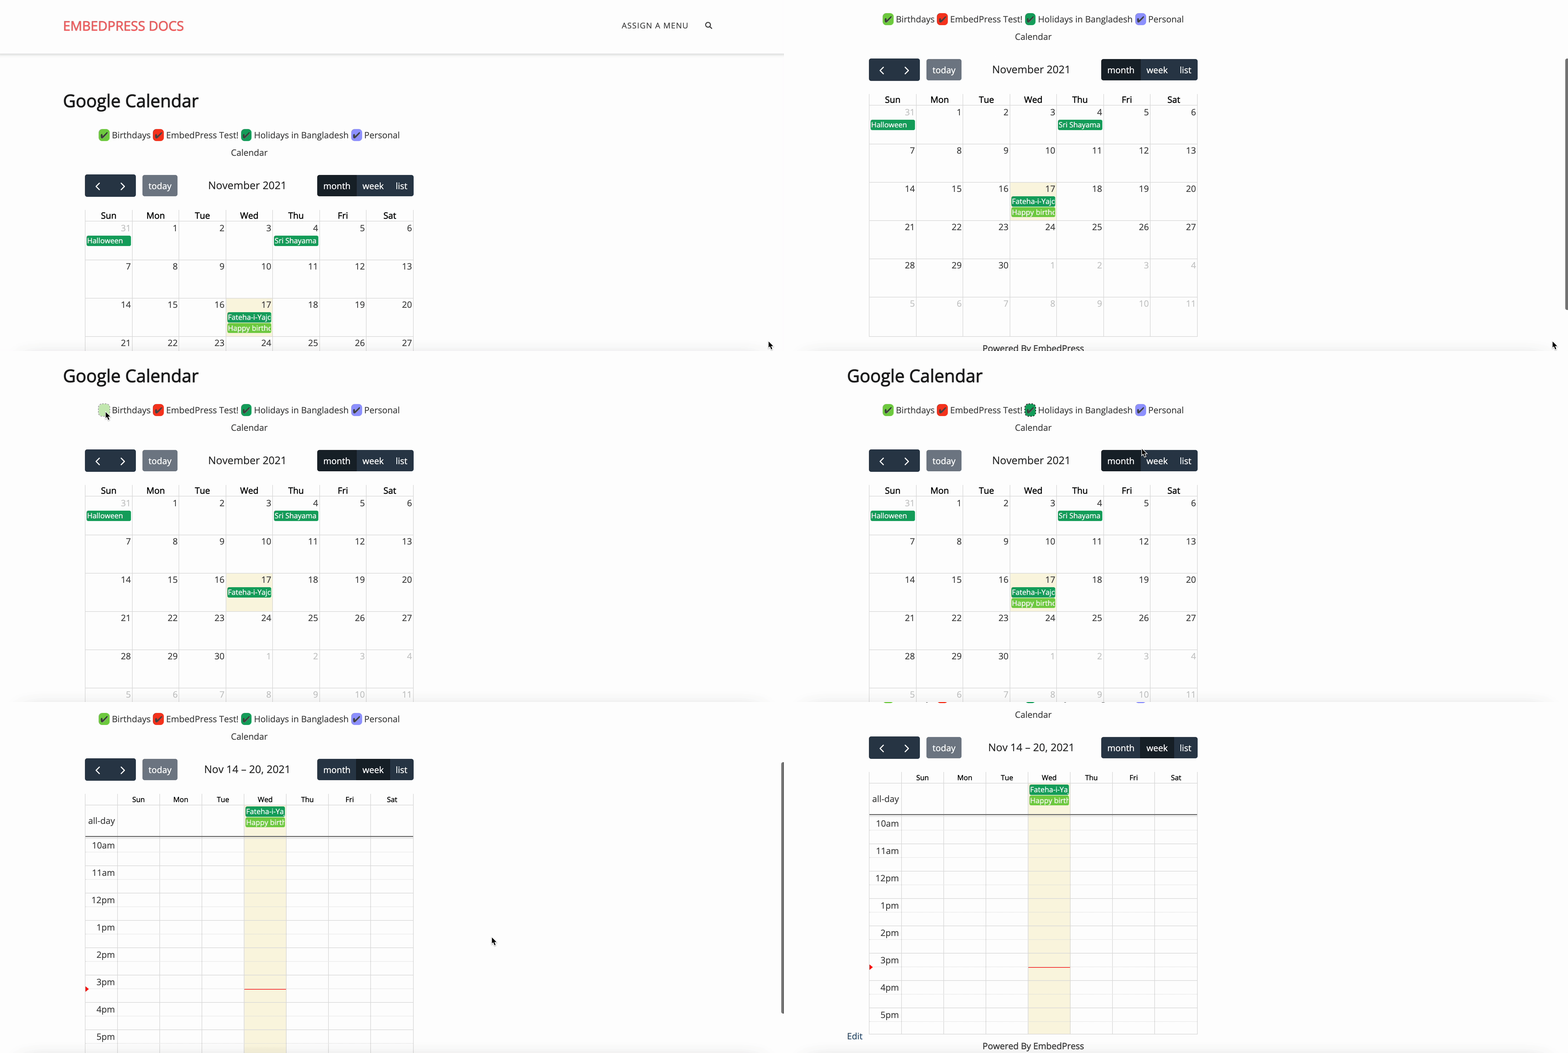
On the other hand, this is how the ‘Private Google Calendar’ will be embedded on your website. You will be able to see a list of the chosen calendars and the colors that represent them.
And this is how easily you can collect URLs or integrate API to embed a stunning Google Calendar onto your WordPress website with ease. If you are facing problems and require further assistance, feel free to contact our support or join our Facebook Community to get in touch with WordPress experts and content creators like yourself.


