WordPress offers you lots of opportunities to customize your blog design. Including customizing styles for your menus.
In this blog post, you will learn how to customize your WordPress menu with your own CSS style without touching your theme CSS file.
Before You Begin
If you are a beginner in WordPress, you may be tempted to turn to your themes’ style.css to customize your menu.
After all, your WordPress theme does store CSS styles for your website elements in the style.css, including the design of your menu.
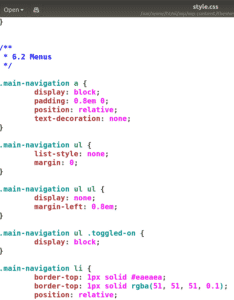
Please don’t. If you enter your custom CSS styles directly in the style.css file, you will lose your work next time you run your theme update.
WordPress offers you one handy feature to avoid such trouble.
Add Your Own Custom CSS Class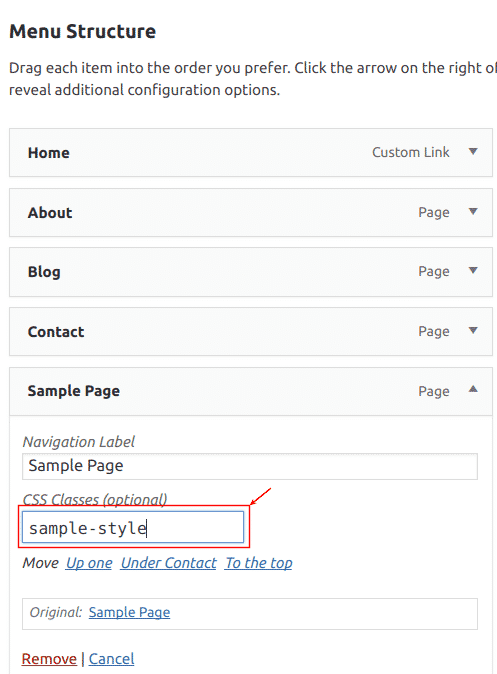
You need to tweak a couple of things on your WordPress dashboard to see “CSS Classes (optional)” setting, in case it is not already enabled.
- Click Screen Options in the top right corner of your dashboard.

- You will the Boxes panel. Click on the CSS Classes checkbox.

You are now ready to find the CSS Classes (optional) setting for every page or post in your menus.
Next, you will do a quick exercise to see how this setting works in practice. You will need a freshly installed WordPress site.
Changing Your Menu Link Background Color
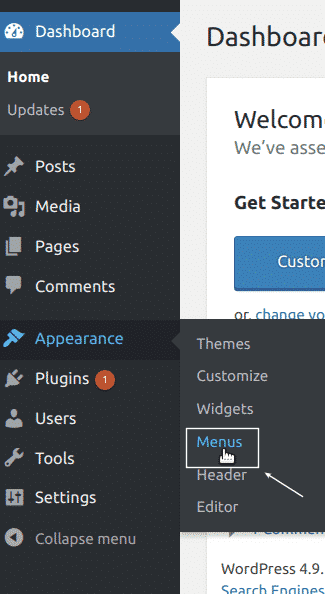
- In your WordPress dashboard, go to Appearance -> Menus.
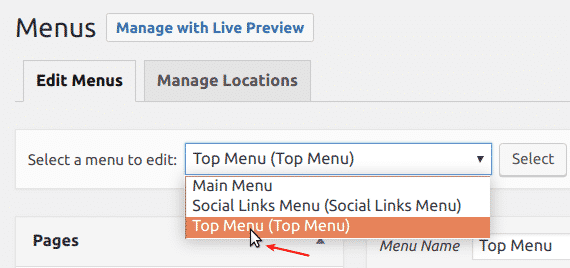
- You will see the menu screen. Select the Top Menu (Top Menu) in the Select a menu to edit field.
- Click on the Sample Page checkbox.
- Click Add to menu.
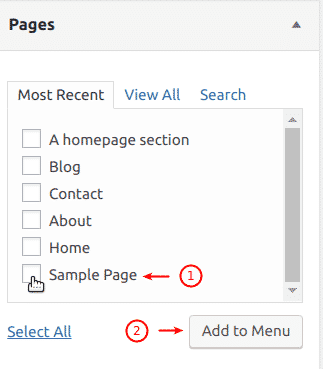
You will now see the Sample Page menu appeared in the Menu Structure box.
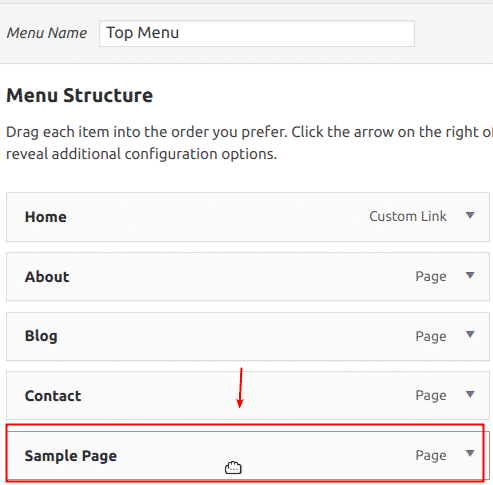
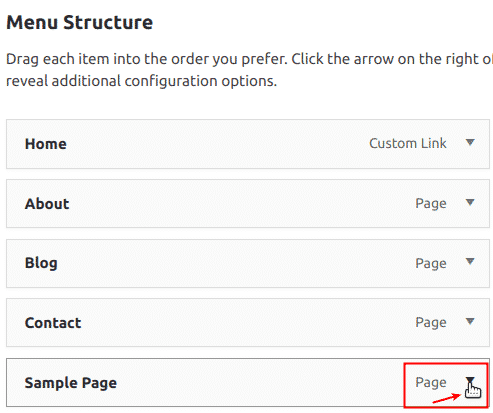
- Click on the little triangle next to the Page on the Sample Page menu.
- You will see the CSS Classes (optional) field. Enter my-menu.
- Click Save Menu.
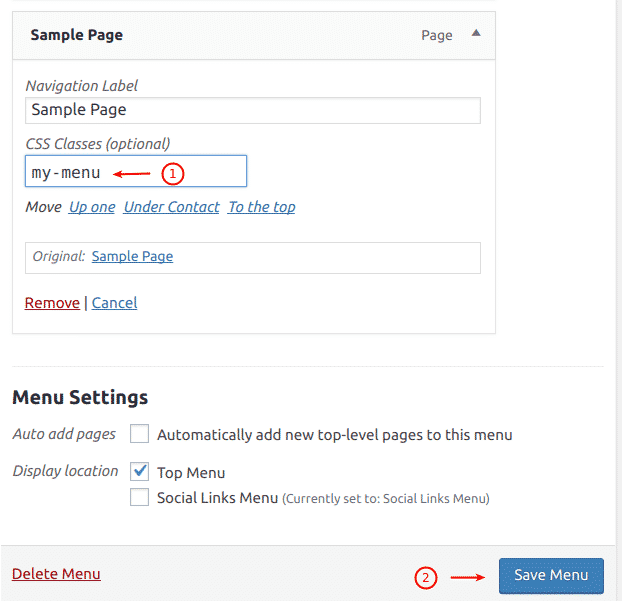
Excellent! You just added your own custom CSS class name to your menu for the Sample Page.
Now you can add your own CSS style rule to this CSS class to customize the menu background to your liking.
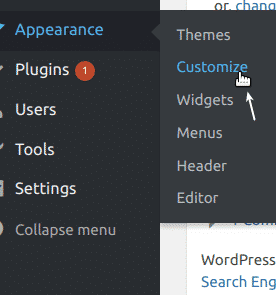
- In your dashboard, go to Appearance -> Customize.
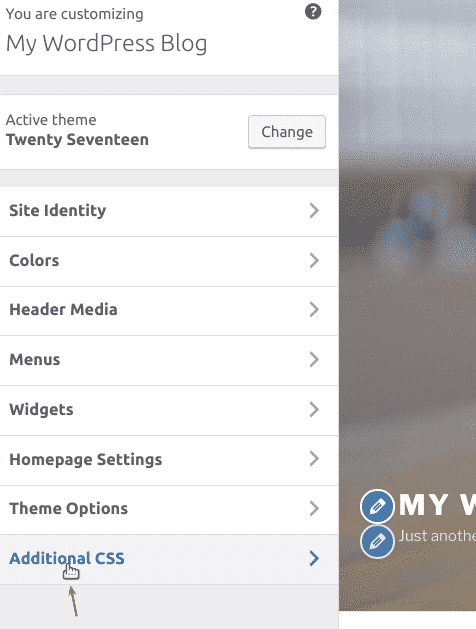
- At the bottom of the left-hand-side menu, click Additional CSS.
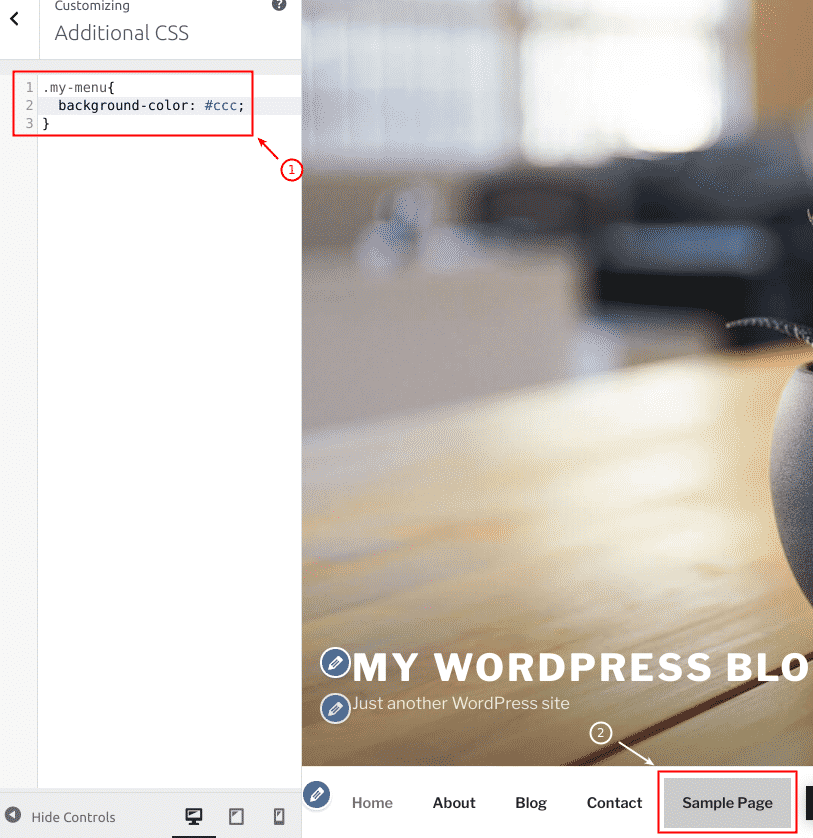
- You will see the Additional CSS pane. Enter the following CSS rule.
.my-menu{

background-color: #ccc;

}
- Take a look at the bottom of the page. You will see that the Sample Page menu background color has changed from white to grey.
- So far the background color changed only for your pre-view under the dashboard. Click Publish.
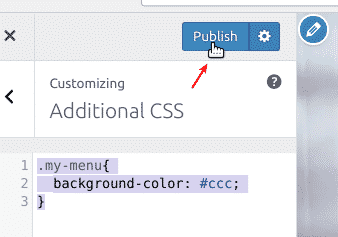
Excellent! Your Sample Page menu new CSS class with the background color rule you created now works at your site front end as well.


